How to Save Tomato Seeds for Next Year’s Garden
If you grew a tomato you loved this summer, saving a few seeds is one of the easiest ways to keep it going next year. The best method for home gardeners is a simple fermentation process that removes the slippery gel around tomato seeds and helps separate good seeds from pulp.
This guide walks through how to save tomato seeds from ripe tomatoes, dry them properly, and store them so they are ready for next spring’s seed-starting trays.
Before You Start: Choose the Right Tomato
For the most predictable results, save seeds from open-pollinated or heirloom tomatoes, not hybrid varieties. Open-pollinated varieties are more likely to grow into plants with fruit similar to the parent plant, while hybrid tomato seeds may produce plants that are quite different from the tomato you saved them from. University extension seed-saving guides consistently recommend open-pollinated varieties for gardeners who want plants that come back true to type. ([extension.umn.edu](https://extension.umn.edu/planting-and-growing-guides/saving-vegetable-seeds?utm_source=openai))
That does not mean hybrid seeds will not sprout. They often will. The issue is that the fruit quality, size, flavor, disease resistance, or plant habit may not match the original plant. If you are saving seeds for fun, experiment away. If you want dependable results, start with an heirloom or open-pollinated tomato.
Pick fruit from your best plant
Choose a fully ripe tomato from a healthy, productive plant. Avoid saving seed from plants that were weak, badly diseased, unusually late, or disappointing in flavor. Seed saving is also a form of selection, so pick from the kind of plant you would be happy to grow again.
The tomato should be ripe to slightly overripe, but not rotten. A beautiful slicer, a flavorful paste tomato, or a cherry tomato from a plant that performed especially well are all good candidates.
What You’ll Need
- 1 fully ripe heirloom or open-pollinated tomato
- Clean glass jar or cup
- Knife and spoon
- A little water, if needed
- Fine mesh strainer
- Paper plate, coffee filter, ceramic plate, or clean screen for drying
- Paper envelope or small seed packet
- Pen or marker for labeling
You do not need special equipment. A small jelly jar, drinking glass, or ramekin works well for a small batch.
Step 1: Scoop Out the Seeds and Gel
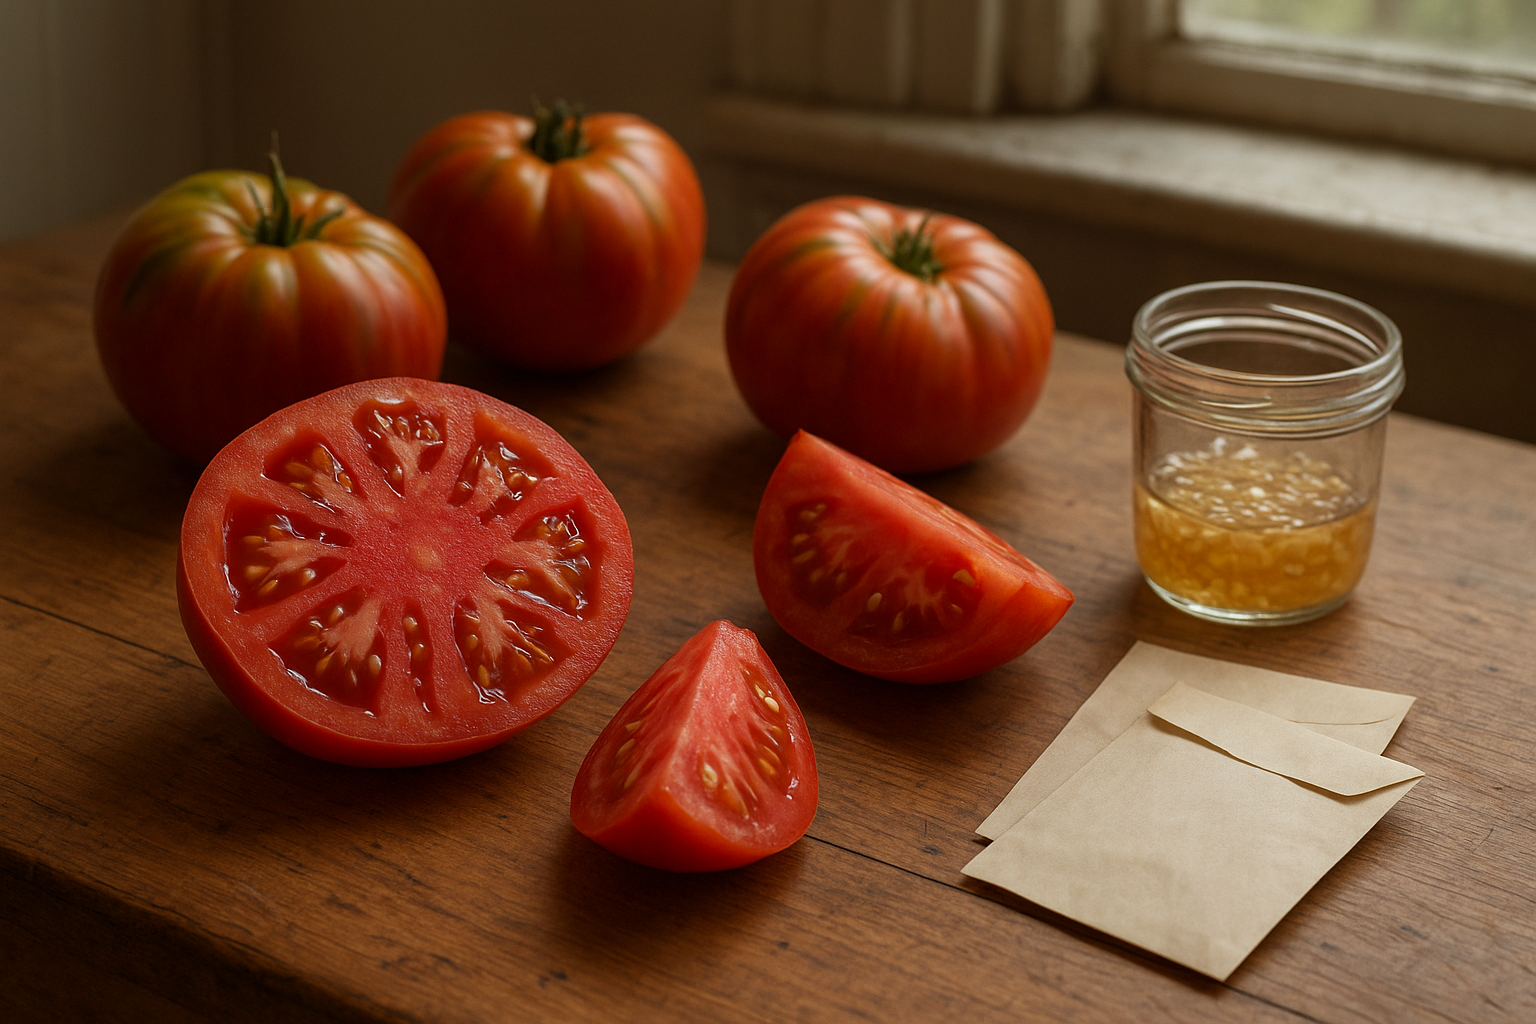
Cut the tomato across the middle so the seed cavities are easy to reach. Squeeze or spoon the seeds and surrounding gel into a clean jar. If the mixture is very thick, add a tablespoon or two of water—just enough to loosen it.
Do not fill the jar more than halfway. The mixture may bubble a little as it ferments, and you want room to stir without splashing.
Step 2: Ferment the Tomato Seeds
Set the jar at room temperature, out of direct sun. Cover it loosely with a paper towel, coffee filter, or lid set on top without tightening. This keeps dust and fruit flies out while still allowing gases to escape.
Let the seeds ferment for about 2 to 5 days. Different extension sources give slightly different timing, often around three to five days, with the key sign being that the gel breaks down and viable seeds begin to sink. ([extension.umn.edu](https://extension.umn.edu/planting-and-growing-guides/saving-vegetable-seeds?utm_source=openai))
Stir or swirl the jar once or twice a day. You may see a thin film, bubbles, or mold on top. That is normal. The mixture will not smell lovely, but it should smell fermented rather than sharply rotten.
Do not ferment too long
Once most of the seeds have sunk and the pulp has separated, move on to rinsing. Leaving seeds in the jar too long can reduce quality or even allow some seeds to sprout, especially in a warm kitchen. If you are unsure, it is better to rinse at day three or four than forget the jar for a week.
Step 3: Rinse and Separate the Seeds
Add clean water to the jar, stir well, and let it settle for a moment. Good seeds usually sink. Pour off floating pulp, mold, and any floating seeds. Repeat this with fresh water until the water is mostly clear.
Then pour the remaining seeds into a fine mesh strainer and rinse them under cool running water. Rub them gently against the strainer with your fingers to remove any lingering gel.
Do not use hot water. You are cleaning the seeds, not cooking them.
Step 4: Dry the Seeds Completely
Spread the clean seeds in a single layer on a paper plate, coffee filter, ceramic plate, or fine screen. Separate clumps with your fingertip while they are still wet. Set them somewhere warm, dry, and out of direct sun.
Let the seeds dry for at least one week, and longer if your home is humid. Seeds should feel hard and dry, not bendy or tacky. If they clump together, break them apart once or twice during drying.
Avoid drying seeds on paper towels if you can. Tomato seeds often stick firmly to the fibers, which makes them annoying to remove later. If paper towel is all you have, it will work, but you may end up planting tiny bits of paper along with the seeds.
Step 5: Label and Store
Once the seeds are fully dry, place them in a paper envelope or small seed packet. Label it with:
- Tomato variety name
- Year saved
- Any useful notes, such as “best flavor,” “early,” or “great in heat”
Store the packet somewhere cool, dark, and dry. A sealed glass jar in a cool closet works well. For longer storage, you can add a small desiccant packet to the jar to help absorb moisture. University of Minnesota Extension recommends cool, dry storage and notes that a refrigerator can be useful when seeds are sealed well against moisture. ([extension.umn.edu](https://extension.umn.edu/planting-and-growing-guides/saving-vegetable-seeds?utm_source=openai))
Tomato seeds can remain viable for several years when dried and stored well. Oregon State University Extension lists tomato among longer-lived vegetable seeds, generally lasting about 4 to 5 years under good storage conditions. ([extension.oregonstate.edu](https://extension.oregonstate.edu/gardening/techniques/collecting-storing-seeds-your-garden?utm_source=openai))
Can You Save Tomato Seeds Without Fermenting?
Yes, many gardeners simply smear seeds on a plate, let them dry, and plant them the next year. It can work, especially for casual seed saving.
Fermentation is still the better method if you want cleaner seeds. It helps remove the gel coating around the seed and can reduce some seed-borne disease issues, which is why it is widely recommended by extension seed-saving guides. ([extension.oregonstate.edu](https://extension.oregonstate.edu/catalog/em-9663-step-step-guide-saving-seeds?utm_source=openai))
If you only want a few seeds from a lunchbox cherry tomato, the quick dry method is fine. If you are saving a favorite heirloom for next year’s main garden bed, take the extra few days and ferment them.
Common Mistakes to Avoid
- Saving from a hybrid tomato: The seeds may grow, but the next generation may not match the parent plant.
- Using underripe fruit: Seeds from fully ripe tomatoes are more mature and more likely to be viable.
- Fermenting too long: Check daily after the second day, especially in warm weather.
- Storing damp seeds: Moisture is the enemy. Seeds must be fully dry before storage.
- Forgetting to label: A mystery packet is fun once. After that, it is just frustrating.
How Many Tomato Seeds Should You Save?
One tomato can provide plenty of seed for a home garden. Even a single cherry tomato may hold enough seeds for several plants. Still, it is smart to save more than you think you need in case germination is lower than expected.
For one variety, aim for at least 20 to 30 seeds. That gives you enough for seed starting, a few extras to share, and a backup packet if some seedlings fail.
Quick Germination Test Before Planting
If your seeds are a few years old, test them before you rely on them. Place 10 seeds on a damp paper towel, fold it up, slip it into a plastic bag, and keep it warm. Check every couple of days and keep the towel damp, not dripping.
If 8 out of 10 sprout, you have about 80 percent germination. If only a few sprout, sow extra seeds or buy a fresh packet.
The Bottom Line
Saving tomato seeds is simple: choose a ripe heirloom tomato, ferment the seeds and gel for a few days, rinse, dry thoroughly, and store in a labeled packet. It is a small summer task that can give you a head start on next year’s garden.
Best of all, it helps you keep growing the tomatoes that already proved themselves in your own yard—flavor, toughness, quirks, and all.