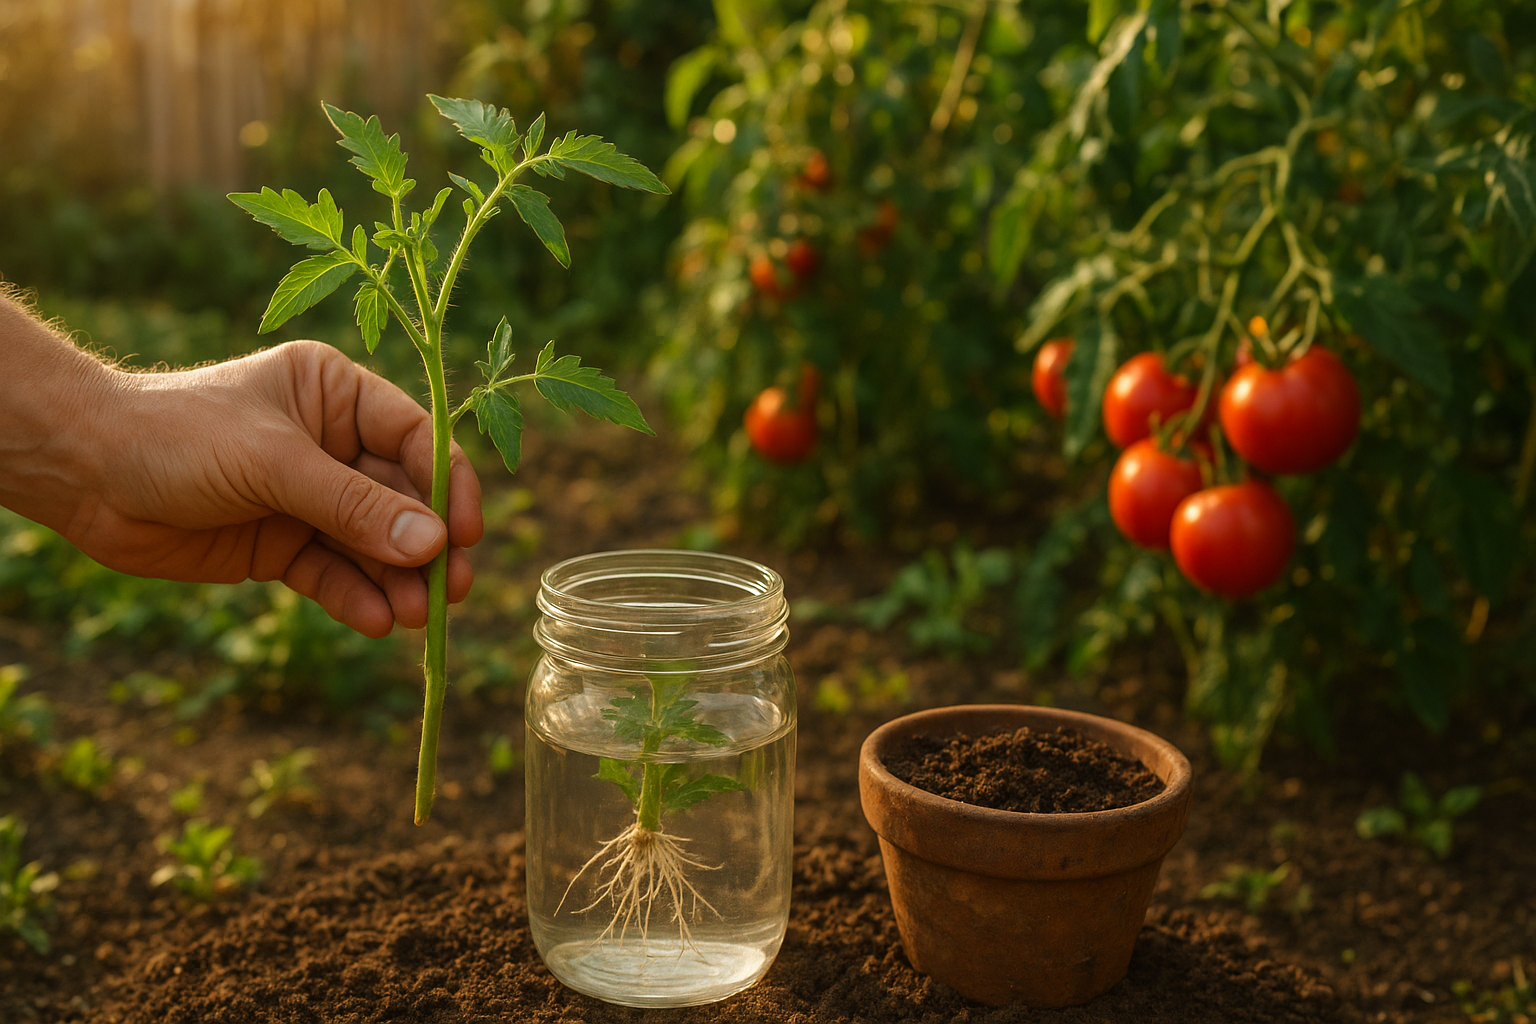
How to Root Tomato Suckers for a Free Fall Harvest
Late summer tomato plants are often full of extra side shoots, and many gardeners pinch them off without a second thought. But healthy tomato suckers can be rooted into brand-new plants, giving you an easy way to stretch the season and maybe bring in a second wave of tomatoes before frost.
This trick works because tomato stems are eager to form roots wherever they touch moisture and soil. With the right cutting, a little care, and some patience, you can turn one pruning session into a useful batch of free plants.
What a tomato sucker actually is
A sucker is the small shoot that grows in the angle between the main stem and a leaf branch. If left alone, it becomes a full side stem with leaves, flowers, and eventually fruit. Some gardeners remove suckers to keep plants tidy and focused, while others let a few develop. The nice part is that those pruned pieces are not waste if they come from a healthy plant.
Good candidates for rooting are:
- 6 to 8 inches long
- Still flexible and green
- Taken from a vigorous, disease-free plant
- Trimmed cleanly with scissors or pruners
Very tiny shoots usually dry out before they can root. Extra-large stems can work, but they are slower to recover and may wilt more dramatically. Medium-sized, actively growing suckers are the easiest to succeed with.
Choose the right cutting
Plant health matters more than anything else. A cutting is a clone of the parent plant, so any disease or pest problem can travel with it. Skip suckers from plants showing yellowing leaves, black spots, curling, or obvious insect damage.
Use clean tools and make your cut just below a leaf node if possible. Remove the leaves from the bottom half of the stem so nothing sits in the rooting medium and rots. If the cutting is tall and leafy, trim off a few upper leaves to reduce moisture loss while it roots.
A helpful rule: the cutting should have enough foliage to keep growing, but not so much that it loses water faster than it can replace it.
How to root tomato suckers in water
Water propagation is popular because it is simple and lets you watch root growth day by day. It is a good choice if you want a quick, visible method and a higher chance of spotting problems early.
- Place the stripped stem in a jar or glass of clean water.
- Keep the leaves above the waterline at all times.
- Set the jar in bright, indirect light.
- Change the water every 2 to 3 days.
Direct sun can heat the water and stress the cutting, so a bright windowsill with filtered light is better than a hot sunny ledge. If a leaf drops into the water, remove it right away to prevent decay.
Roots often begin forming within 7 to 14 days. Once they are about 1 inch long, the cutting is ready to move into potting mix. Don’t wait too long in water if you can help it; very long water-grown roots can be more fragile when transplanted.
How to root tomato suckers in potting mix
Rooting directly in soil takes a little longer, but it can make the move to the garden smoother because the plant does not need to adjust from water roots to soil roots.
- Fill a small pot or cell tray with moist, loose potting mix.
- Make a hole with a pencil or finger.
- Insert the bare stem 1 to 2 inches deep.
- Firm the mix gently around the stem.
- Water lightly so the soil is evenly moist, not soggy.
Keep the pot in bright shade or filtered light for the first week. Too much sun during the rooting stage can cause wilting. If the cutting stays upright and looks refreshed after several days, roots are likely forming.
You can give the stem a very gentle tug after 10 to 14 days. Resistance usually means roots have begun to anchor the plant. If it slips out easily, give it more time and keep the soil slightly damp.
Water vs. soil: which method is better?
Both methods work, and the best one depends on what you want. Water propagation is easier to monitor and great for beginners. Soil propagation creates less transplant shock later, which can be helpful if you are planning to move the new plant straight outdoors after rooting.
Use water if you want:
- Easy root visibility
- A simple method for beginners
- Fast troubleshooting if the cutting starts to decline
Use potting mix if you want:
- Less disturbance at transplant time
- One less rooting transfer
- A plant that adjusts to soil from the beginning
If you are new to propagation, try a few cuttings each way. That gives you a backup plan and helps you see which method works best in your growing space.
Potting up and hardening off
Once the cutting has a strong root system, move it into a larger container or directly into the garden. Use quality potting mix, and bury the stem a little deeper than it was in the rooting jar or cell. Tomatoes root readily along buried stems, so this helps build a sturdier plant.
If the plant has been indoors or in deep shade, harden it off before putting it outside full time. Start with a few hours of morning shade, then gradually increase sun exposure over 7 to 10 days. This step helps prevent leaf scorch and transplant shock.
For container growing, choose at least a 5-gallon pot with drainage holes. For garden beds, add compost and water the planting area well before transplanting.
How to give your new tomato plant a strong start
A rooted sucker is already a head start, but it still needs good care to produce fruit in time.
- Provide support: Use a cage, stake, or trellis right away.
- Water consistently: Keep soil evenly moist, especially during the first two weeks after transplanting.
- Feed lightly: A balanced tomato fertilizer or compost tea can help, but avoid overfeeding with nitrogen, which can produce lots of leaves and fewer tomatoes.
- Mulch around the base: Mulch helps hold moisture and keeps soil from splashing onto leaves.
In late summer, newly rooted plants may not match the size of spring transplants, but they can still produce a worthwhile fall crop if you act quickly and protect them from early cold snaps.
Common mistakes to avoid
A few small errors can cause the cutting to fail, but they are easy to avoid once you know them.
- Using diseased parent plants: This is the biggest risk.
- Leaving too many leaves on the cutting: Too much foliage leads to wilting.
- Letting leaves sit in water: This causes rot quickly.
- Putting cuttings in hot, direct sun: They need bright light, not harsh heat.
- Forgetting to keep the medium moist: Drying out stops root development.
When this method makes the most sense
Rooting tomato suckers is especially useful in midsummer and early fall, when plants are already established and producing side growth. It is also handy if a storm breaks a healthy stem, if you have to prune for airflow, or if you want to multiply a tomato variety you especially love.
Heirloom tomatoes, cherry tomatoes, and indeterminate varieties are especially good candidates because they tend to keep growing and setting fruit over a long season. Determinate types can be rooted too, but they have a shorter production window, so the payoff may be smaller.
A simple way to turn pruning into harvest
Instead of tossing every tomato sucker into the compost, set aside a few of the healthiest ones and give propagation a try. Whether you root them in water or potting mix, the process is quick, inexpensive, and surprisingly rewarding. With a little attention, that leftover pruning can become another plant loaded with tomatoes before the season ends.
If you already have a thriving tomato bed, this is one of the easiest ways to get more from it without buying a single seedling. In gardening, that kind of bonus always feels like a win.