How to Clean a Dryer Vent Without Making a Mess
If your towels need two cycles to dry or the laundry room feels hotter than usual, the dryer vent may be overdue for a cleanout. Learning how to clean a dryer vent is a practical home maintenance job that can help clothes dry faster, save energy, and reduce a real fire risk.
The National Fire Protection Association recommends cleaning lint from the vent pipe once a year, or more often if clothes are taking longer than normal to dry. The U.S. Fire Administration also lists failure to clean as a leading factor in home clothes dryer fires, so this is one chore worth putting on the calendar. ([nfpa.org](https://www.nfpa.org/-/media/project/storefront/catalog/files/safety-tip-sheets/dryersafetytips.pdf?rev=8af04b5662ec41ebaed95e6064888f71&utm_source=openai))
How Often Should You Clean a Dryer Vent?
For many households, once a year is a good baseline. Clean it sooner if you have a large family, wash lots of pet bedding, use the dryer daily, or have a long vent run with bends. The Department of Energy’s Building America Solution Center notes that annual dryer duct cleaning can help clothes dry faster, save energy, and help prevent fire. ([basc.pnnl.gov](https://basc.pnnl.gov/diy-guides/clean-dryer-exhaust?utm_source=openai))
You should also clean the lint screen after every load. That quick habit does not replace vent cleaning, but it keeps lint from building up as quickly in the duct and helps the dryer move air properly.
Signs Your Dryer Vent Is Clogged
Do not wait for a burning smell. A clogged vent usually gives you smaller warnings first:
- Clothes take longer than one normal cycle to dry.
- The dryer top or laundry room feels unusually hot.
- There is lint around the outside vent flap.
- The outside flap barely opens when the dryer is running.
- Clothes smell musty, smoky, or overheated.
- The dryer shuts off mid-cycle or shows an airflow warning.
If you smell burning, stop the dryer right away, unplug it if you can do so safely, and investigate before using it again.
Tools and Supplies
You do not need fancy equipment for a straightforward vent, but the right tools make the job cleaner and safer.
- Vacuum with hose attachment
- Dryer vent brush kit with flexible rods
- Screwdriver or nut driver
- Work gloves
- Dust mask, if you are sensitive to lint
- Drop cloth or old towel
- Foil HVAC tape, if the duct joint needs resealing
- Flashlight
Avoid using regular duct tape on dryer vent connections. It can dry out and fail from heat. Use metal foil HVAC tape where tape is needed.
Before You Start: Check the Vent Type
First, look behind the dryer. A rigid or semi-rigid metal duct is best for airflow and durability. If you find a crushed plastic or thin foil-style duct, consider replacing it with a safer metal option. The Consumer Product Safety Commission advises cleaning dryer vents and exhaust ducts periodically, and older or damaged vent materials can make lint buildup and overheating worse. ([cpsc.gov](https://www.cpsc.gov/s3fs-public/5022.pdf?utm_source=openai))
Also check the outside vent cover. A dryer exhaust should not have a screen over it because screens trap lint. A louvered flap or hood that opens freely is the better setup.
Step-by-Step: How to Clean a Dryer Vent
1. Unplug the Dryer
For an electric dryer, unplug it from the wall. For a gas dryer, unplug the power cord and be careful not to disturb the gas line. If you need to move a gas dryer more than a few inches, or the line feels tight, stop and call a qualified professional.
2. Pull the Dryer Away From the Wall
Slide the dryer out slowly. Place a towel or cardboard under the feet if you are worried about scratching the floor. Give yourself enough room to reach the vent connection without stretching or crushing the duct.
3. Disconnect the Vent Duct
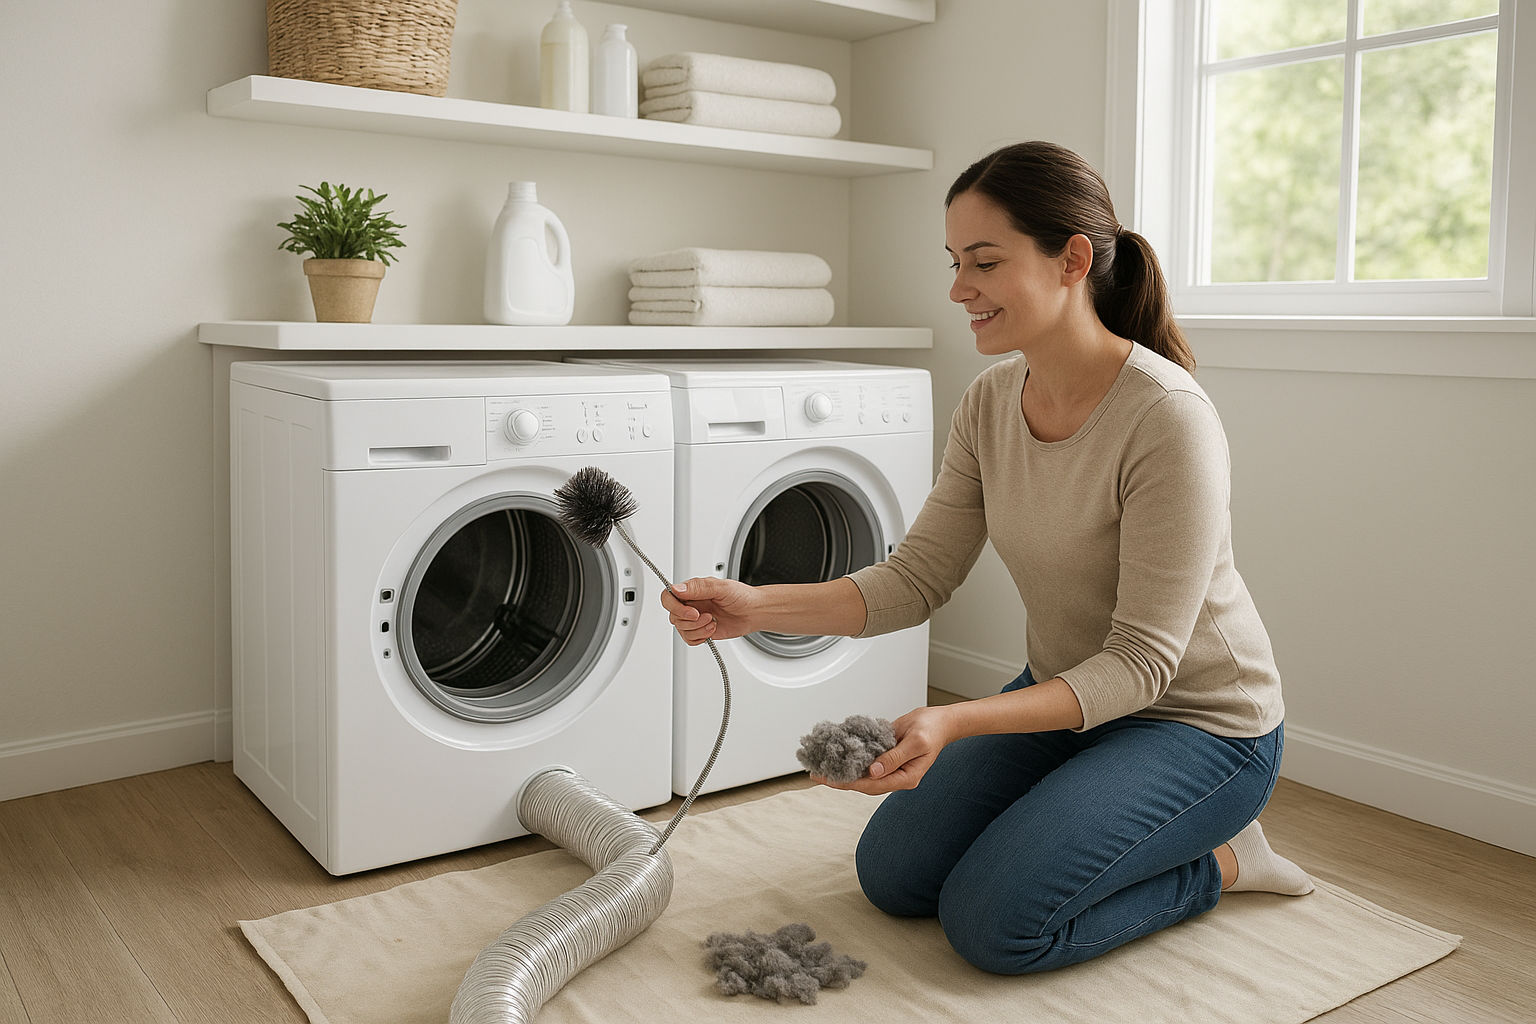
Loosen the clamp where the duct attaches to the back of the dryer. Gently remove the duct and set the clamp aside. Expect lint to fall out, especially if this has not been cleaned in a while.
4. Vacuum the Dryer Outlet
Use the vacuum hose to clean the round outlet on the back of the dryer. Do not force the hose deep into the machine. The goal is to remove loose lint at the opening and around the floor behind the dryer.
5. Brush the Duct From the Laundry Room Side
Insert the dryer vent brush into the duct and work it forward gently. Rotate the brush as you go, then pull it back and vacuum up loosened lint. If your brush kit attaches to a drill, use a low speed and follow the kit instructions. Do not reverse the drill while the rods are inside the duct, because some rods can unscrew and get stuck.
6. Clean From the Outside Vent
Go outside and remove lint from the vent hood by hand or with the vacuum. Then insert the brush from the exterior side and work it inward. This two-sided approach clears more lint, especially near bends and at the flap where lint tends to collect.
7. Check the Flap
The outside flap should open easily and close when the dryer is off. Remove packed lint, leaves, nests, or debris. If the cover is cracked, stuck, or has a screen that keeps clogging, replace it with a proper dryer vent hood.
8. Reconnect Without Crushing the Duct
Reattach the duct to the dryer outlet and tighten the clamp. Push the dryer back slowly while watching the duct. A crushed or sharply kinked duct restricts airflow and can undo all your work. The Department of Energy specifically warns not to crush the vent when moving the dryer back into place. ([energy.gov](https://www.energy.gov/documents/dryerventingpdf?utm_source=openai))
9. Run a Test Cycle
Plug the dryer back in and run it on an air-only or low-heat setting for a few minutes. Go outside and check that strong air is blowing from the vent. The flap should lift while the dryer runs and settle closed afterward.
How to Keep the Dryer Vent Cleaner Longer
- Clean the lint screen after every load. This is the simplest prevention step.
- Do not overload the dryer. Clothes need room for air to circulate.
- Wash very linty items separately. New towels, fleece blankets, and pet bedding shed a lot.
- Keep the dryer area clear. NFPA recommends keeping boxes, clothing, and cleaning supplies away from the dryer area. ([nfpa.org](https://www.nfpa.org/-/media/project/storefront/catalog/files/safety-tip-sheets/dryersafetytips.pdf?rev=8af04b5662ec41ebaed95e6064888f71&utm_source=openai))
- Check the outside vent after storms. Snow, leaves, and mulch can block the flap.
When to Call a Professional
Call a dryer vent cleaning service if the vent runs through the roof, travels a long distance through walls or ceilings, has several elbows, or still has weak airflow after you clean it. You should also get help if you suspect a bird nest, if brush rods get stuck, or if you have a gas dryer that cannot be moved safely.
A professional is also a smart choice if the dryer keeps overheating or shutting off after the vent is clear. At that point, the problem may be inside the appliance rather than the duct.
A Simple Yearly Reminder
Add dryer vent cleaning to your fall or spring home maintenance checklist, right alongside changing smoke alarm batteries and replacing HVAC filters. It is not glamorous, but it is one of those small jobs that helps your home run better.
Once you know how to clean a dryer vent, the job usually takes less than an hour for a simple setup. The reward is worth it: better airflow, shorter drying times, less lint hiding behind the dryer, and a safer laundry room.