How to Clean a Showerhead for Better Water Pressure
If your shower has started spraying sideways, dribbling from a few holes, or feeling weaker than usual, mineral buildup may be the problem. The good news is that learning how to clean a showerhead is simple, inexpensive, and often takes less than an hour of hands-on work.
This method uses plain white vinegar, a soft brush, and a careful rinse to dissolve hard water deposits without scratching the finish. It also gives you a chance to check whether the showerhead is simply clogged or ready to be replaced.
Why Showerheads Get Clogged
Most clogged showerheads are not broken. They are blocked by scale, which forms when minerals in hard water dry around the spray holes. Over time, those deposits narrow the openings and make the spray uneven.
Showerheads can also collect biofilm, a slimy buildup where microbes live together. The CDC notes that showerheads and hoses may sometimes need to be removed and soaked in a solution such as white vinegar to remove buildup. ([cdc.gov](https://www.cdc.gov/drinking-water/prevention/preventing-waterborne-germs-at-home.html?utm_source=openai))
A clean showerhead is not just nicer to use. It can help the fixture perform the way it was designed, especially if the water is coming out in a weak fan, random spurts, or one hard stream instead of an even spray.
What You’ll Need
- Distilled white vinegar
- A plastic bag large enough to fit over the showerhead
- Rubber band, twist tie, or painter’s tape
- Soft toothbrush or small cleaning brush
- Microfiber cloth
- Toothpick or wooden skewer, optional
- Adjustable wrench, optional
- Old towel, optional for protecting finishes
Before you start: Avoid abrasive pads, stiff wire brushes, and harsh scraping tools. They can scratch chrome, brushed nickel, black finishes, and plastic spray nozzles. If your showerhead is made of brass, oil-rubbed bronze, stone, or a specialty finish, check the manufacturer’s care instructions before soaking it in vinegar.
The Easy Bag Method for a Fixed Showerhead
This is the best first step if the showerhead is still attached to the pipe and the buildup is mostly around the face of the fixture.
- Wipe away loose grime. Use a damp microfiber cloth to remove soap film, dust, and loose mineral flakes from the outside of the showerhead.
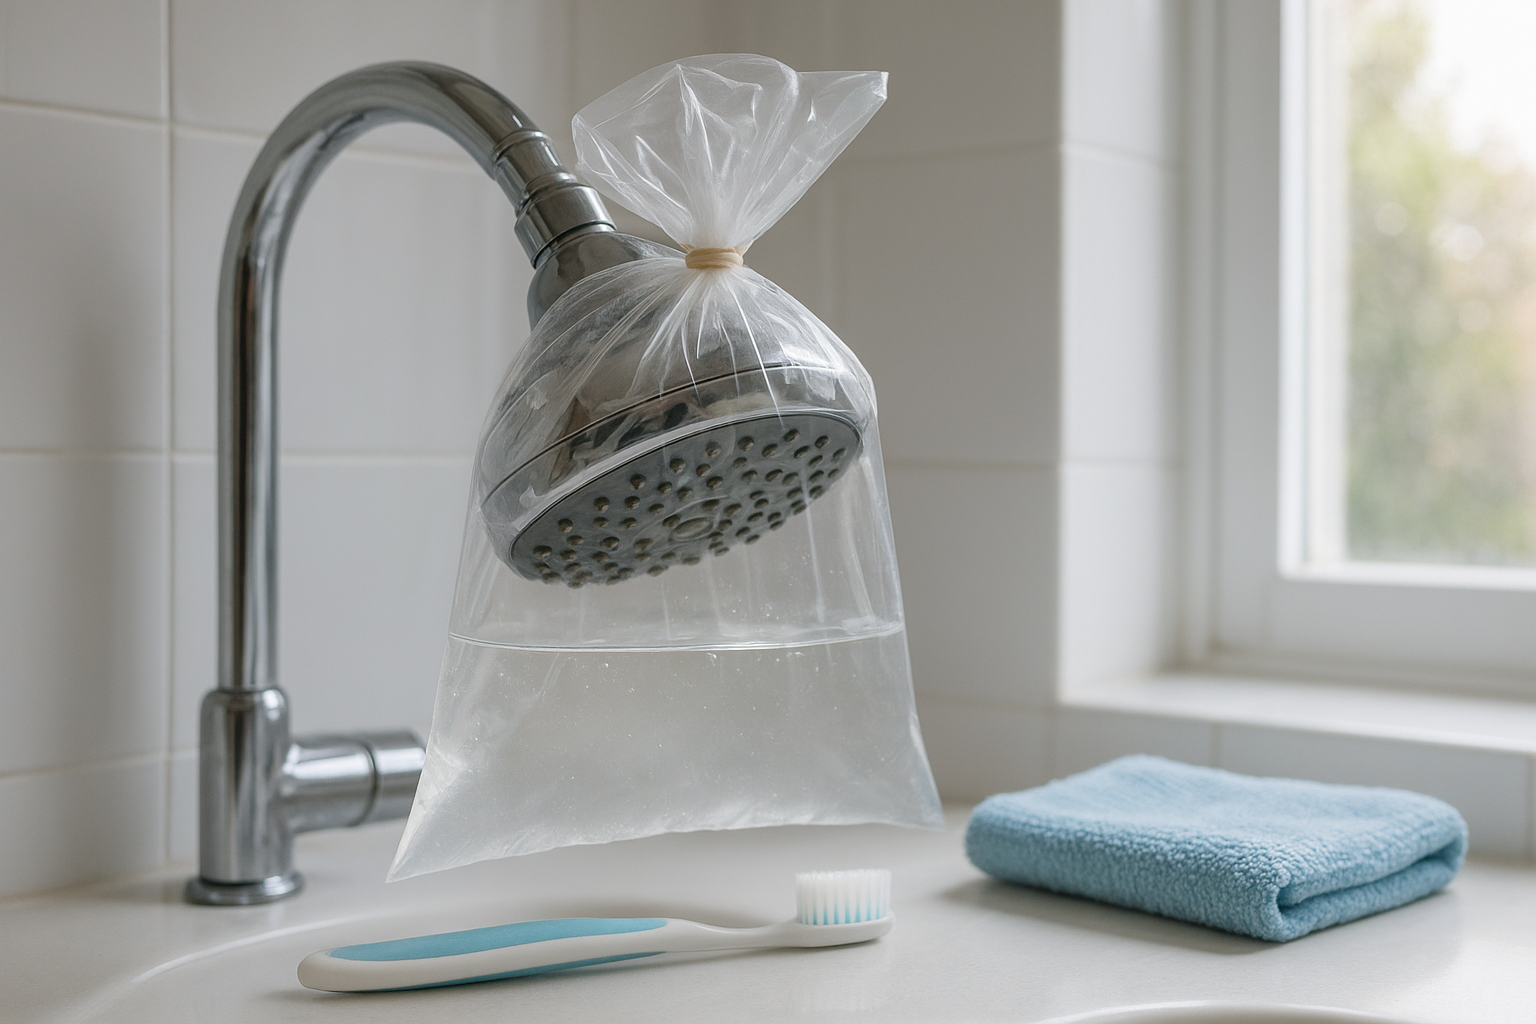
- Fill a bag with vinegar. Add enough white vinegar so the spray face will be fully submerged once the bag is lifted into place.
- Secure the bag. Slip the bag over the showerhead and fasten it snugly with a rubber band or twist tie. The spray holes should sit in the vinegar.
- Soak for 30 minutes. For light buildup, 30 minutes is often enough. For heavier deposits, try 1 to 2 hours. Avoid overnight soaking unless you know the finish can handle it.
- Remove and scrub gently. Take off the bag, then scrub the spray face with a soft toothbrush. Focus on the holes and rubber nozzles.
- Run hot water. Turn on the shower for a minute or two to flush loosened deposits from the inside.
- Polish dry. Wipe the showerhead with a clean microfiber cloth to reduce new spotting.
If a few holes are still blocked, use a toothpick or wooden skewer to loosen the softened scale. Do not use a needle or metal pin unless the manufacturer recommends it; metal can enlarge or damage small spray openings.
How to Deep Clean a Removable Showerhead
If the spray is still poor after the bag method, remove the showerhead and soak it more thoroughly. This is also a good choice for handheld showerheads with hoses, especially if you can see buildup around the connection points.
- Turn the shower off completely. You usually do not need to shut off water to the whole house for this job, but the shower valve must be off.
- Unscrew the showerhead. Try turning it by hand first. If it is tight, wrap the fitting with a towel and use an adjustable wrench gently.
- Check the washer and screen. Many showerheads have a small rubber washer and a screen filter inside the connection. Rinse these parts and set them somewhere safe.
- Soak the showerhead. Place it face down in a bowl of white vinegar for 10 to 20 minutes for moderate buildup. University of Michigan Health recommends soaking a showerhead in white vinegar until deposits dissolve, often 10 to 20 minutes, as part of cleaning mineral deposits. ([med.umich.edu](https://www.med.umich.edu/1libr/PedDialysis/CleaningShowerHeads.pdf?utm_source=openai))
- Brush and rinse. Scrub the face and threads with a soft brush, then rinse well under running water.
- Reinstall carefully. Put the washer and screen back in place, then screw the showerhead on by hand. Tighten only until snug.
- Flush the fixture. Run hot water for a minute to clear loosened debris.
If water leaks at the threaded connection after reinstalling, remove the showerhead and check that the washer is seated flat. If the washer is cracked or stiff, replace it. Plumber’s tape can help on some threaded joints, but a damaged washer is a common cause of drips.
How Often Should You Clean a Showerhead?
For most homes, cleaning a showerhead every 2 to 3 months keeps mineral buildup from becoming stubborn. If you have very hard water, a well, or a shower that is used several times a day, monthly cleaning may be more realistic.
A quick weekly wipe also helps. After cleaning the bathroom, rub the showerhead dry with a microfiber cloth. That small habit removes water droplets before they dry into white spots.
When Vinegar Is Not Enough
Vinegar works well for ordinary mineral deposits, but it cannot fix every shower problem. If the spray is still weak after cleaning, check these common issues:
- Clogged screen filter: Remove the showerhead and rinse the small inlet screen.
- Old flow restrictor packed with debris: Clean around it gently, but do not damage or remove parts that are required for the fixture to work properly.
- Low household water pressure: If every faucet is weak, the issue is probably not the showerhead.
- Worn internal parts: If the showerhead is cracked, leaking from the body, or spraying from seams, replacement is usually smarter than repeated cleaning.
If you replace the showerhead, look for a WaterSense labeled model. EPA says WaterSense showerheads use no more than 2.0 gallons per minute while meeting performance criteria, compared with the federal standard of 2.5 gallons per minute for standard showerheads. ([epa.gov](https://www.epa.gov/watersense/showerheads?utm_source=openai))
What Not to Use on a Showerhead
A few popular cleaning shortcuts can do more harm than good. Skip these unless your manufacturer specifically says they are safe:
- Bleach mixed with vinegar: Never mix bleach and vinegar. The combination can create dangerous chlorine gas.
- Steel wool or scouring powder: These can permanently scratch shiny or coated finishes.
- Long vinegar soaks on delicate finishes: Acid can dull or damage some specialty finishes if left too long.
- Metal picks in spray holes: They can deform soft rubber nozzles or enlarge precision openings.
A Simple Maintenance Routine
Once the showerhead is flowing well again, keep it that way with a light routine. Wipe it dry once a week, do a vinegar bag soak every few months, and remove the showerhead once or twice a year to rinse the screen and connection point.
If your shower is rarely used, run hot water through it for a few minutes from time to time. Stagnant water can encourage buildup in plumbing fixtures, and regular flushing helps keep the fixture fresher.
Bottom Line
The simplest way to clean a showerhead is to soak the spray face in white vinegar, scrub gently, and flush it well with hot water. For stubborn buildup, remove the showerhead and clean the inlet screen, washer, and spray holes more thoroughly.
If cleaning restores the spray, you have saved yourself the cost of a replacement. If the fixture still leaks, sputters, or performs poorly, it may be time to install a new efficient showerhead and start fresh.