8 Smart Ways to Reuse Tin Cans in the Garden
Empty food cans are one of the easiest things to save for the garden. After a quick wash and a little prep, they can become useful tools for seed starting, plant support, watering, and even pest control. Instead of sending them straight to the recycling bin, try keeping a small stash in your shed or potting area for the next planting project.
The best part is that you do not need special equipment to make them useful. A hammer, a nail, some pliers, and a can opener are usually enough to turn a plain kitchen discard into something practical outdoors. With a few smart tweaks, you can reuse tin cans in the garden all season long.
Before You Put Cans to Work
Not every can is ready for the garden as soon as it is empty. Food residue, sharp edges, and trapped moisture can create problems if you skip the prep step. Take a few minutes to get them garden-ready first.
Clean and dry them well
Rinse cans soon after use so food does not dry and stick to the inside. Wash them with warm, soapy water, then let them dry completely. This helps prevent odors and keeps pests from being attracted to your storage pile.
Deal with sharp edges
If you use a standard can opener, the rim may be sharp. A smooth-edge can opener is safer because it removes the lid without leaving a jagged top. If your cans already have rough edges, bend them down with pliers or file them smooth before handling them near kids or gloves.
Add drainage holes
Most gardening projects need water to drain freely. Turn the can upside down on a scrap piece of wood and tap a few holes in the bottom with a nail and hammer. For larger cans, four to six holes is usually enough. If you plan to keep the can outdoors for a long time, several side holes near the base can help too.
Know when to retire a can
Metal cans are sturdy, but they will rust over time. A little surface rust is not a problem for short-term use, especially during one growing season. If the can starts to crumble, leak badly, or develop sharp flakes, move on to recycling it.
1. Start Seeds Without Buying New Pots
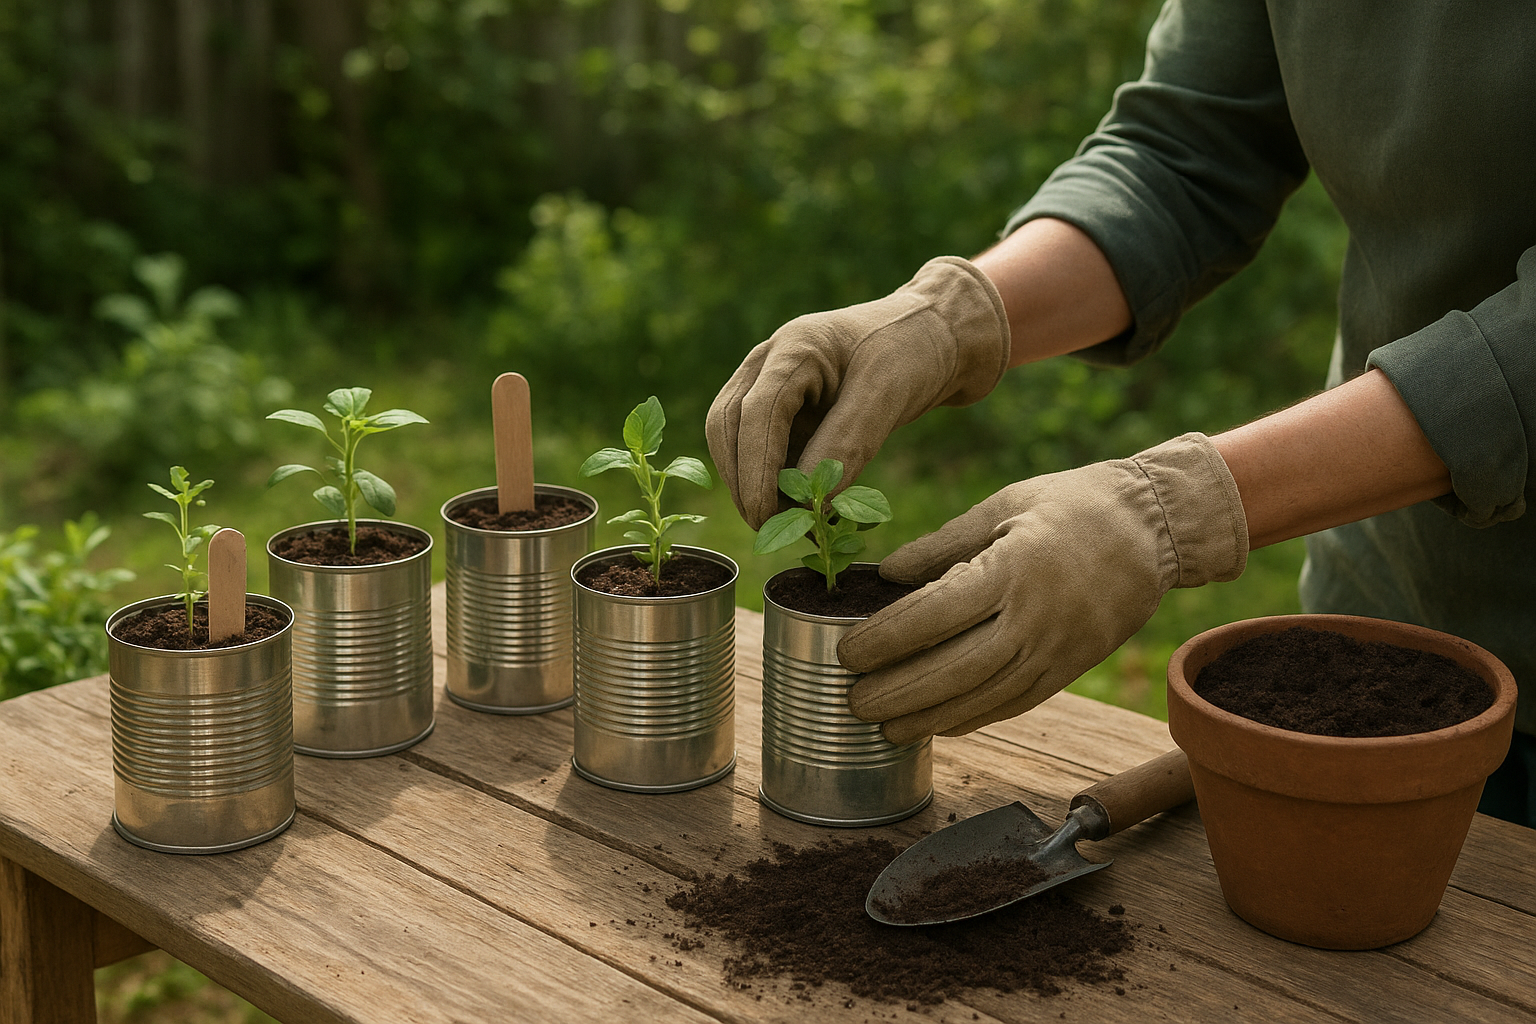
One of the most useful ways to reuse tin cans in the garden is as seed-starting containers. They are heavier than flimsy plastic cells, so they stay upright better on windy porches or crowded shelves. They also come in handy for herbs, tomatoes, peppers, and flowers that need a head start indoors.
After adding drainage holes, fill the can with a light seed-starting mix rather than heavy garden soil. Seedlings do better in a finer, more airy medium that drains well and supports delicate roots. Water gently and label each can clearly so you do not confuse your sprouts later.
Best tip: choose medium or large cans for seedlings that will stay indoors for a few weeks. Very small cans dry out faster and may not give roots enough room.
2. Use Cans as Temporary Plant Markers
Flat metal cans can be cut into simple plant tags. Clean and dry the can, then slice it into strips with sturdy shears. You can write on the pieces with a permanent marker or scratch the name into the metal with a nail.
These labels hold up better than paper tags in rain and sun. Stick one near each row of vegetables or herb pot so you can remember what you planted, when you planted it, and which variety is which. That is especially helpful if you grow several kinds of tomatoes or peppers at once.
3. Create a Simple Cutworm Collar
Young transplants are vulnerable to cutworms, which can chew through stems right at soil level. A tin can can help protect seedlings by acting as a collar. Remove both the top and bottom so you have a hollow cylinder, then press it a couple of inches into the soil around the plant.
Use this only for short-term protection while seedlings are small and tender. Once the plant thickens up, you can remove the collar so the stem has room to grow. This works well for tomatoes, peppers, and other starter plants that need a little extra help early on.
4. Make a Handy Watering Can for Spot Watering
You do not need a fancy watering tool for every job. A clean tin can with a few holes punched in the bottom can become a small drip-style waterer for seedlings, houseplants moved outdoors, or dry spots in a raised bed. Fill it with water and let it gently release moisture near the base of the plant.
This method is especially useful when you want to avoid splashing leaves or washing away newly sown seeds. It is not a replacement for a regular watering can, but it is great for targeted watering in tight spaces.
5. Protect Hanging and Climbing Plants
Some gardeners use cut cans as shields around stems that need support. For example, if you are training a vine or a tall seedling, a short can placed around the base can help hold mulch in place and keep soil from splashing onto tender leaves during rain.
You can also use a can as a temporary anchor point for string or twine in small garden projects. Just make sure any sharp edges are folded down and the can is stable enough not to tip in wind.
6. Store Twine, Tags, and Small Tools
Not every garden use has to happen in the soil. Cans are excellent little storage bins for the small items that always seem to disappear in a shed or potting bench drawer. Use them for twist ties, plant clips, seed packets, labels, bamboo stakes, or pruning markers.
For a tidier setup, keep one can for each category and group them on a shelf or in a crate. If you like, you can paint the outside with exterior spray paint or wrap it with twine for a more polished look. Just make sure the paint is fully dry before storing anything damp inside.
7. Hang Them as Lightweight Garden Helpers
With a little wire, a can can become a hanging container for herbs, flowers, or pollinator-friendly plants. This works best for lightweight annuals or small herbs such as thyme and parsley. Punch two holes near the top edge, thread in wire, and hang the can from a sturdy hook or fence.
Because metal heats up in direct sun, choose a spot that gets morning sun and some afternoon shade if possible. Also check moisture often, since hanging containers dry out faster than pots on the ground. A bit of mulch on top of the soil can help slow evaporation.
8. Use Them for Winter Garden Cleanup
At the end of the season, cans can help you gather and sort garden debris. Use one for spent flower heads, another for seed pods, and another for cut stems that are destined for the compost pile. Smaller, hollow stems can also be bundled and tucked into a can or tube-like container if you are saving them for beneficial insects or craft projects.
This is a simple way to stay organized during fall cleanup. Instead of tossing everything into one pile, you can separate what should be composted, saved, or recycled. It makes spring cleanup easier too.
Extra Tips for Safer Garden Use
- Use gloves when drilling holes, cutting metal, or smoothing edges.
- Avoid cans with lining damage if you plan to use them for edible plants long term.
- Paint or cover cans if they will sit in direct sun for months, since dark metal can heat up quickly.
- Do not use rusty cans for anything that needs to hold water for long periods.
- Keep them seasonal if you want the easiest, safest results.
A Small Habit That Pays Off
Saving a few empty cans may not seem like much, but those little containers can solve a surprising number of garden problems. They are cheap, sturdy, and ready to be repurposed for jobs that do not always need a store-bought solution. Once you start keeping a clean stash on hand, you may find yourself reaching for a tin can before you reach for new supplies.
If you are trying to garden on a budget or simply want to waste less, this is an easy habit to keep. Wash them, smooth the edges, punch the holes, and put them to work where they can do a little more growing before they are finally recycled.