How to Weatherstrip a Door to Stop Cold Drafts
A drafty exterior door can make a room feel colder than the thermostat says, especially on windy fall and winter days. The good news: learning how to weatherstrip a door is a manageable DIY project that usually takes basic tools, inexpensive materials, and a careful eye for gaps.
This guide walks you through finding the leak, choosing the right weatherstripping, installing seals along the sides and top, and adding a door sweep at the bottom. Take your time with measuring and test the door as you go—the best seal is snug, not so tight that the door won’t latch.
Why Weatherstripping Works
Weatherstripping seals the small gaps around parts of the house that move, such as exterior doors and operable windows. Caulk is better for stationary cracks, like gaps around trim, while weatherstripping belongs where the door still needs to open and close.
Sealing air leaks can make a home feel more comfortable and may help reduce energy waste. ENERGY STAR notes that sealing leaks and adding insulation can improve comfort and energy efficiency, with potential annual energy bill savings of up to 10% for many homes.
What You’ll Need
- Tape measure
- Pencil
- Scissors or utility knife
- Putty knife or small pry bar, if removing old weatherstripping
- Cleaning cloth and mild cleaner
- Self-adhesive foam, rubber, or silicone weatherstripping for the jambs
- Door sweep, door shoe, or draft seal for the bottom
- Screwdriver or drill, if using a screw-on sweep
- Optional: flashlight, incense stick, or tissue for checking drafts
Step 1: Find Where the Door Is Leaking
Start with the door closed and locked. Run your hand slowly around the top, sides, and bottom of the door. On a windy day, you may feel cold air moving through the gap. You can also have someone stand outside with a flashlight at night while you look from indoors; visible light around the door is a clear sign of a gap.
Another simple test is to close the door on a piece of paper. If the paper slides out with almost no resistance, that area needs a better seal. Check several spots: hinge side, latch side, top corners, and the threshold.
Step 2: Decide What Type of Weatherstripping to Use
For many everyday homes, self-adhesive foam or rubber weatherstripping is the easiest option. It is inexpensive, simple to cut, and beginner-friendly. It works best on doors with small, even gaps and smooth, clean surfaces.
Silicone or rubber tubular seals are a step up in durability and flexibility. They compress well when the door closes and can handle repeated use better than basic foam. For older wood doors or uneven frames, a screw-on vinyl-clad foam strip or metal-backed weatherstrip can be more reliable because it stays firmly attached and can be adjusted more precisely.
For the bottom of the door, choose a door sweep or door shoe. A door sweep attaches to the inside face of the door and lightly brushes the threshold. A door shoe wraps around the bottom edge of the door and can seal more completely, but it may require removing the door or trimming the product to fit.
Step 3: Remove Old, Worn Seals
If your door already has weatherstripping that is flattened, cracked, peeling, or missing in places, remove it before adding new material. Pull off adhesive strips by hand, then scrape away leftover residue with a putty knife. For nailed or stapled strips, use a small pry bar or pliers and work gently so you do not damage the door frame.
Clean the surface with a mild cleaner and let it dry completely. Adhesive weatherstripping will not stick well to dust, grease, damp paint, or crumbling old adhesive. This small prep step often makes the difference between a seal that lasts all season and one that peels off after a week.
Step 4: Measure the Door Frame
Measure the two vertical jambs and the top jamb separately. Do not assume both sides are exactly the same length, especially in an older house. Write down each measurement, then cut your weatherstripping slightly long. You can always trim a little more, but you cannot add length back once it is cut short.
Before peeling off any adhesive backing, hold each piece in place and close the door gently to see how it will compress. The seal should touch the door all along the edge without bunching, folding, or blocking the latch.
Step 5: Install the Side and Top Weatherstripping
Begin on the hinge side. Peel back a few inches of the adhesive liner, position the strip where the door meets the stop, and press it firmly in place. Work slowly down the jamb, peeling the backing as you go. Avoid stretching the strip; stretched foam can shrink back later and leave a gap.
Repeat on the latch side, then install the top piece. Pay close attention to the upper corners, which are common trouble spots. The pieces should meet neatly without leaving a hole. If you are using screw-on weatherstripping, start with the screws slightly loose, close the door to check compression, then adjust and tighten.
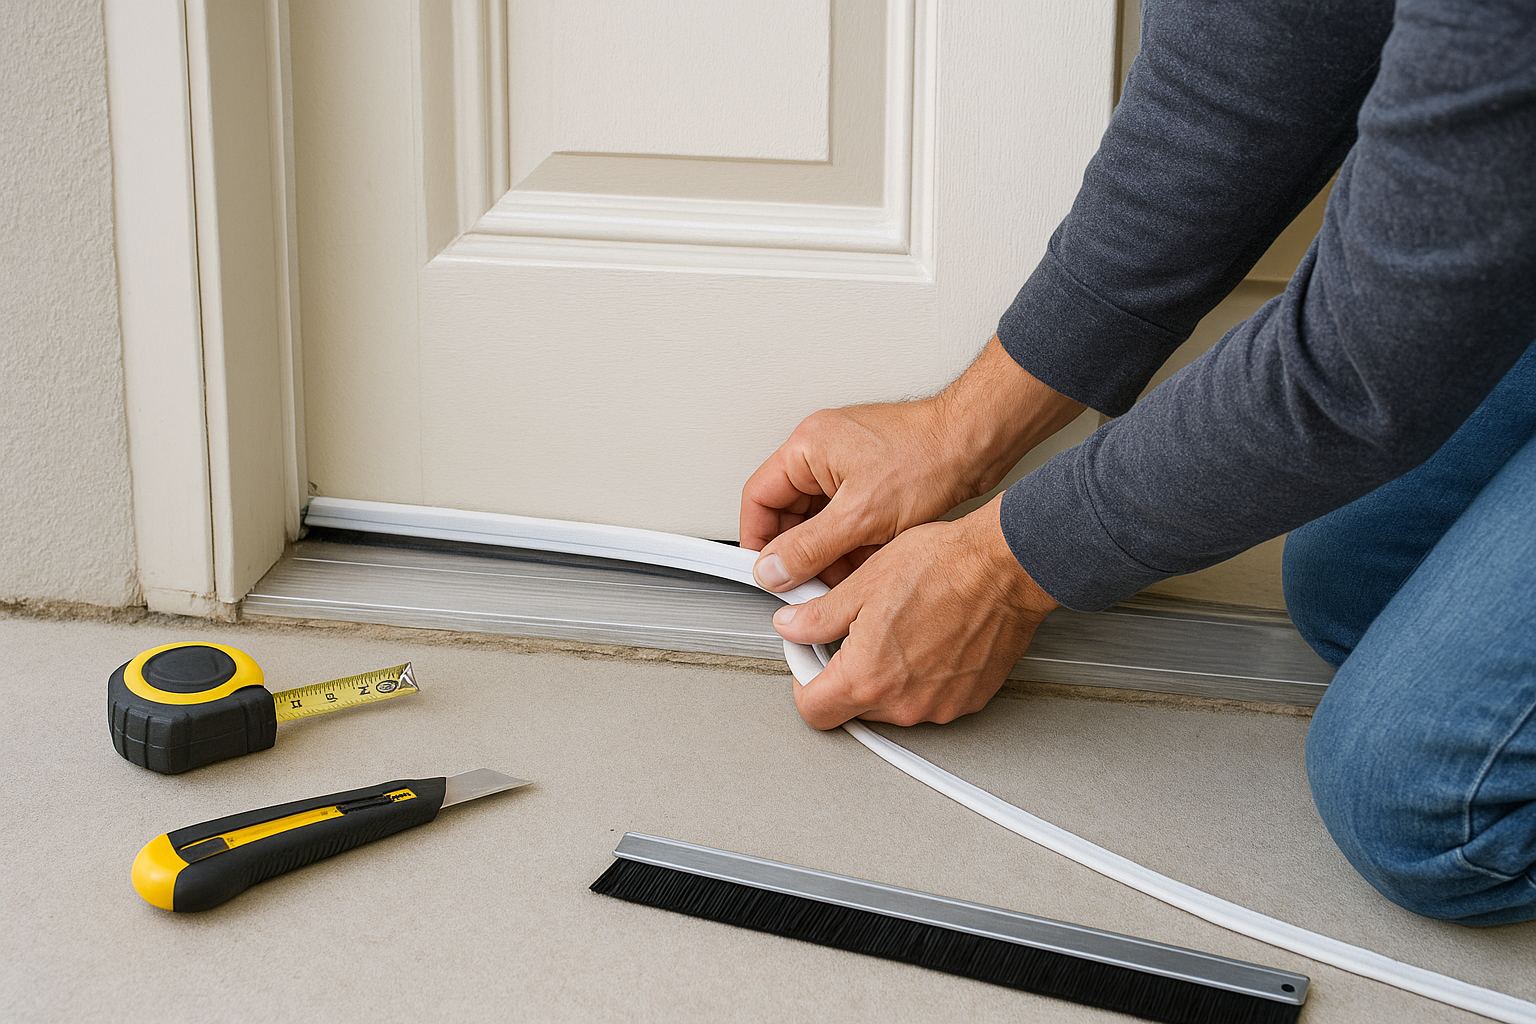
Step 6: Install a Door Sweep
The bottom of the door is often the biggest source of cold air. Measure the width of the door and cut the sweep to fit if needed, following the product directions. For a screw-on sweep, close the door and position the sweep on the interior side so the flexible fin or bristles just touch the threshold.
Mark the screw holes, drill small pilot holes if needed, and fasten the sweep in place. Do not set it so low that it drags hard across the threshold; that can make the door difficult to open and wear out the sweep quickly. You want light, even contact from side to side.
Step 7: Test the Door
Open and close the door several times. It should latch securely without slamming or forcing. If the door will not close, the weatherstripping may be too thick or placed too far forward. If you still feel a draft, look for gaps at the corners, behind loose trim, or under an uneven threshold.
Use the paper test again around the door. You should feel gentle resistance when pulling the paper out. If one area is loose, add a small adjustment rather than doubling up weatherstripping everywhere. Too much material can create new alignment problems.
Common Mistakes to Avoid
- Using caulk where the door moves: Caulk is for fixed gaps, not the edge where the door opens and closes.
- Skipping the cleaning step: Adhesive strips need a clean, dry surface to bond well.
- Choosing weatherstripping that is too thick: A tight seal is good, but a door that will not latch is not.
- Ignoring the threshold: If the threshold is damaged, loose, or badly uneven, a sweep alone may not solve the problem.
- Stretching foam tape during installation: Press it in place gently so it keeps its shape.
When to Look Beyond Weatherstripping
If you still have a strong draft after replacing the seals, the problem may be around the door frame rather than between the door and frame. Gaps behind interior trim can leak air, especially in older homes. In that case, removable trim, backer rod, low-expansion window-and-door foam, or caulk may be needed around the rough opening.
You should also inspect the door itself. A warped slab, loose hinges, cracked threshold, or poorly aligned latch can keep even good weatherstripping from sealing properly. Tightening hinge screws or adjusting the strike plate may help the door sit more evenly against the stop.
How Often Should You Replace Door Weatherstripping?
Check exterior door weatherstripping at least once a year, ideally in early fall before cold weather settles in. Replace it when it becomes brittle, torn, permanently flattened, loose, or visibly gapped. Door sweeps may need attention sooner if they scrape heavily or sit in a high-traffic entry.
A well-sealed door is one of those small home fixes you can feel right away. Once the drafts are gone, the entry feels calmer, the room stays more comfortable, and your heating system does not have to fight a constant stream of outdoor air.