How to Winterize Outdoor Faucets Before a Freeze
Outdoor faucets are easy to forget once the garden hose is put away, but they can cause real trouble when freezing weather arrives. The good news: learning how to winterize outdoor faucets usually takes just a few minutes per spigot, and it can help prevent cracked hoses, frozen hose bibs, and water damage inside the wall.
Do this before your first hard freeze, or any time nighttime temperatures are expected to drop below freezing. Even if you have a frost-free faucet, you still need to disconnect the hose so the faucet can drain properly. The EPA also recommends winterizing irrigation systems by shutting off the water supply and draining lines before freezing weather arrives. ([epa.gov](https://www.epa.gov/watersense/home-maintenance?utm_source=openai))
What You’ll Need
- Bucket or towel
- Work gloves
- Adjustable wrench or pliers, if hose fittings are stuck
- Insulated outdoor faucet covers
- Flashlight for finding indoor shutoff valves
- Hose reel, bin, or hooks for winter storage
If you have a lawn sprinkler system, backflow preventer, outdoor shower, pool line, or complicated exterior plumbing, check the manufacturer’s directions or call a plumber or irrigation professional. This guide is for regular outdoor faucets, often called hose bibs, sillcocks, or spigots.
Step 1: Disconnect Every Hose and Attachment
Start by removing anything attached to the faucet: garden hoses, hose splitters, watering timers, quick-connect fittings, spray nozzles, and pressure-washer hoses. This is the most important step and the one people skip most often.
A hose left attached can trap water at the faucet. When that water freezes and expands, it can damage the faucet or the pipe just inside the wall. This matters even with many frost-free faucets, because they are designed to drain after use only when the outlet is not blocked by a connected hose or attachment.
If a fitting is stuck, don’t force it so hard that you twist the pipe in the wall. Try gloves first, then use two tools: one to hold the faucet body steady and one to turn the hose fitting. If it still will not budge, call a plumber before a freeze rather than cracking the pipe.
Step 2: Drain and Store the Garden Hose
Carry the hose to a slight slope, stretch it out, and lift one end so water runs out the other. Remove spray nozzles and let them drain separately. A few drops left inside are not a disaster, but a hose stored full of water can split or become stiff and damaged over repeated freeze-thaw cycles.
Once drained, coil the hose loosely. Store it in a garage, shed, basement, or another protected spot. If you must store it outdoors, keep it off the ground and out of standing water, and make sure both ends are open so any leftover moisture can escape.
Step 3: Find the Indoor Shutoff Valve
For a standard outdoor faucet, look inside the house for a shutoff valve on the pipe that feeds the spigot. Common places include the basement ceiling, crawl space, utility room, laundry room, under a kitchen sink near an exterior wall, or inside an access panel.
Turn the valve clockwise until it stops if it is a round handle. If it is a lever-style ball valve, turn the lever so it sits perpendicular to the pipe. Do not crank hard on an old valve; if it leaks, feels frozen, or will not close fully, it may need repair.
Some homes do not have a separate indoor shutoff for every outdoor faucet. If yours does not, you may have frost-free faucets, or you may simply have older plumbing that needs extra care. When in doubt, treat the faucet as vulnerable and use an insulated cover at minimum.
Step 4: Open the Outdoor Faucet to Drain the Line
After shutting off the indoor valve, go back outside and open the faucet all the way. Water should run briefly, then slow to a drip or stop. Leave the faucet open for several minutes so the pipe can drain.
If the indoor shutoff valve has a small bleeder cap or drain port, place a bucket beneath it and open it carefully after the shutoff is closed. This lets trapped water drain from the section of pipe between the indoor valve and the outdoor faucet. Close the bleeder once the line is empty, but many homeowners leave the outdoor faucet itself open through winter after the indoor shutoff is closed.
Step 5: Add an Insulated Faucet Cover
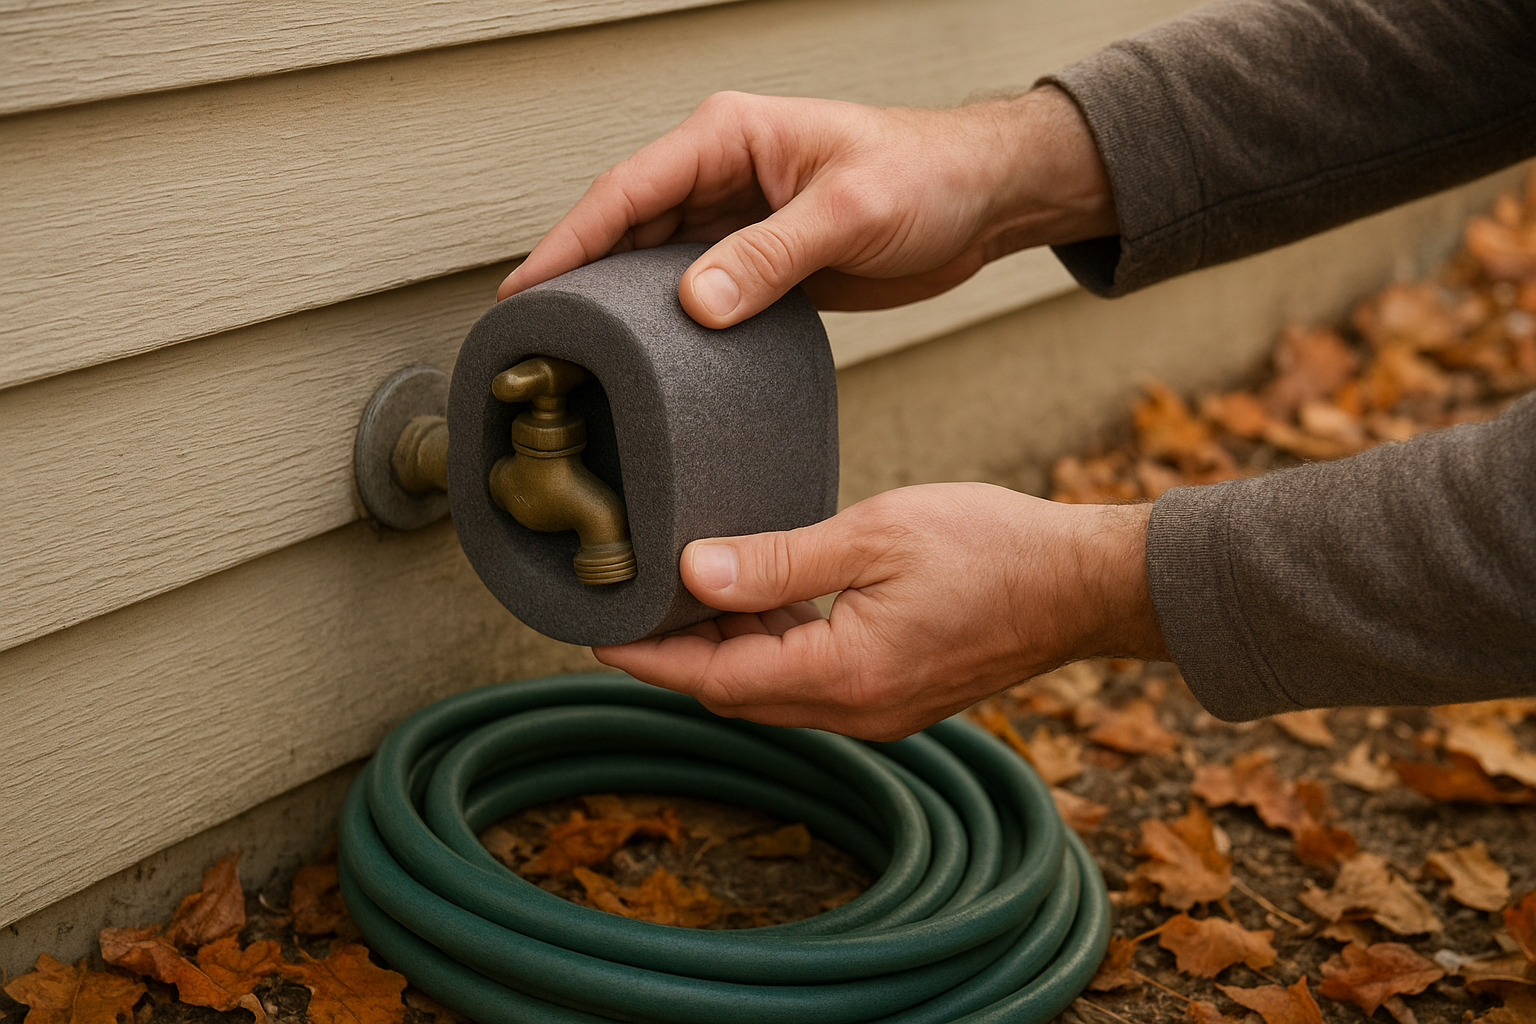
Once the faucet is drained, add an insulated faucet cover. These covers are inexpensive and usually attach with a loop or drawstring that pulls the foam snug against the wall. They are not a substitute for shutting off and draining a standard faucet, but they add a useful layer of protection against cold air and wind.
Make sure the cover sits flat against the siding, brick, or foundation. If there is a gap, cold air can still reach the faucet. For odd-shaped fixtures, a soft faucet sock may fit better than a hard foam dome.
What If You Have a Frost-Free Outdoor Faucet?
A frost-free faucet has a long stem that shuts water off farther inside the house, away from the exterior wall. When installed correctly with a slight downward pitch toward the outside, it drains after you turn it off. That design helps reduce freezing risk, but it does not make the faucet maintenance-free.
For frost-free faucets, do these three things before freezing weather:
- Remove the hose and all attachments. This lets the faucet drain as intended.
- Turn the faucet off fully. A slow drip can freeze around the outlet.
- Add a cover if your winters are cold or windy. It is cheap insurance, especially on north-facing walls.
If your frost-free faucet leaks from the handle, drips after shutoff, or sits perfectly level instead of sloping outward, have it checked. A frost-free faucet can still freeze if it is installed incorrectly or if water is trapped inside.
Do You Need to Drip Outdoor Faucets?
No. Outdoor faucets should generally be disconnected, shut off indoors if possible, drained, and covered. Dripping is a strategy sometimes used for certain indoor faucets during extreme cold, especially when pipes run through unheated spaces. Outdoor hose bibs are different because they are directly exposed to cold and should not be left running.
If you are facing an unusual freeze and cannot find a shutoff valve, remove the hose, cover the faucet, and consider calling a plumber for advice. For exposed pipes in unheated areas, follow local guidance and use products rated specifically for pipe freeze protection.
Common Mistakes to Avoid
- Leaving a splitter attached: A hose splitter can trap water just like a hose.
- Forgetting the backyard faucet: Walk the full perimeter of the house.
- Covering a faucet without draining it: Covers help, but trapped water can still freeze in cold climates.
- Using towels as the only insulation: Wet towels can freeze solid. Use a proper faucet cover.
- Ignoring irrigation lines: Sprinkler systems and backflow preventers often need separate winterizing.
Quick Outdoor Faucet Winterizing Checklist
- Remove hoses, nozzles, timers, and splitters.
- Drain hoses completely and store them indoors or in a shed.
- Find and close the indoor shutoff valve for each standard faucet.
- Open the outdoor faucet to drain the line.
- Use the bleeder cap on the indoor valve if your plumbing has one.
- Install an insulated faucet cover.
- Repeat for every exterior faucet, including garage, deck, porch, and backyard spigots.
Put this task on your fall home checklist right after the last lawn watering or garden cleanup. A few quiet minutes now can save you from a frozen faucet, a split hose, or a messy plumbing repair when winter settles in.