How to Save Bell Pepper Seeds for Next Season
Saving your own pepper seeds is a simple way to stretch your garden budget and keep a favorite variety growing year after year. If you’ve ever had one bell pepper that was especially sweet, thick-walled, or productive, collecting seeds from it can help you grow a similar crop next season.
The key is starting with the right pepper, letting the seeds mature fully, and storing them in a dry place so they stay viable. With a little care, you can save seeds from the peppers on your dinner counter or from the best fruits in your backyard beds.
Start with the right kind of bell pepper
Before you save seeds, it helps to know what type of pepper you’re growing. Seeds from open-pollinated or heirloom bell peppers are the most reliable choice if you want plants that resemble the parent. Seeds from hybrid peppers will often grow, but the resulting plants may not produce the same fruit shape, size, or color as the pepper you saved them from.
If your goal is consistency, look for seed packets or plant tags that say open-pollinated or heirloom. If you already have a pepper plant in your garden and you’re not sure whether it’s hybrid, you can still save the seeds for an experiment—just don’t expect exact copies.
Choose a fully ripe pepper
For the strongest seeds, let the pepper ripen completely on the plant. Bell peppers are often harvested green, but seeds are usually more mature in a fully ripe fruit, which may be red, yellow, orange, or even purple depending on the variety.
Ripe peppers have a firmer, more developed interior and seeds that are more likely to germinate well. If you pick a pepper too early, the seeds may still be underdeveloped and less dependable for planting later.
- Choose a healthy, blemish-free pepper.
- Pick fruit from a vigorous plant with good production.
- Avoid peppers that are damaged by insects, rot, or disease.
- Let the pepper sit on the plant until it reaches full color.
How to save bell pepper seeds step by step
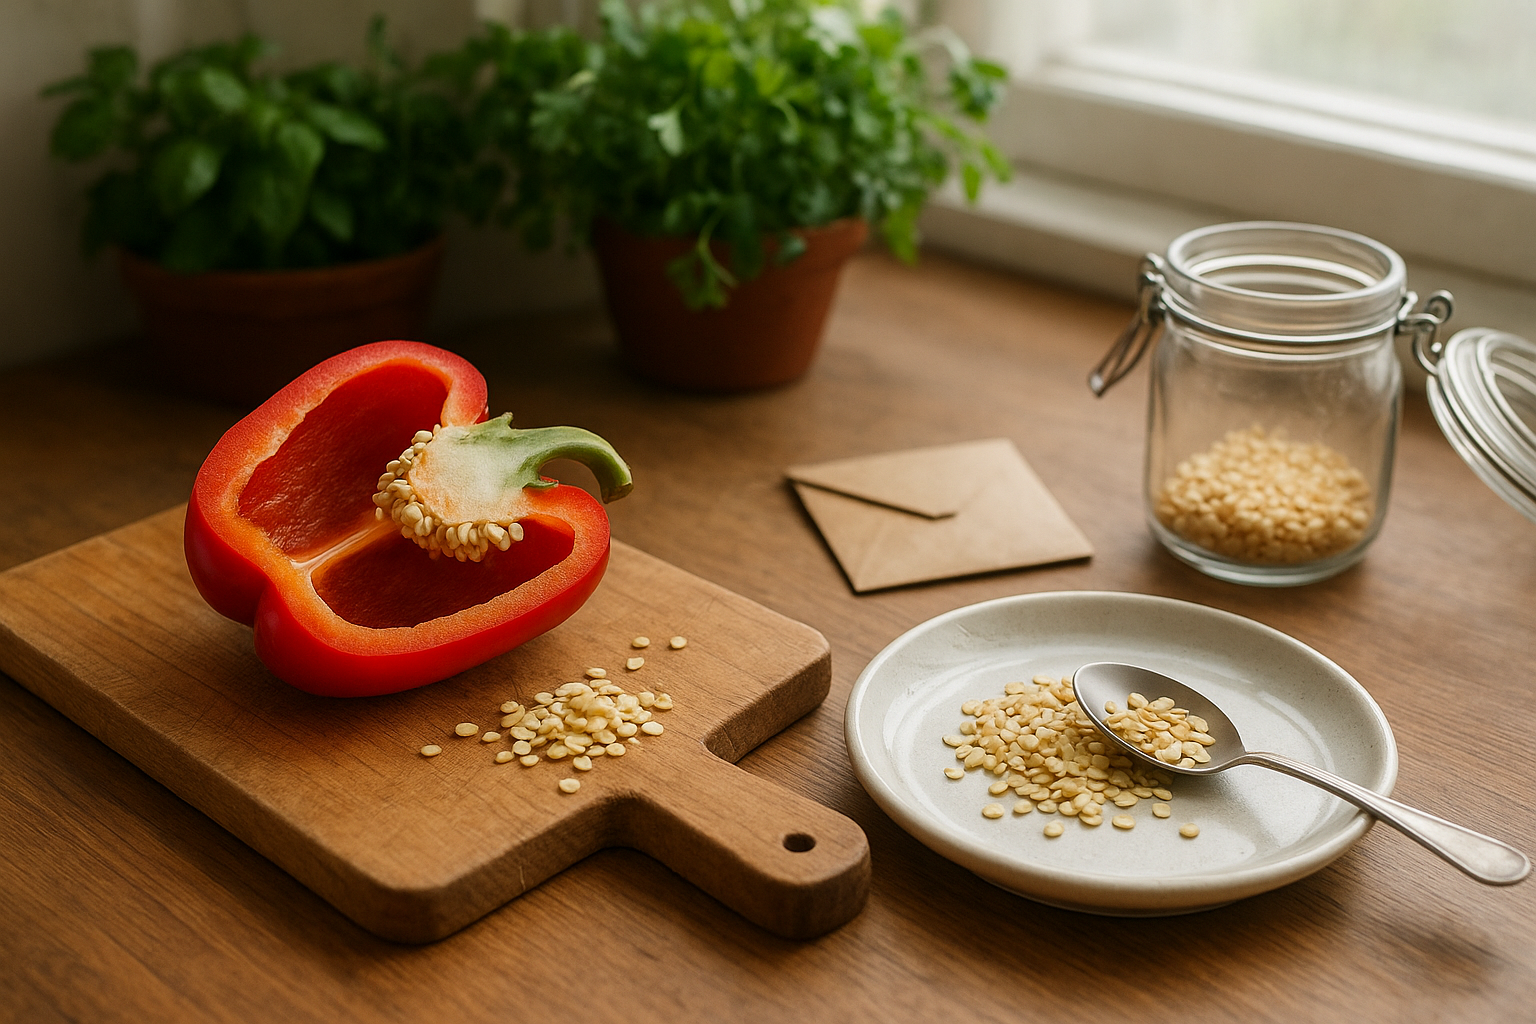
Once you have a ripe pepper, the process is straightforward. You do not need special equipment—just a knife, a spoon, a plate or tray, and a paper envelope or jar for storage.
- Cut open the pepper lengthwise and remove the core.
- Scoop out the seeds onto a dry plate, paper towel, or fine mesh screen.
- Separate any pulp so the seeds can dry evenly.
- Air-dry the seeds in a warm, dry spot out of direct sun.
- Store the seeds only after they are completely dry.
Bell pepper seeds are usually easy to remove because they are attached to the inner core rather than buried in sticky pulp. If a few bits of flesh cling to the seeds, gently rub them off with your fingers or a dry towel.
Dry the seeds properly
Drying is one of the most important steps in seed saving. Seeds that go into storage with too much moisture can mold or spoil. Spread them in a single layer so air can move around them, and turn them once or twice during drying if they stick together.
A cool, dry room with good airflow works well. Avoid placing seeds in full sun or in a hot oven, dehydrator, or microwave. Heat can damage the embryo inside the seed and reduce germination.
Most bell pepper seeds dry well in about one to two weeks, depending on humidity. They should feel hard and brittle, not bendy or soft. If you press a seed between your fingers and it still feels flexible, give it more time.
A quick dryness test
Try snapping a seed with your fingernail. A dry seed should break cleanly rather than squash or smear. If you’re unsure, wait another few days before packing them away.
Prevent unwanted cross-pollination
Bell peppers are mostly self-pollinating, which makes seed saving easier than with some other crops. Still, bees and other insects can transfer pollen between nearby pepper plants, especially if several varieties are growing close together.
If you want the seeds to stay true to one variety, give your pepper plants some spacing from other pepper types. Gardeners who save seed seriously often isolate plants, cover blossoms with fine mesh, or grow just one variety for seed collection.
If cross-pollination happens, the fruit you eat this year will not change, but the seeds may produce mixed traits in the next generation. For a home gardener, that may be fine. If you’re trying to preserve a specific variety, take extra care with isolation.
Label and store seeds for the best shelf life
Once the seeds are completely dry, move them to a labeled paper envelope, coin envelope, or airtight jar. A small paper packet inside a sealed container is a smart option because it keeps the seeds organized while helping manage moisture.
Write the variety name and the date on the label. If you know the source plant, note details such as color, flavor, or where it was grown. Those notes can be helpful when you compare seedlings next season.
Store the seeds in a cool, dark, dry place. A pantry drawer, closet shelf, or another low-humidity area is better than a sunny windowsill or damp garage. For extra protection in humid climates, you can keep the sealed container with a small desiccant packet.
- Best storage conditions: cool, dry, and dark
- Good containers: paper envelopes, glass jars, seed tins
- Avoid: heat, moisture, and direct sunlight
How long bell pepper seeds last
When stored well, bell pepper seeds can remain usable for several years. Freshly saved seeds usually have the best germination, but many gardeners get good results for three to five years or longer if the seeds stay cool and dry.
If you’re saving seeds to use next season, you’re in great shape. If you’re planning to keep them longer, package them carefully and check them periodically for any signs of moisture or mold.
How to test saved seeds before planting
If you want reassurance before seed-starting time, you can test a few seeds in a damp paper towel. Place several seeds between folded paper towels, set them in a plastic bag or covered container, and keep them warm. Check them after about a week or two, depending on temperature.
Healthy seeds should begin to sprout roots. If only a few germinate, you may want to sow extra seeds when planting time comes. A simple germination test helps you avoid wasting trays, potting mix, and valuable early-season time.
Common mistakes to avoid
Most seed-saving problems come from rushing the process. If you avoid these common mistakes, you’ll have a much better chance of success.
- Saving seeds from unripe peppers: immature seeds may not sprout well.
- Storing seeds before they are dry: trapped moisture can lead to mold.
- Using diseased fruit: choose only healthy peppers.
- Mixing up varieties: label everything right away.
- Ignoring humidity: moisture shortens storage life.
Why saving pepper seeds is worth it
There’s something satisfying about growing a new crop from a pepper you selected yourself. Seed saving can help you keep a dependable variety going, share seeds with friends, and become more involved in the rhythm of your garden from season to season.
It’s also a great way to learn. Over time, you’ll notice which plants produce the sweetest fruit, which ripen earliest, and which hold up best in your climate. That knowledge can help you choose better peppers year after year.
If you have a bell pepper that you truly love, don’t toss those seeds. Dry them, label them, and tuck them away for next season. With just a few minutes of effort, you can turn one pepper into many more.