How to Propagate Spider Plants: 3 Easy Methods
Spider plants are one of the easiest houseplants to multiply, which is great news if yours has started sending out long stems full of baby plantlets. With just a few basic supplies, you can turn one healthy plant into several new ones for your own home or to share with friends.
If you’ve ever wondered how to propagate spider plants, the good news is that there’s no single “right” method. You can root the little plantlets while they’re still attached, place them in water, or divide a mature plant into separate clumps. Each approach works well, and the best choice depends on the size of your plant and how quickly you want new growth.
Why spider plants are so easy to propagate
Spider plants naturally produce offsets, often called spiderettes or plantlets, on long arching stems. In the wild, this gives them a simple way to spread. In your home, it means propagation can happen with very little effort from you.
Unlike many plants that require complicated cutting techniques, spider plants are forgiving. Their plantlets often have tiny roots already forming before you do anything at all. That makes them ideal for beginner gardeners, kids helping with plants, or anyone who wants fast results.
Before you start: gather your supplies
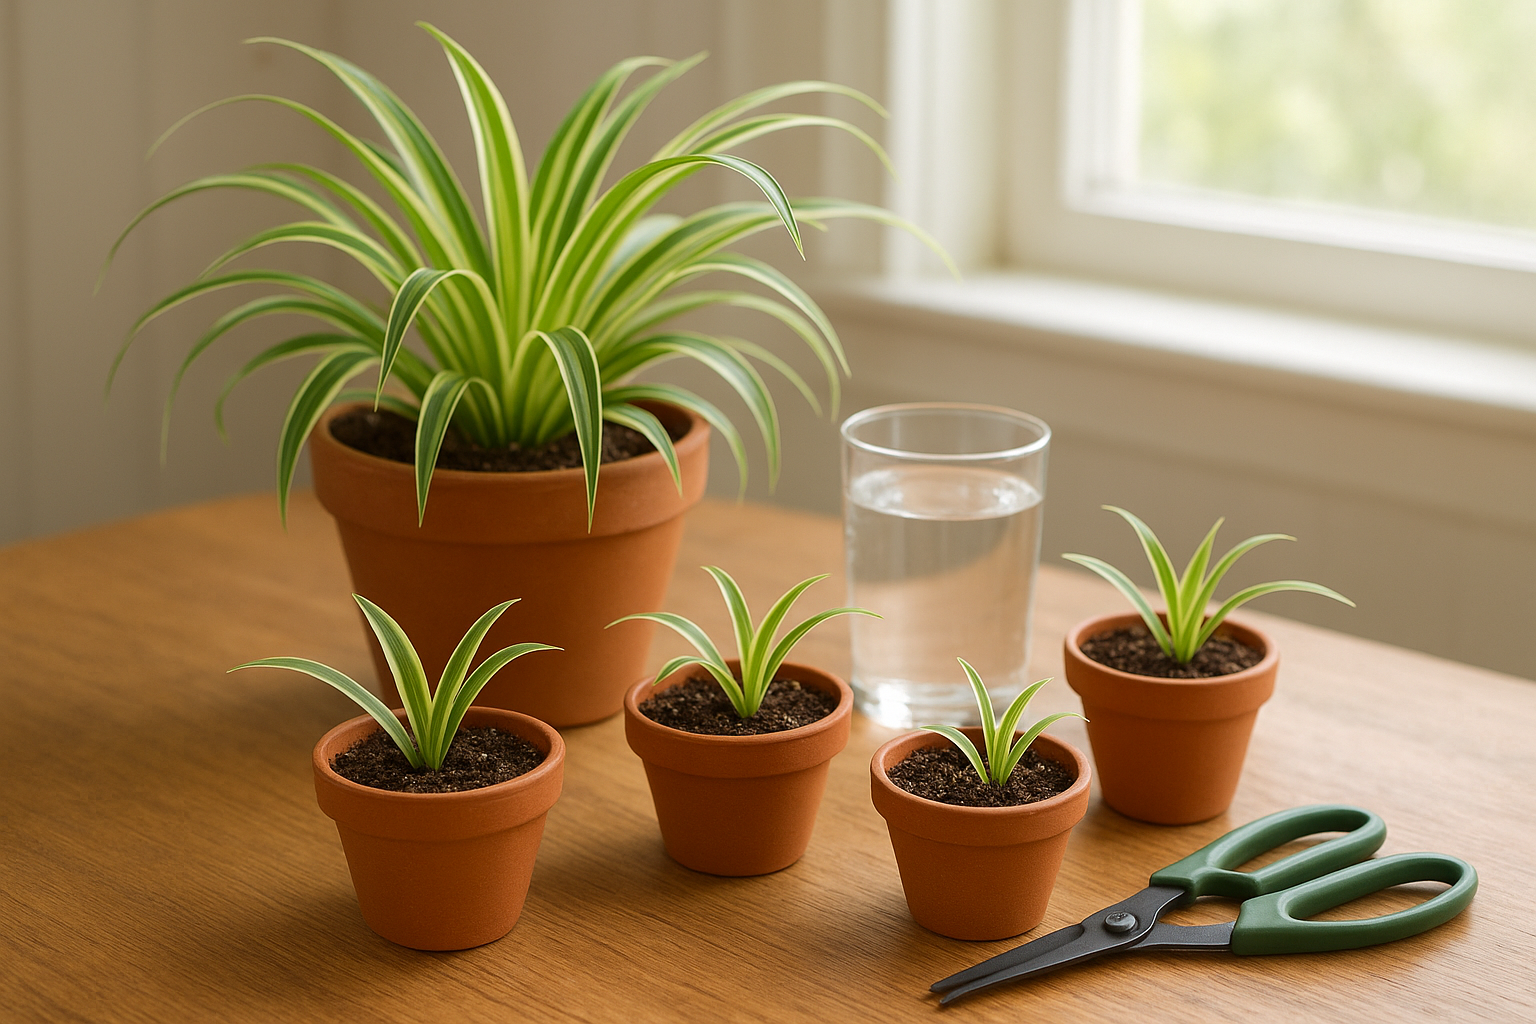
You do not need much to propagate a spider plant, but having a few tools ready makes the process smoother.
- A healthy spider plant with plantlets or multiple crowns
- Small pots or containers with drainage holes
- Light, well-draining potting mix
- Clean scissors or pruning snips
- A glass or jar of water, if using the water-rooting method
- Optional: small plant stakes or paper clips to hold plantlets in place
Choose a mother plant that looks vigorous, with firm green leaves and no major signs of pests or disease. Strong parent plants produce stronger babies.
Method 1: Root plantlets while they’re still attached
This is often the simplest and most reliable method, especially if the baby plant already has visible roots. It keeps the plantlet nourished while it establishes itself.
Steps to follow
- Find a plantlet with roots. Look for a baby plant that has small root nubs or a tiny root system of its own.
- Set a pot of moist potting mix nearby. Use a small pot with drainage holes and fill it with a fresh, airy mix.
- Place the plantlet on the soil surface. Set the base of the baby plant directly on the mix, with the roots touching the soil.
- Pin it in place if needed. Use a bent paper clip, floral pin, or small pebble to keep the plantlet from slipping.
- Keep the runner attached. Leave the baby connected to the mother plant until you see new growth and the plantlet resists a gentle tug.
Once the baby spider plant starts growing on its own, snip the runner between the parent and the new plant. This method reduces shock because the plantlet stays connected while it settles in.
Method 2: Root spider plant babies in water
Water propagation is a popular choice because it is easy to monitor root growth. It is especially useful if the plantlet has very small or undeveloped roots.
How to do it
- Cut the plantlet from the runner. Use clean scissors and leave a short piece of stem attached if possible.
- Place the base in a small jar of water. Only the bottom portion should touch the water; keep the leaves dry.
- Set the jar in bright, indirect light. A windowsill with filtered sunlight works well.
- Refresh the water every few days. Clean water helps prevent rot and keeps oxygen levels better for root development.
- Pot up once roots are established. When roots are about 1 to 2 inches long, transplant the baby into soil.
Water propagation is easy to watch, but the roots formed in water can be a little more delicate than those grown in soil. When you move the plant to a pot, water it gently and keep the soil evenly moist for the first week or two.
Method 3: Divide a mature spider plant
If your spider plant has become large, crowded, or root-bound, division is a smart way to rejuvenate it and create new plants at the same time. This method works well when the plant has multiple crowns growing from one pot.
When division makes sense
- The plant is pushing up out of the pot
- Roots are circling heavily at the bottom
- The center of the plant looks crowded
- You want several full-sized plants rather than tiny babies
Division steps
- Remove the plant from its pot. Gently loosen the root ball and shake off excess soil.
- Identify natural sections. Look for clumps that already have roots and leaves of their own.
- Separate the clumps. Pull them apart by hand if possible, or use a clean knife for stubborn sections.
- Pot each division separately. Use pots with drainage holes and fresh potting mix.
- Water lightly and place in indirect light. Keep the soil slightly moist until the plants settle in.
Dividing a spider plant is also a good rescue strategy if an older plant is looking tired. A fresh pot and new soil can bring it back to life.
The best soil and potting setup
Spider plants grow best in a loose, well-draining mix. A standard indoor potting soil works, but adding a little extra perlite can improve drainage. That matters because spider plants dislike sitting in soggy soil.
Choose small pots for baby plants. It is tempting to use a large container, but oversized pots hold too much moisture and can slow root development. A snug pot helps the plant focus on growing roots before it fills out above the soil line.
If you’re potting up several plantlets at once, group them in small individual containers first. You can always move them into larger pots later.
How to care for new spider plant propagations
Newly propagated spider plants do best with steady, gentle care. The first few weeks are about helping roots establish, not pushing fast top growth.
- Light: Bright, indirect light is ideal. Avoid harsh direct sun, which can scorch young leaves.
- Water: Keep the soil lightly moist, but never wet. Let the top inch dry slightly between waterings.
- Temperature: Average indoor temperatures are fine. Avoid cold drafts and heat vents.
- Fertilizer: Wait a few weeks before feeding new plants. Once they are growing steadily, use a diluted houseplant fertilizer during the growing season.
If a new plant looks a little limp at first, do not panic. A short adjustment period is normal after transplanting. As long as the roots are healthy and the soil is not too wet, it should perk up.
Common propagation mistakes to avoid
Spider plants are easygoing, but a few simple mistakes can slow them down.
- Using heavy soil: Dense soil holds too much water and can lead to root rot.
- Overwatering: Young plants need moisture, but constantly soggy soil causes more harm than good.
- Cutting babies too early: Plantlets with no roots may struggle unless you root them in water first.
- Using dirty tools: Clean scissors reduce the chance of introducing disease.
- Placing them in strong sun: Bright light is helpful, but direct midday sun can damage tender leaves.
How long propagation usually takes
Spider plant babies can root fairly quickly. Plantlets already showing root nubs may establish in a couple of weeks, while water-rooted babies often show visible roots in one to three weeks. Divisions may take a little longer to bounce back, especially if the parent plant was crowded or root-bound.
The pace depends on light, warmth, and how mature the plantlet is when you start. The most important thing is consistency. Stable moisture and indirect light usually produce the best results.
A simple way to grow your collection
Once you learn how to propagate spider plants, you may never need to buy another one. These adaptable houseplants are generous, resilient, and quick to reward a little care with fresh new growth.
Whether you root the babies in soil, start them in water, or divide a mature plant, you’ll end up with more greenery for your shelves, desks, and windowsills. It’s an easy project with a satisfying payoff—and a great way to keep a favorite plant going for years.