How to Clean Refrigerator Coils Safely
If your refrigerator seems to run constantly, feels hot around the bottom, or struggles to stay cold, dusty condenser coils may be part of the problem. Learning how to clean refrigerator coils is a simple home maintenance job that can help your fridge move heat away from the appliance more efficiently.
The job usually takes 15 to 30 minutes, and you only need a vacuum, a soft brush, and a little patience. Before you begin, check your owner’s manual if you have it, because some newer refrigerators have enclosed or “no-clean” condenser designs that are not meant to be serviced the same way.
Why Refrigerator Coils Get Dirty
Refrigerator condenser coils release heat from the cooling system. Depending on the model, they may be underneath the fridge behind the toe grille, on the back of the appliance, or near the top behind a service panel. GE Appliances notes that accessible condenser coils may be located under, behind, or on top of the refrigerator, and that some newer models have condenser designs that do not require owner cleaning. ([products.geappliances.com](https://products.geappliances.com/appliance/gea-support-search-content?contentId=16266&utm_source=openai))
Over time, those areas collect dust, pet hair, crumbs, lint, and grease from kitchen air. That layer acts like a blanket. The refrigerator can still work, but it may need to run longer to remove heat.
ENERGY STAR recommends keeping condenser coils clean on older refrigerators and leaving a few inches of space between the wall and the refrigerator or cooler for airflow. ([energystar.gov](https://www.energystar.gov/products/refrigerators?utm_source=openai)) That makes this a practical task to add to your seasonal cleaning list, especially if you have pets or a dusty kitchen.
How Often Should You Clean Refrigerator Coils?
For many households, once a year is a good starting point. If you have shedding pets, a refrigerator in a garage, or a kitchen that gets dusty quickly, check the coils every six months.
GE says coil cleaning may be needed more often in homes with shedding pets or in dusty areas such as garages. Whirlpool’s maintenance guidance also lists condenser coil cleaning as a yearly refrigerator care task. ([products.geappliances.com](https://products.geappliances.com/appliance/gea-support-search-content?contentId=16266&utm_source=openai))
A good rule: if you pull off the grille and see gray dust mats, pet hair clumps, or lint packed onto the vents, it is time to clean.
What You’ll Need
- Vacuum with hose attachment
- Long refrigerator coil brush or appliance brush
- Soft cloth or microfiber rag
- Flashlight
- Work gloves, especially for top-mounted coils or sharp metal edges
- Screwdriver, only if your model has a removable access panel
A refrigerator coil brush is narrow and flexible, so it reaches places a regular dusting brush cannot. If you do not have one, use the softest long brush you own, but avoid bending fins, yanking wires, or forcing anything into the machine compartment.
Step 1: Unplug the Refrigerator
Always start by cutting power. Unplug the refrigerator from the wall outlet before cleaning accessible coils. GE specifically advises unplugging before maintenance or cleaning to reduce the risk of electric shock. ([products.geappliances.com](https://products.geappliances.com/appliance/gea-support-search-content?contentId=16266&utm_source=openai))
If the outlet is hard to reach, turn the refrigerator off at the circuit breaker. Keep the doors closed while you work so food stays cold. For a basic coil cleaning, the fridge should not be off long enough to cause a food safety concern.
Step 2: Find the Coils
Look in three common places:
- Under the refrigerator: Remove the lower front toe grille, if your model has one. Many modern refrigerators hide coils behind this grille.
- On the back: Pull the refrigerator straight out from the wall and look for a black coil grid or covered lower panel.
- On the top: Some built-in or higher-end models place condenser parts behind a top grille or panel.
If you cannot find exposed coils, do not start removing random panels. Check the owner’s manual by model number. Some refrigerators have a condenser that is not intended for routine owner access.
Step 3: Vacuum Loose Dust First
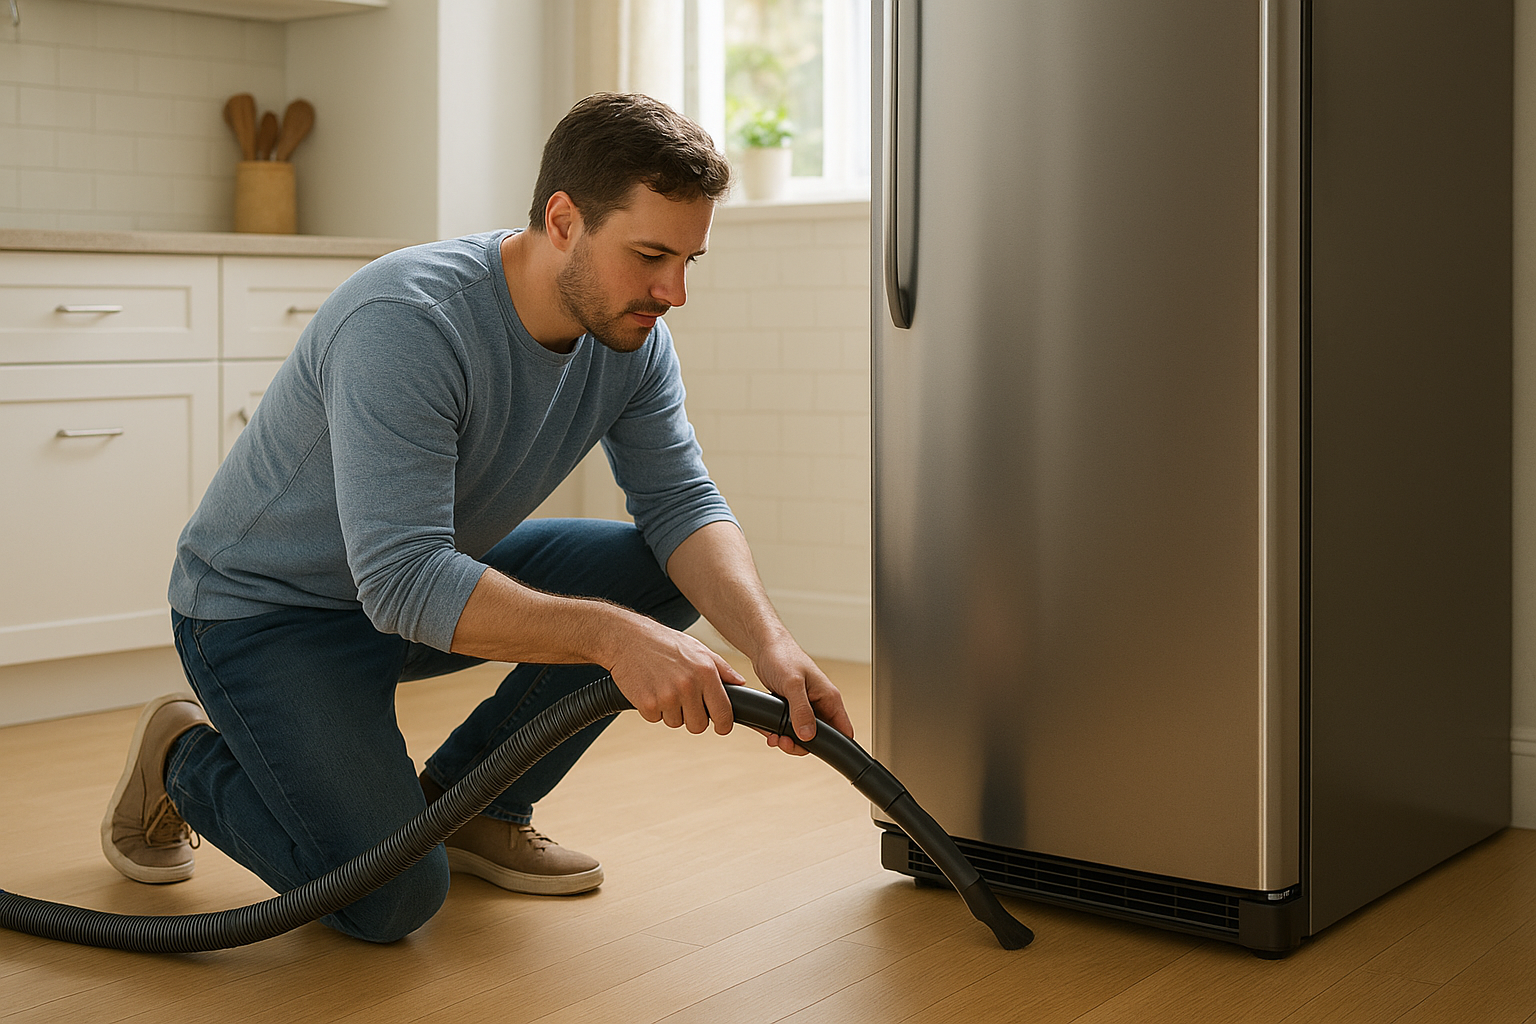
Use the vacuum hose to remove loose dust from the grille, floor, wall, and the area around the coils. This keeps you from pushing debris deeper into the appliance.
If the coils are underneath, vacuum along the front opening first. If the coils are on the back, vacuum the floor behind the fridge before you clean the coil area. Dust bunnies often collect around the compressor and fan, too, but be gentle and avoid touching wires or moving parts.
Step 4: Brush the Coils Gently
Slide the coil brush into the coil area and use light strokes to loosen stuck-on dust. Pull the brush out often and vacuum the debris that comes with it.
Do not scrub aggressively. Condenser fins can have sharp edges and can bend if handled roughly. GE recommends using a condenser cleaning coil brush to remove dust, dirt, and pet hair, then sweeping or vacuuming debris from the floor before putting the grille back. ([products.geappliances.com](https://products.geappliances.com/appliance/gea-support-search-content?contentId=16266&utm_source=openai))
For back-mounted coils, work from top to bottom. For bottom-mounted coils, alternate between brushing and vacuuming until the brush comes out with very little dust. You may need a flashlight to see what is still packed inside.
Step 5: Clean the Grille and Floor
Before you reassemble anything, clean the air path. Wash or wipe the toe grille if it is dusty or greasy. Vacuum the floor beneath the refrigerator, the wall behind it, and the sides where lint gathers.
This step matters because a clean coil can get dirty again quickly if it is surrounded by a mat of dust and pet hair. If your refrigerator has wheels, move it slowly and keep an eye on the water line if it has an ice maker or water dispenser.
Step 6: Put Everything Back Carefully
Replace the grille or panel. Push the refrigerator back into place slowly, making sure you do not roll over the power cord, water tubing, or copper line. Leave some breathing room behind the appliance if your kitchen layout allows it.
Plug the refrigerator back in or turn the breaker back on. Listen for the compressor or fan to start. The fridge may take a little while to settle back into its normal cycle, especially if it was already running warm.
Signs the Coils May Need Attention
- The refrigerator runs almost all the time.
- The bottom front grille area feels very warm.
- You see pet hair or dust packed around the toe grille.
- The fridge is not cold enough even though the temperature setting has not changed.
- You recently moved the refrigerator and found heavy dust behind it.
Dirty coils are not the only cause of cooling trouble. Door gasket leaks, blocked interior vents, a failing fan, low refrigerant, or a compressor problem can also cause issues. But coil cleaning is one of the easiest things to check before calling for service.
What Not to Do
- Do not spray water into the coil area. You are working near electrical parts.
- Do not use a stiff wire brush. It can damage fins, tubing, or wiring.
- Do not remove sealed panels unless the manual tells you to. Some areas are not meant for routine homeowner maintenance.
- Do not yank the fridge forward quickly. Water lines and cords can be damaged.
- Do not ignore the manual. Manufacturer instructions should always come first for your specific model.
A Simple Refrigerator Coil Cleaning Schedule
To make this task easy to remember, tie it to another household routine. Clean the coils when you replace smoke alarm batteries, deep clean the kitchen, or change HVAC filters for the season.
For most homes, write “vacuum refrigerator coils” on your calendar once a year. If you have pets, check every six months. If the coils look clean when you inspect them, just vacuum the floor and grille and move on.
The Bottom Line
Cleaning refrigerator coils is not glamorous, but it is one of those small chores that can help a hardworking appliance do its job. Unplug the fridge, find the coils, vacuum loose dust, brush gently, and clear the surrounding floor and grille.
If your refrigerator still runs constantly or will not hold a safe temperature after cleaning, it is time to look at the door seals, temperature settings, airflow inside the fridge, or call an appliance technician. But in many kitchens, a quick coil cleaning is a smart first step.