How to Use Cardboard Mulch in a Veggie Garden
If your vegetable beds are drying out too fast or weeds are taking over, cardboard mulch can be a simple fix. It is one of the easiest ways to give tired soil a little protection in summer, and it uses something many households already have on hand.
Done well, cardboard acts like a barrier on the soil surface: it helps slow evaporation, blocks light from weed seeds, and creates a neater, more manageable growing space. It can also make watering more effective, especially in raised beds and hot, exposed gardens.
Why cardboard works so well in vegetable beds
Cardboard is useful because it does several jobs at once. Instead of leaving bare soil exposed to sun and wind, you cover it with a layer that reduces drying and discourages weed growth. Over time, the cardboard softens and breaks down, feeding soil life and improving the structure of the top layer.
- Holds moisture: Less water is lost from the soil surface.
- Suppresses weeds: Light cannot reach most weed seedlings.
- Protects soil: Bare earth is less likely to crust, bake, or erode.
- Supports soil health: Worms and microbes gradually break it down.
It is especially helpful in summer when watering can feel like a never-ending chore. It is also useful in spots where grass or persistent weeds keep trying to creep into the bed.
What kind of cardboard to use
Not all cardboard is equally suitable. The safest choice is plain brown corrugated cardboard with minimal printing and no glossy coating. Boxes from deliveries, appliance packaging, and shipping cartons are often perfect.
Choose cardboard that is:
- Clean and dry
- Free of tape, staples, and labels where possible
- Uncoated and unwaxed
- Brown rather than heavily printed
Avoid cardboard that has a shiny surface, waterproof lining, or heavy grease stains. Pizza boxes can be used only if they are free from food residue and grease; if the bottom is oily, recycle that part instead.
How to prepare the bed before mulching
Before laying down cardboard, take a few minutes to prepare the bed properly. This step makes the mulch far more effective and helps prevent problems later.
- Remove large weeds. Pull up perennial weeds with roots if you can, especially docks, thistles, bindweed, couch grass, or nettles. Cardboard helps with weeds, but tough established roots may survive if left in place.
- Water the soil lightly. Slightly damp soil helps the cardboard settle and start softening sooner.
- Trim tall growth. Mow or cut down long grass and big weeds so the cardboard sits flat.
- Clear away debris. Take off stones, broken plant ties, and anything sharp that could puncture the cardboard.
If you are mulching around established vegetables, take care not to damage stems or shallow roots while you tidy the bed.
How to lay cardboard mulch the right way
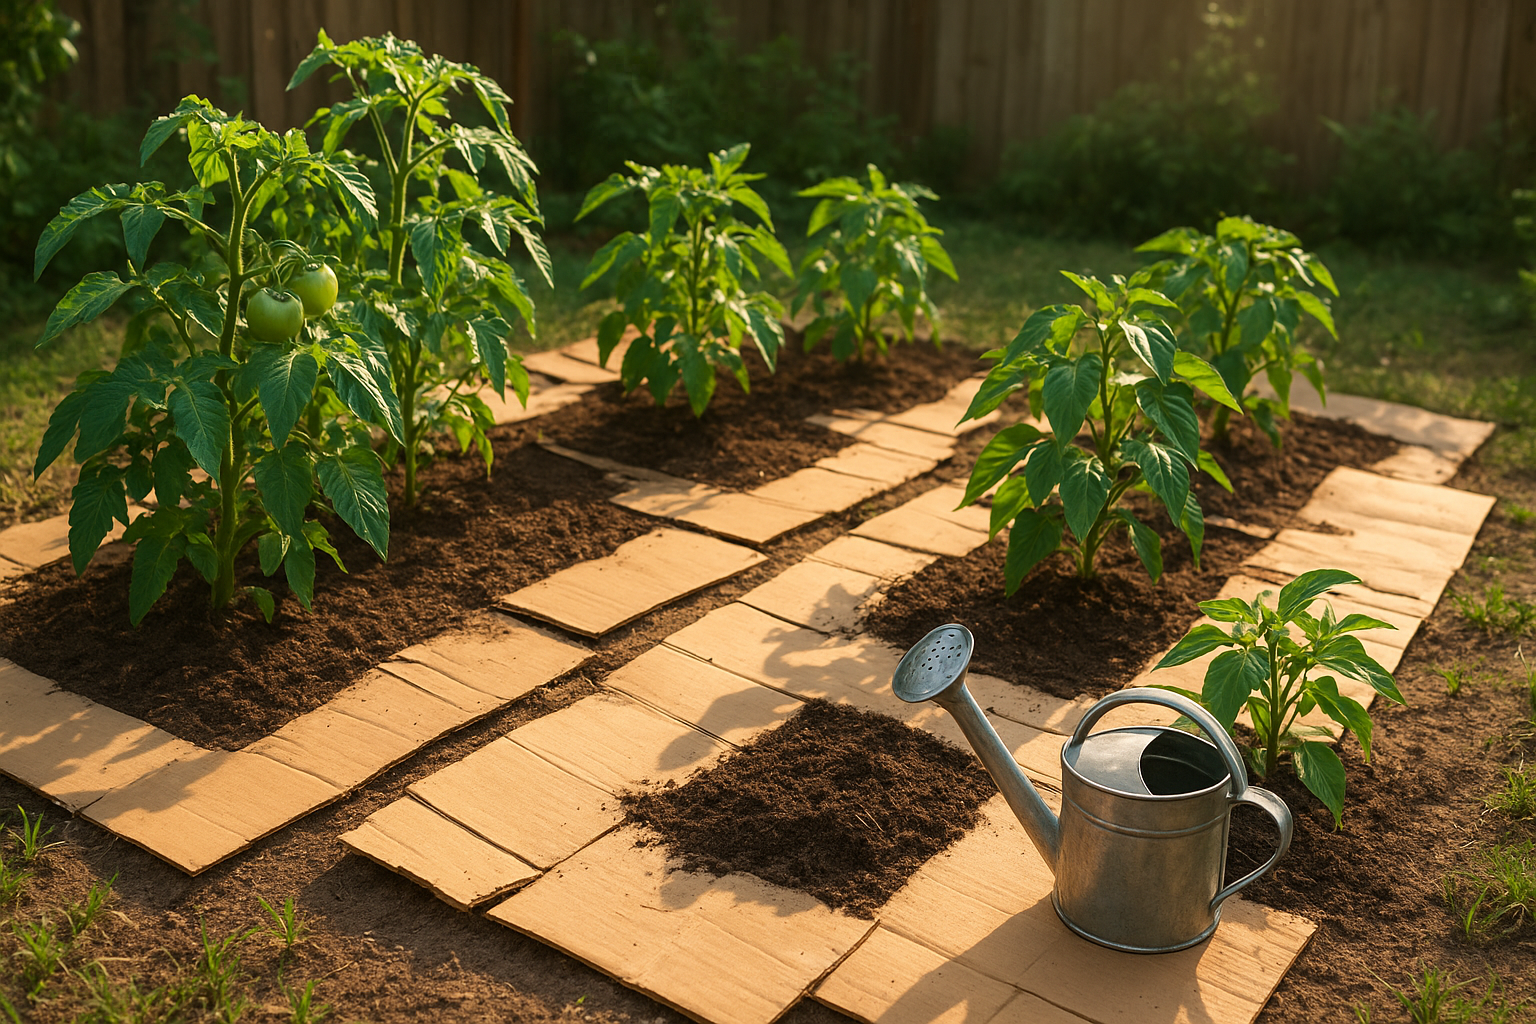
The goal is to create a continuous layer that blocks light while still allowing water to reach the soil. You do not need a thick, bulky stack of cardboard; overlapping sheets are better than multiple loose layers.
Step-by-step method
- Flatten the boxes completely. Remove lids, fold out tabs, and press seams open.
- Lay the sheets overlapping. Overlap each piece by at least 10 to 15 cm so weeds cannot push through gaps.
- Cut around plants. Use scissors or a knife to make a slit or hole for each existing plant, then slide the cardboard around the stem.
- Moisten the cardboard. Water it thoroughly once it is in place so it settles and starts to soften.
- Add a topping layer. Cover the cardboard with compost, leaf mould, straw, grass clippings, or well-rotted manure if you want a tidier look and better performance.
That final topping layer is optional, but it is often a smart move. A few centimeters of compost or mulch on top hides the cardboard, weighs it down in wind, and gives the bed a cleaner finish.
How much cardboard is enough?
For weed suppression, one solid layer of cardboard is usually enough if the sheets overlap well. If the cardboard is thin, you may need a second layer in especially weedy areas, but do not build it so thick that water struggles to penetrate.
As a general rule, you want the bed covered, but not sealed off. If rain or watering just beads up and runs off, the layers may be too compressed or too dry. A good soaking usually solves this.
Best places to use cardboard mulch
Cardboard mulch works well in many parts of the garden, but it shines in a few specific spots:
- New vegetable beds that need weed control before planting
- Raised beds that dry out quickly in summer
- Paths between beds to keep mud and weeds down
- Areas being converted from lawn into planting space
- Under shrubs or fruit bushes where a tidy, moisture-holding surface is helpful
It is best used where you want to slow weeds and protect the soil, not where you need to dig or regularly cultivate deeply.
When cardboard mulch is not ideal
There are a few situations where cardboard is less suitable. Avoid using it in places where you are trying to grow very tiny direct-sown seeds, since a covering layer makes sowing difficult. It is also not the best choice in permanently wet soil, where too much barrier material can reduce airflow.
Be cautious if you are dealing with aggressive perennial weeds. Cardboard can weaken them, but some plants are determined enough to push through unless you remove the root system first.
Helpful extras that make it work better
Cardboard mulch performs even better when paired with good garden habits.
- Water deeply but less often so moisture reaches the roots.
- Top up with organic mulch as the cardboard softens.
- Feed the soil with compost around established plants.
- Check edges and seams every couple of weeks for gaps or emerging weeds.
If animals are a problem, cardboard can also help discourage digging and disturbance by covering bare soil. It is not a guaranteed fix, but many gardeners find it makes beds less tempting to cats and other curious visitors.
How long it lasts
Cardboard does not last forever, which is part of the appeal. In warm, damp conditions it can start breaking down within a season. In drier spots it may remain partly intact for longer, especially if it is covered with another mulch.
That gradual breakdown is useful: the cardboard does its job while it lasts, then becomes part of the soil-improvement process. If you want continued weed suppression, simply add more cardboard or refresh the top mulch layer when needed.
Simple safety and sustainability tips
To keep cardboard mulch garden-friendly, stick with plain materials and avoid anything heavily treated. Tear out plastic tape, remove labels where practical, and do not use materials soaked in chemical residues or food waste.
Used thoughtfully, cardboard is a great example of garden recycling that saves money, reduces waste, and makes summer maintenance easier. For busy gardeners, that combination is hard to beat.
Bottom line: if you have a stack of old boxes and a bed that needs help, cardboard mulch is an easy, low-cost way to protect soil, save water, and cut down on weed work during hot weather.