How to Clean Under a Refrigerator Without Damage
Cleaning under a refrigerator is one of those jobs most of us avoid until a dust bunny rolls out or the kitchen starts smelling a little stale. The good news: you do not have to take the appliance apart to make a big improvement.
This guide shows you how to clean under a refrigerator safely, protect your flooring, remove pet hair and crumbs, and know when to stop instead of forcing access to parts that were not meant to be removed.
Why Cleaning Under the Refrigerator Matters
The space under and behind a refrigerator collects dust, crumbs, pet hair, dry spills, and sometimes small bits of food that attract pests. On some refrigerators, the condenser coils are also located underneath or behind the base grille. When accessible coils are covered with dust, the refrigerator may have to work harder to release heat.
That said, not every modern refrigerator has coils you are expected to clean. Some newer models have enclosed or “never clean” style condenser designs. Your goal is simple: clean the floor, the grille area, and any owner-accessible dust buildup without bending tubing, damaging wiring, or forcing panels loose.
What You’ll Need
- Vacuum with hose attachment
- Long, narrow appliance brush or refrigerator coil brush
- Microfiber cloths
- Mild dish soap
- Bucket or bowl of warm water
- Old towel or thin cardboard to protect flooring
- Flashlight
- Work gloves, especially if cleaning near metal edges
- Optional: yardstick wrapped with a microfiber cloth for tight spaces
Avoid soaking the area with water. You are cleaning near an electrical appliance, flooring seams, and sometimes water supply lines. Damp cloths are useful; puddles are not.
Step 1: Make a Quick Safety Check
Before moving or cleaning around your refrigerator, take a minute to look at what is connected. If your fridge has an ice maker or water dispenser, there may be a water supply line behind it. If the appliance is built in, unusually heavy, or wedged tightly into cabinetry, do not force it.
Unplug the refrigerator before cleaning coils, removing a base grille, or reaching underneath. This reduces the risk of electric shock and also keeps moving parts from turning on while you work. If the outlet is hard to reach, you may need to switch off power at the breaker, but only do that if you are comfortable identifying the correct circuit.
Step 2: Protect the Floor Before You Move It
Many refrigerators roll forward and backward on wheels or rollers, but they are not meant to be dragged sideways. Side-to-side movement can scratch vinyl, dent softer flooring, or damage the appliance’s rollers.
- Remove magnets, breakable items, and anything stored on top of the fridge.
- If the refrigerator has leveling legs, check your owner’s manual for how to raise them before rolling the unit.
- Place a flat piece of cardboard, a towel, or a floor protector in front of the fridge if your flooring scratches easily.
- Pull the refrigerator straight out slowly. Stop if you feel resistance.
If the fridge is connected to a water line, pull it out only far enough to work comfortably. Do not stretch the line tight.
Step 3: Vacuum the Loose Dust First
Start with the easy win: vacuum the floor where the refrigerator usually sits. Use the hose attachment to pick up crumbs, pet hair, dust, and any dry debris along the wall and baseboard.
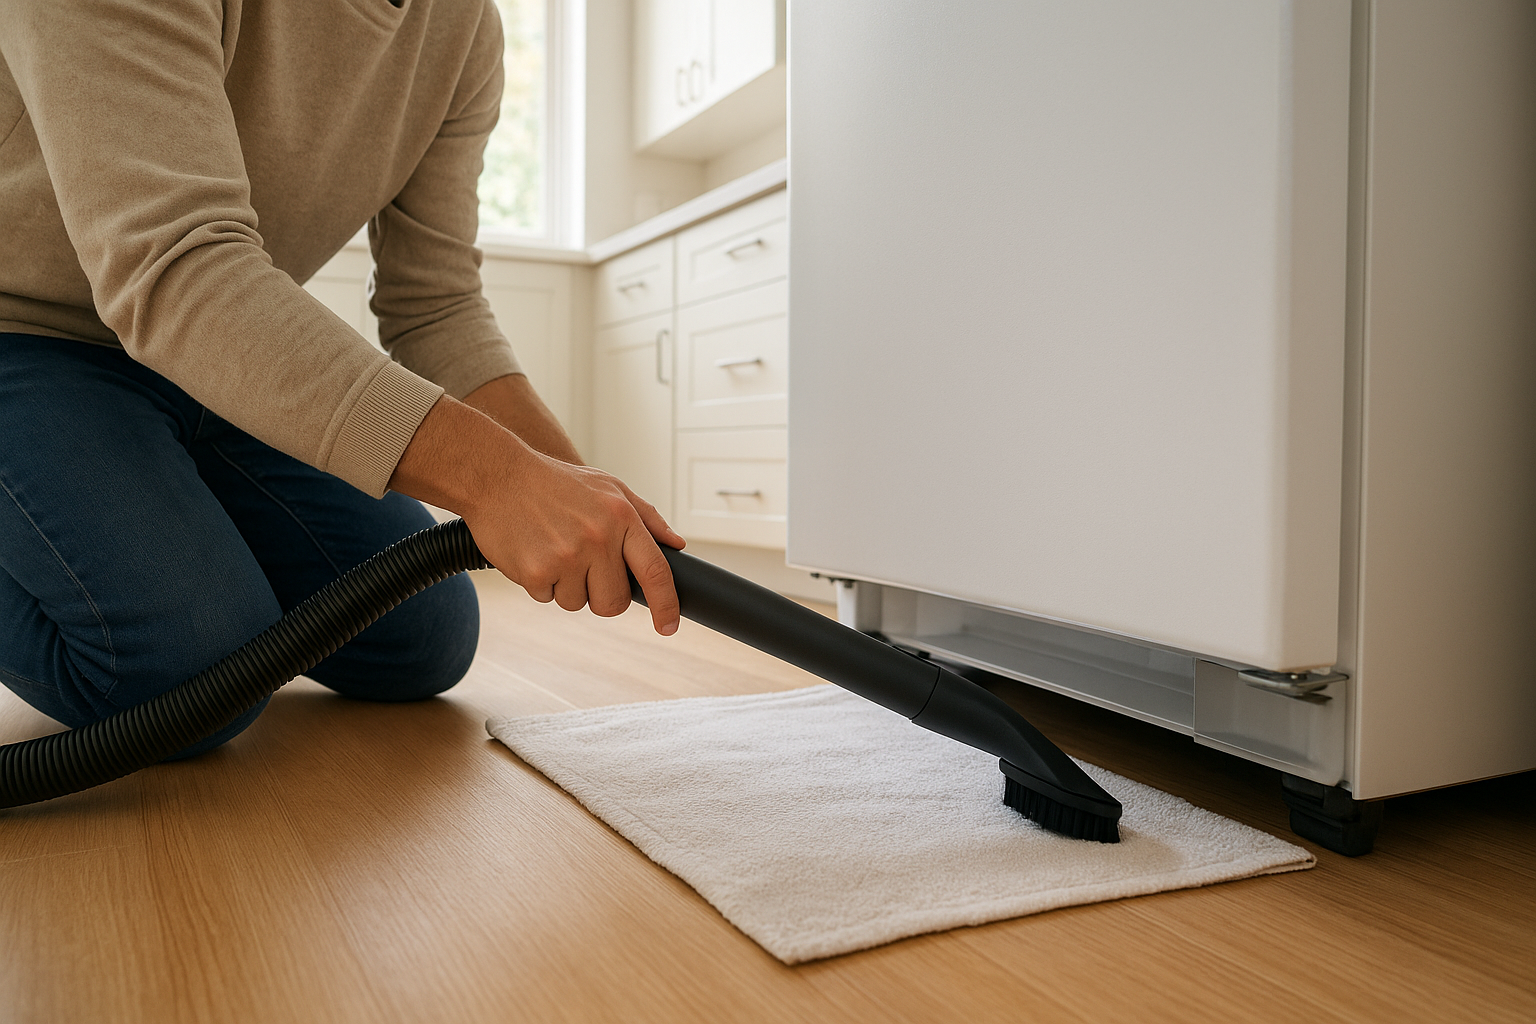
Next, vacuum the back of the refrigerator, the floor behind it, and the air vents or grille openings you can reach. Keep the hose gentle around wires, tubing, and thin metal fins. If you see a thick blanket of dust, loosen it with the appliance brush first, then vacuum it away.
Step 4: Clean the Front Base Grille Area
Many refrigerators have a removable base grille or toe grille at the front bottom edge. Some pull straight off, while others have tabs or screws. If it does not come off easily, stop and check the manual for your model.
Once removed, wash the grille in warm, soapy water, rinse, and dry it well. While the grille is off, use your flashlight to look underneath. Vacuum loose dust and gently sweep the appliance brush back and forth to pull debris toward you.
If condenser coils are visible and accessible, clean them with a refrigerator coil brush using light pressure. The fins can be sharp and bendable, so do not scrub aggressively. Vacuum the dust that falls to the floor before replacing the grille.
Step 5: Clean Behind the Refrigerator
With the appliance pulled straight out, wipe the wall, baseboard, and floor behind it. A damp microfiber cloth with a drop of dish soap is usually enough for sticky spots. Dry the floor before pushing the fridge back, especially if you have wood, laminate, or seams in vinyl flooring.
If the condenser coils are on the back of your refrigerator, unplug the fridge and use the coil brush to loosen dust. Vacuum carefully as you go. Do not bend refrigerant tubing or tug at anything that looks like a wire, copper line, or sealed component.
What About the Refrigerator Drip Pan?
The drip pan catches water from the automatic defrost cycle so it can evaporate. On many newer refrigerators, the pan is fixed in place and not intended to be removed by the homeowner. Older models may have a removable pan behind the front grille, but that is not universal.
If you can clearly slide out a removable pan without tools or force, wash it with warm, soapy water, rinse, dry, and put it back exactly as it was. If the pan is fixed, hidden, or blocked by mechanical parts, do not pry it out. Instead, clean what you can reach around the area with a cloth wrapped around a long tool, keeping moisture controlled.
A sour or musty smell that seems to come from a non-removable drip pan may call for an appliance technician, especially if there has been a spill inside the refrigerator that drained down into the pan.
Step 6: Push the Refrigerator Back Carefully
Before moving the refrigerator back, check three things:
- The floor is dry.
- The power cord is clear and not under a wheel.
- The water supply line, if present, is not kinked or stretched.
Push the refrigerator straight back into place. Avoid wiggling it side to side. Leave the amount of clearance recommended in your owner’s manual so the appliance can ventilate properly. Once it is positioned, plug it back in and confirm that the interior light and cooling system come on.
How Often Should You Clean Under a Refrigerator?
For most homes, cleaning under and behind the refrigerator every six months is a good routine. If you have shedding pets, a dusty kitchen, nearby litter boxes, or a garage refrigerator, check every three months.
Here is an easy schedule:
- Monthly: Vacuum along the front toe-kick area.
- Every 3 to 6 months: Pull dust from under the fridge with an appliance brush.
- Every 6 to 12 months: Pull the refrigerator straight out and clean behind it.
- As needed: Clean accessible coils if your manual says they require maintenance.
Mistakes to Avoid
- Do not spray cleaner directly under the refrigerator. Spray the cloth instead.
- Do not use a pressure washer, steam cleaner, or soaking mop. Too much moisture can create electrical and flooring problems.
- Do not force off a grille or panel. If it resists, look up the model instructions.
- Do not drag the fridge sideways. Pull it straight out and push it straight back.
- Do not bend coil fins, copper tubing, or water lines. Gentle cleaning is enough.
When to Call for Help
Stop and call an appliance technician if you find water pooling under the refrigerator, ice forming on the freezer floor, a burnt smell, damaged wiring, a cracked water line, or a drip pan you cannot access but strongly suspect is contaminated. Those problems go beyond ordinary cleaning.
For a normal dusty fridge, though, this is a manageable household task. A vacuum, a long brush, and 30 minutes can remove months of dust and crumbs while helping your kitchen feel cleaner from the ground up.