How to Insulate Pipes Under a Sink Before Winter
If the cabinet under your kitchen or bathroom sink feels icy in winter, the pipes inside are often sitting in one of the coldest little pockets of the house. Learning how to insulate pipes under a sink is a simple, low-cost project that can help reduce heat loss, limit pipe sweating, and give vulnerable plumbing a little extra protection during cold snaps.
This is not a magic shield against freezing, especially if pipes run through an exterior wall or an unheated crawlspace. But paired with sealing drafts and keeping the cabinet warm, foam pipe insulation is one of the easiest beginner DIY jobs you can do in under an hour.
When Under-Sink Pipe Insulation Is Worth Doing
Under-sink insulation is most useful when the cabinet is on an exterior wall, over a chilly crawlspace, in a garage-adjacent room, or anywhere you can feel cold air leaking around pipe openings. It also helps on hot water lines because insulation slows heat loss between the water heater and the faucet. The U.S. Department of Energy includes insulating water heating pipes as part of home weatherization work, and its weatherization job aids call for pipe insulation of at least R-3 near water heaters on hot and cold lines. ([energy.gov](https://www.energy.gov/cmei/scep/wap/whole-house-weatherization?utm_source=openai))
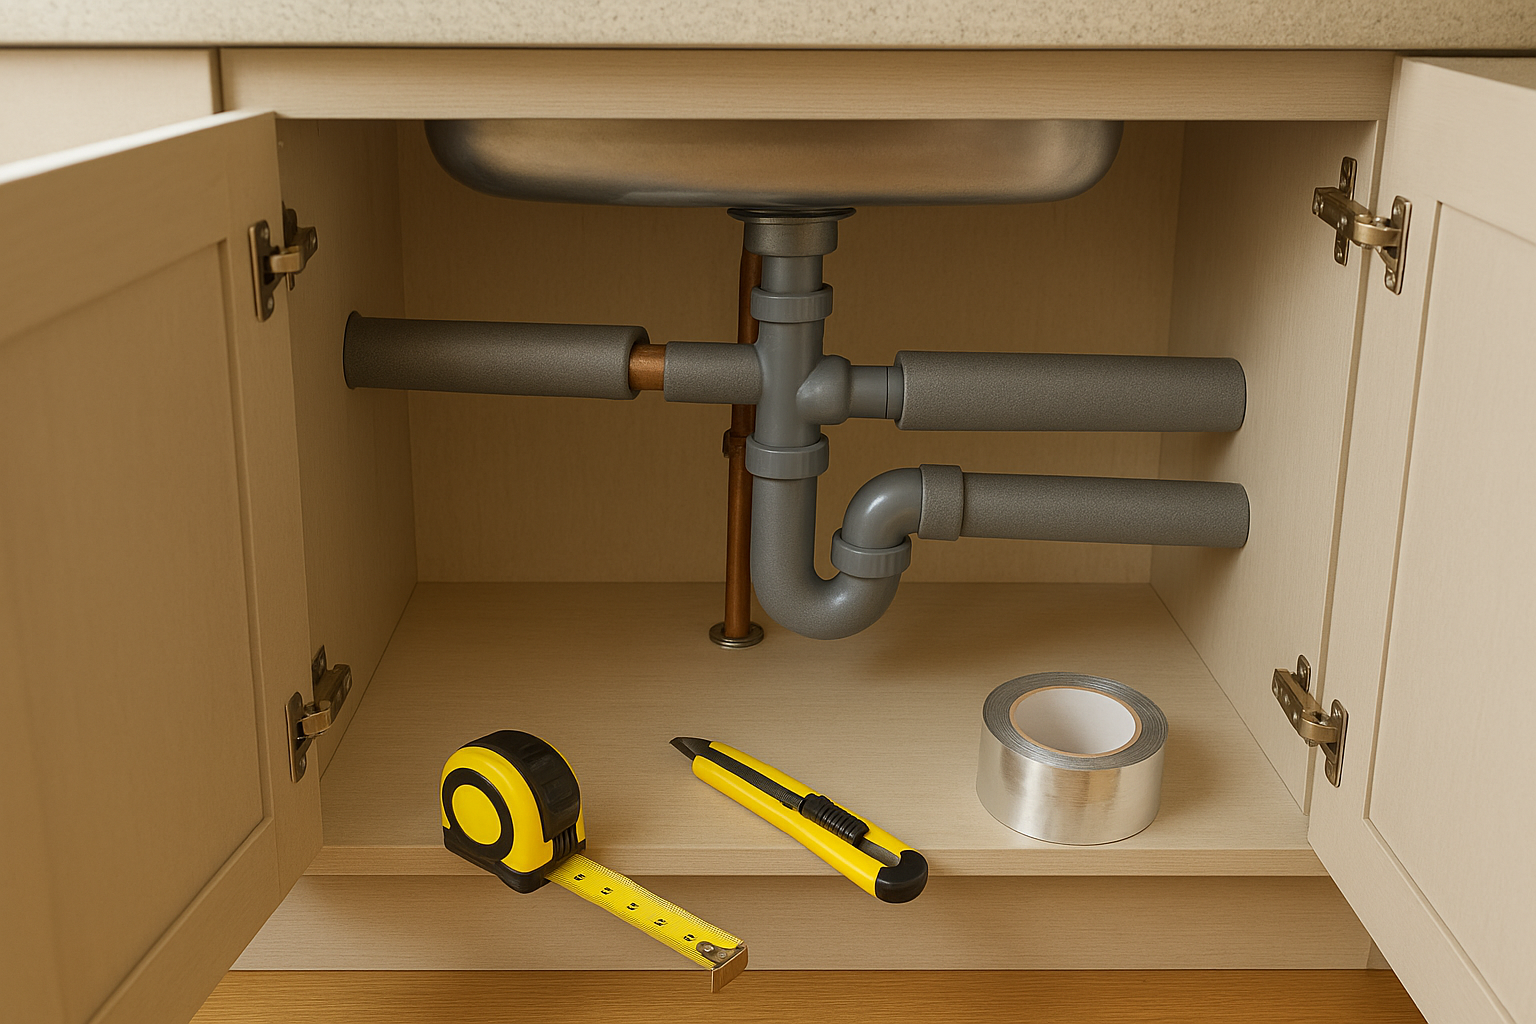
For a sink cabinet, you are usually dealing with short, exposed sections of supply pipe, shutoff valves, and the drain trap. The best candidates for foam sleeves are the straight hot and cold water supply lines. Drain pipes do not normally need insulation for energy savings, but they may benefit from attention if you have a condensation problem.
What Pipe Insulation Can and Cannot Do
Foam pipe sleeves help slow temperature changes. On hot water pipes, that means water may stay warmer a bit longer. On cold water pipes, insulation can reduce surface condensation when humid indoor air meets a cold pipe. Moisture control matters because the EPA notes that mold prevention starts with controlling moisture, fixing plumbing leaks promptly, and drying wet areas within 24 to 48 hours after a leak or spill. ([epa.gov](https://www.epa.gov/mold/brief-guide-mold-moisture-and-your-home?pfrom=mailchimp&utm_source=openai))
What insulation cannot do is fix a leak, stop a serious draft, or protect a pipe that is already in a dangerously cold wall cavity. If your pipes have frozen before, if you see bulging, corrosion, active dripping, or water stains, handle those issues first. Insulation should go over sound, dry pipes, not hide a problem.
Supplies You’ll Need
- Foam pipe insulation sleeves sized to your pipe diameter, commonly 1/2 inch or 3/4 inch for supply lines
- Tape measure
- Utility knife or sharp scissors
- Foil HVAC tape or compatible pipe insulation tape
- Rag and mild cleaner
- Flashlight
- Expanding foam or caulk for sealing small gaps around wall penetrations, if appropriate
- Gloves to protect your hands in tight cabinet spaces
Before you shop, measure the outside diameter of the pipe or take a clear photo and a small measurement note with you. Foam sleeves are sold for specific pipe sizes, and a snug fit works better than one that gaps open.
Step 1: Empty and Inspect the Cabinet
Take everything out from under the sink. Look closely at the cabinet floor, back wall, shutoff valves, supply tubes, and drain connections. You are checking for dampness, staining, swollen cabinet material, mineral crust, moldy odors, or a slow drip.
If anything is wet, stop and find the source before insulating. Dry the area completely. The EPA recommends fixing leaks and other water problems as soon as possible and keeping indoor humidity low to discourage mold growth. ([epa.gov](https://www.epa.gov/mold/brief-guide-mold-moisture-and-your-home?pfrom=mailchimp&utm_source=openai))
Step 2: Find the Cold Air Leaks
Run your hand around the holes where pipes enter the wall or floor. If you feel a draft, pipe insulation alone will not solve the problem. Seal small gaps with paintable caulk or low-expansion foam rated for indoor use, following the product directions. Avoid packing foam or caulk against moving parts, shutoff valve handles, electrical wiring, or anything you may need to access later.
This step is especially important for sinks on exterior walls. Cold air blowing directly into the cabinet can chill pipes much faster than still air. After sealing, let the product cure as directed before covering nearby pipes.
Step 3: Measure the Straight Pipe Runs
Measure each straight section of exposed supply pipe. In many sink cabinets, you may only have short runs from the wall to the shutoff valves and from the valves toward the faucet supply lines. Write down each length, then cut foam sleeves slightly long so you can trim for a neat fit.
Do not cover the shutoff valve handle. You need to be able to turn water off quickly in an emergency. Leave the handle and valve stem accessible, and insulate the straight pipe sections on either side where possible.
Step 4: Cut and Fit the Foam Sleeves
Most foam pipe insulation comes pre-slit along one side. Open the slit and press the sleeve around the pipe. If you need to turn a corner, make simple angled cuts so the pieces meet cleanly. For tight spaces, shorter pieces are easier to handle than one long piece.
Fit the insulation with the slit facing down or to the side when you can. This helps the seam stay closed and makes it easier to tape. If your sleeve has a self-sealing strip, test the fit before peeling the backing. Once adhesive touches, it can be difficult to reposition neatly.
Step 5: Tape the Seams and Joints
Close the seam firmly and tape any joints where two pieces meet. A few neat bands of foil HVAC tape usually work better than wrapping the entire pipe like a mummy. The goal is to keep the sleeve closed without crushing the foam.
At valves and bends, do the best you can while keeping access clear. Small gaps around a shutoff valve are acceptable. A perfectly sealed-looking job is not worth it if you can no longer turn the water off.
Step 6: Deal With Condensation the Right Way
If your cold water line sweats in humid weather, insulation can help by separating moist air from the cold pipe surface. Still, you should also manage humidity in the room. The CDC recommends keeping home humidity no higher than 50 percent all day, and the EPA notes that relative humidity above 60 percent can contribute to condensation and mold risk. ([portugues.cdc.gov](https://portugues.cdc.gov/mold-health/about/index.html?utm_source=openai))
Use the bathroom fan during showers, fix faucet drips, and consider a small hygrometer if the room often feels damp. If the cabinet floor is repeatedly wet, there may be a leak or a drainage issue rather than simple pipe sweating.
Extra Winter Protection for Sink Cabinets
- Keep cabinet doors open during severe cold. This lets warmer room air reach the pipes.
- Do not block heat vents. Good room airflow helps the cabinet stay warmer.
- Seal drafts at the wall or floor. Insulation works better when cold air is not blowing through the cabinet.
- Know where the shutoff valves are. Test them gently before winter so you know they move.
- Let a faucet drip only when truly needed. Follow local guidance during extreme freezes, especially for pipes on exterior walls.
When to Call a Plumber
Call a plumber if you find active leaks, badly corroded metal pipes, valves that will not turn, recurring frozen pipes, or plumbing inside an exterior wall that has frozen before. Also get help if you are unsure whether a line is water, gas, or something else. Do not insulate over mystery pipes.
For most sound under-sink supply lines, though, foam sleeves are a straightforward upgrade. Clean the area, seal obvious drafts, wrap the straight pipe runs, and keep valves accessible. It is a small job, but it can make a chilly sink cabinet more winter-ready and easier to maintain.