How to Clean a Dryer Vent the Right Way
If your towels need two cycles to dry, your dryer may not be the problem. A clogged dryer vent can slow drying, waste energy, and create a fire risk, so this is one home maintenance job worth learning.
The good news: many straight, short dryer vents can be cleaned with basic tools in under an hour. Here is how to clean a dryer vent safely, what to check outside, and when it is smarter to call a professional.
Why Dryer Vent Cleaning Matters
Dryers move hot, moist air out of your home through an exhaust duct. Over time, lint slips past the lint screen and collects in the duct, elbows, hose, and exterior vent hood. That buildup restricts airflow, which can make the dryer run hotter and longer.
The U.S. Fire Administration warns that you are at higher risk of a clothes dryer fire if you do not clean the lint filter and dryer vents, and it recommends making sure the outdoor vent covering opens when the dryer is running. The Consumer Product Safety Commission also advises cleaning the dryer vent and exhaust duct periodically. ([usfa.fema.gov](https://www.usfa.fema.gov/downloads/pdf/publications/clothes_dryer_fire_safety_flyer.pdf?utm_source=openai))
Signs Your Dryer Vent Is Clogged
You do not have to wait for a total blockage. Watch for these common warning signs:
- Clothes take longer than usual to dry, especially heavy towels or jeans.
- The dryer feels unusually hot on the outside during a normal cycle.
- Laundry smells musty or scorched after drying.
- The laundry room feels humid while the dryer is running.
- The outside vent flap barely opens or no warm air is blowing out.
- Lint collects around the dryer or around the exterior vent hood.
Whirlpool notes that a clogged exhaust vent can slow moist air from leaving the dryer and extend drying time. If outside airflow feels weaker than a hair dryer on high speed, the vent system may need cleaning. ([producthelp.whirlpool.com](https://producthelp.whirlpool.com/Laundry/Dryers/Dryer/Drying_Performance/Not_Drying?utm_source=openai))
How Often Should You Clean a Dryer Vent?
Clean the lint screen before or after every load. For the vent itself, once a year is a good starting point for many households. Clean it more often if you do a lot of laundry, have pets, dry bulky bedding often, or have a long vent run with several turns.
The Building America Solution Center recommends annual dryer duct cleaning to help clothes dry faster, save energy, and reduce fire risk. Fairfax County Fire and Rescue gives similar advice: clean lint out of the vent pipe once a year, or more often if clothes are taking longer than normal to dry. ([basc.pnnl.gov](https://basc.pnnl.gov/diy-guides/clean-dryer-exhaust?utm_source=openai))
Tools and Supplies
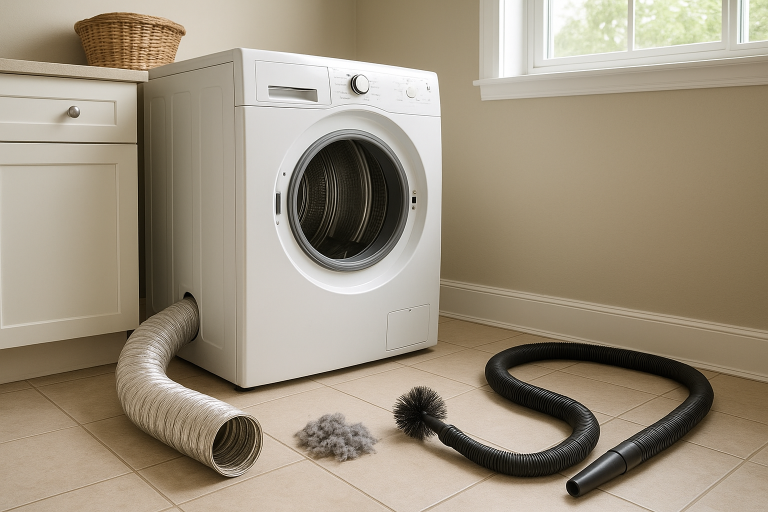
- Vacuum with hose attachment
- Dryer vent brush kit or flexible lint brush
- Screwdriver or nut driver
- Work gloves
- Flashlight
- Foil HVAC tape, if needed
- Replacement metal duct or semi-rigid transition duct, if the old hose is crushed or damaged
Avoid using regular cloth duct tape on dryer duct connections. Heat and lint can make it fail. Foil HVAC tape is the better choice for sealing metal duct joints.
How to Clean a Dryer Vent Step by Step
1. Unplug the Dryer
Before you move anything, unplug an electric dryer. If you have a gas dryer, unplug it and be careful not to strain or loosen the gas line. If the gas line must be disconnected, stop and call a qualified technician.
2. Pull the Dryer Away From the Wall
Move the dryer slowly, just far enough to reach the vent connection. Do not yank it forward. Many dryer problems start when the transition duct gets crushed behind the machine, so use this moment to notice whether the hose is kinked, flattened, torn, or too long.
3. Disconnect the Vent Hose
Use a screwdriver or nut driver to loosen the clamp at the back of the dryer. Gently remove the hose or semi-rigid duct. Have your vacuum ready because loose lint may fall out right away.
4. Vacuum the Dryer Outlet
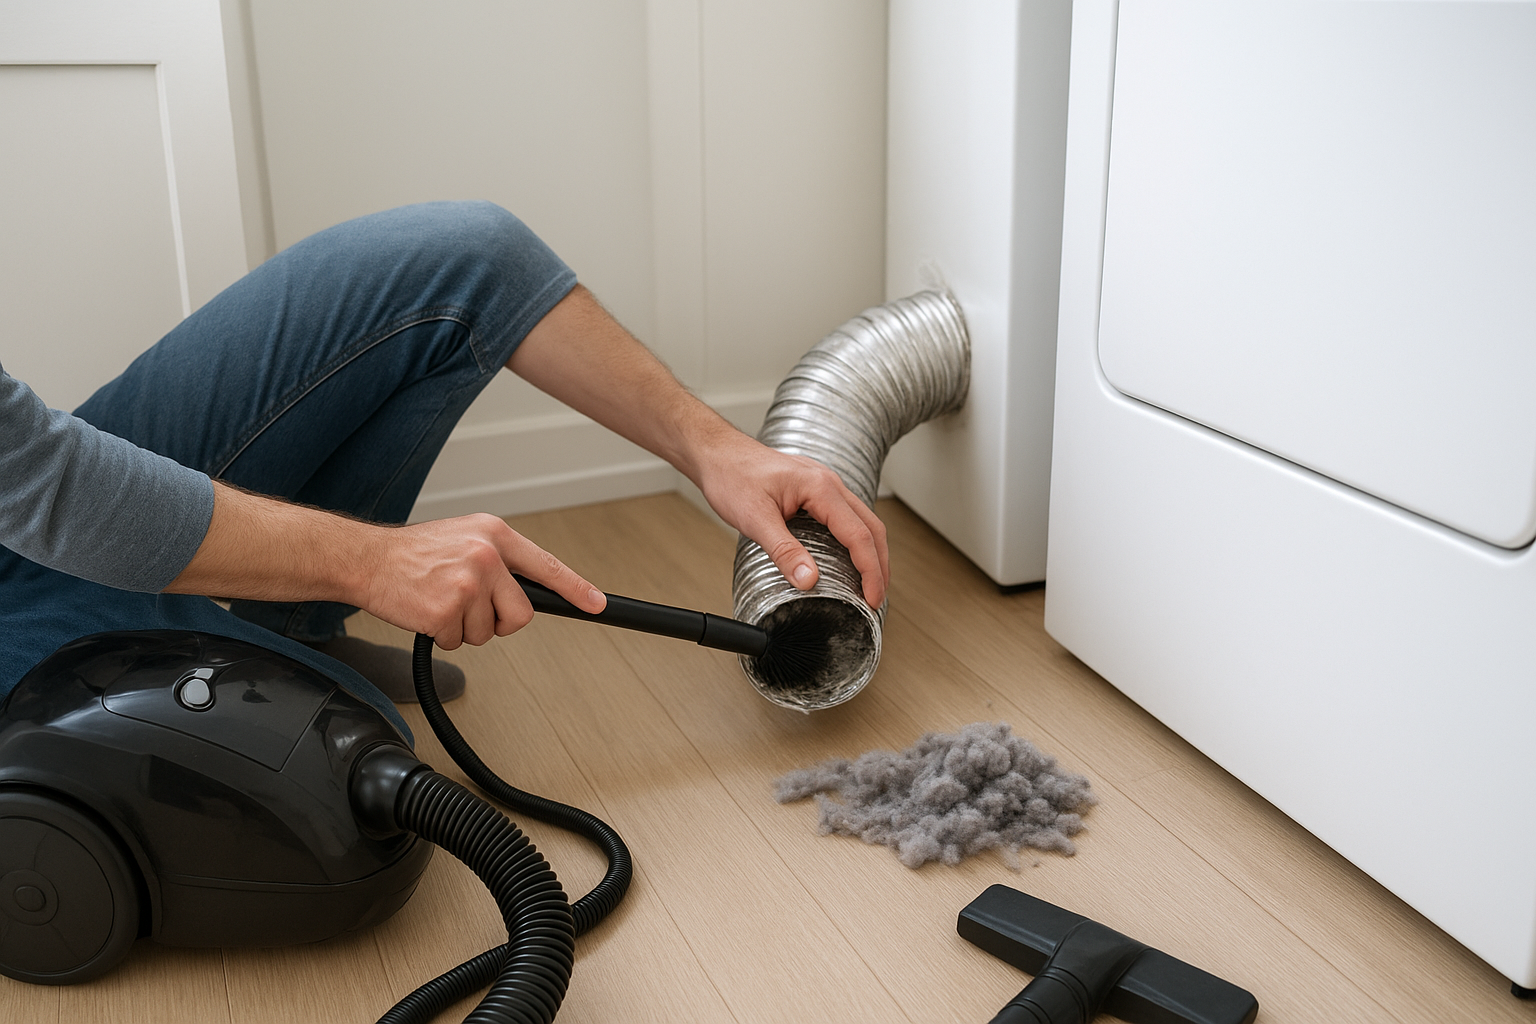
Use the vacuum hose to clean around the dryer outlet and the floor behind the dryer. Then use a flexible lint brush to reach into the dryer’s exhaust opening. Do not force the brush deep into the machine; the goal is to remove lint near the opening, not damage internal parts.
5. Clean the Transition Duct
If your transition duct is short and removable, take it outside or to an easy-to-clean area. Run the vent brush through it, then vacuum out loose lint. If it is plastic, vinyl, torn, crushed, or full of stubborn lint, replace it rather than trying to save it. Many safety guides recommend using metal ducting because flimsy materials can sag, trap lint, or be damaged more easily.
6. Brush the Wall Duct
Insert the dryer vent brush into the wall duct and work it gently forward. Rotate the brush as you go, then pull it back and vacuum the lint. Repeat until the brush comes out mostly clean.
If your vent run is long, goes upward through a roof, or has several elbows, a homeowner brush may not reach the full length. In that case, clean what you safely can from the laundry room and outside vent, then consider hiring a dryer vent cleaning service.
7. Check the Outdoor Vent Hood
Go outside and inspect the vent hood. Remove lint, leaves, nests, or other debris. The flap or louvers should open freely when the dryer runs and close when it is off. Do not install a screen over the dryer vent opening; screens catch lint quickly and can cause blockages.
8. Reconnect Everything
Reconnect the duct to the dryer and wall outlet. Keep the hose as short and straight as practical, with gentle curves instead of tight bends. Tighten the clamps and seal metal duct joints with foil HVAC tape if needed. Push the dryer back carefully so the duct does not crush behind it.
9. Test the Airflow
Plug the dryer back in and run it on an air-only or low-heat setting for a few minutes. Go outside and confirm that the vent flap opens and air is moving well. If airflow is still weak after cleaning, there may be a hidden clog, crushed duct, too-long vent run, or dryer issue that needs professional attention.
What Not to Do
- Do not ignore slow drying. It is one of the clearest signs of restricted airflow.
- Do not push the dryer tight to the wall if it crushes the duct.
- Do not use screws inside duct joints. Screw tips can snag lint inside the pipe.
- Do not dry items with flammable residue. Items exposed to gasoline, oils, or solvents need special care and may not belong in the dryer at all.
- Do not keep running the dryer if you smell burning. Turn it off, unplug it if safe, and investigate before using it again.
When to Call a Pro
Call a professional if the vent exits through the roof, the duct run is very long, you cannot access the outside hood safely, or drying is still poor after cleaning. You should also call for help if you find disconnected ductwork inside a wall or ceiling, signs of animals nesting in the vent, or a gas line that must be moved.
A professional cleaning is also worthwhile if you have just moved into a home and do not know when the dryer vent was last cleaned. It gives you a clean baseline and may reveal crushed, unsafe, or poorly routed ductwork.
Simple Habits That Keep the Vent Cleaner
- Clean the lint screen every load.
- Wash the lint screen occasionally with warm, soapy water if it feels filmy from fabric softener residue.
- Dry bulky blankets and towels in smaller loads.
- Check the outdoor vent every few months for lint, leaves, snow, or stuck louvers.
- Keep the area behind and around the dryer free of dust, lint, boxes, and laundry clutter.
Cleaning a dryer vent is not glamorous, but it is one of those small jobs that can make a noticeable difference. Your dryer can work more efficiently, laundry may dry faster, and you will have one less hidden maintenance problem sitting behind the machine.