How to Clean a Front Load Washer Drain Pump Filter
If your front load washer smells musty, drains slowly, or suddenly refuses to spin out a load of towels, the problem may be hiding behind that little door near the floor. Many front load machines have a drain pump filter that catches coins, hairpins, lint, pet hair, and other small debris before it reaches the pump.
The good news: cleaning it is usually a 15- to 25-minute job you can do with towels, a shallow pan, and a little patience. Always check your owner’s manual first, because access and instructions vary by brand and model.
What the Drain Pump Filter Does
On many front load washers, small items can slip past the drum and travel toward the drain pump. The pump filter is there to catch that debris so it does not go straight into the drain system or damage the pump. GE Appliances notes that these filters can also help you retrieve lost items that made their way into the washer’s pump area. ([products.geappliances.com](https://products.geappliances.com/appliance/gea-support-search-content?contentId=16687&utm_source=openai))
A dirty filter can slow drainage, leave water in the drum, trigger a drain error code, or make the washer stop before the final spin. It can also contribute to stale smells because soggy lint and trapped debris sit in a dark, damp spot between loads.
Before You Start: Check Your Machine
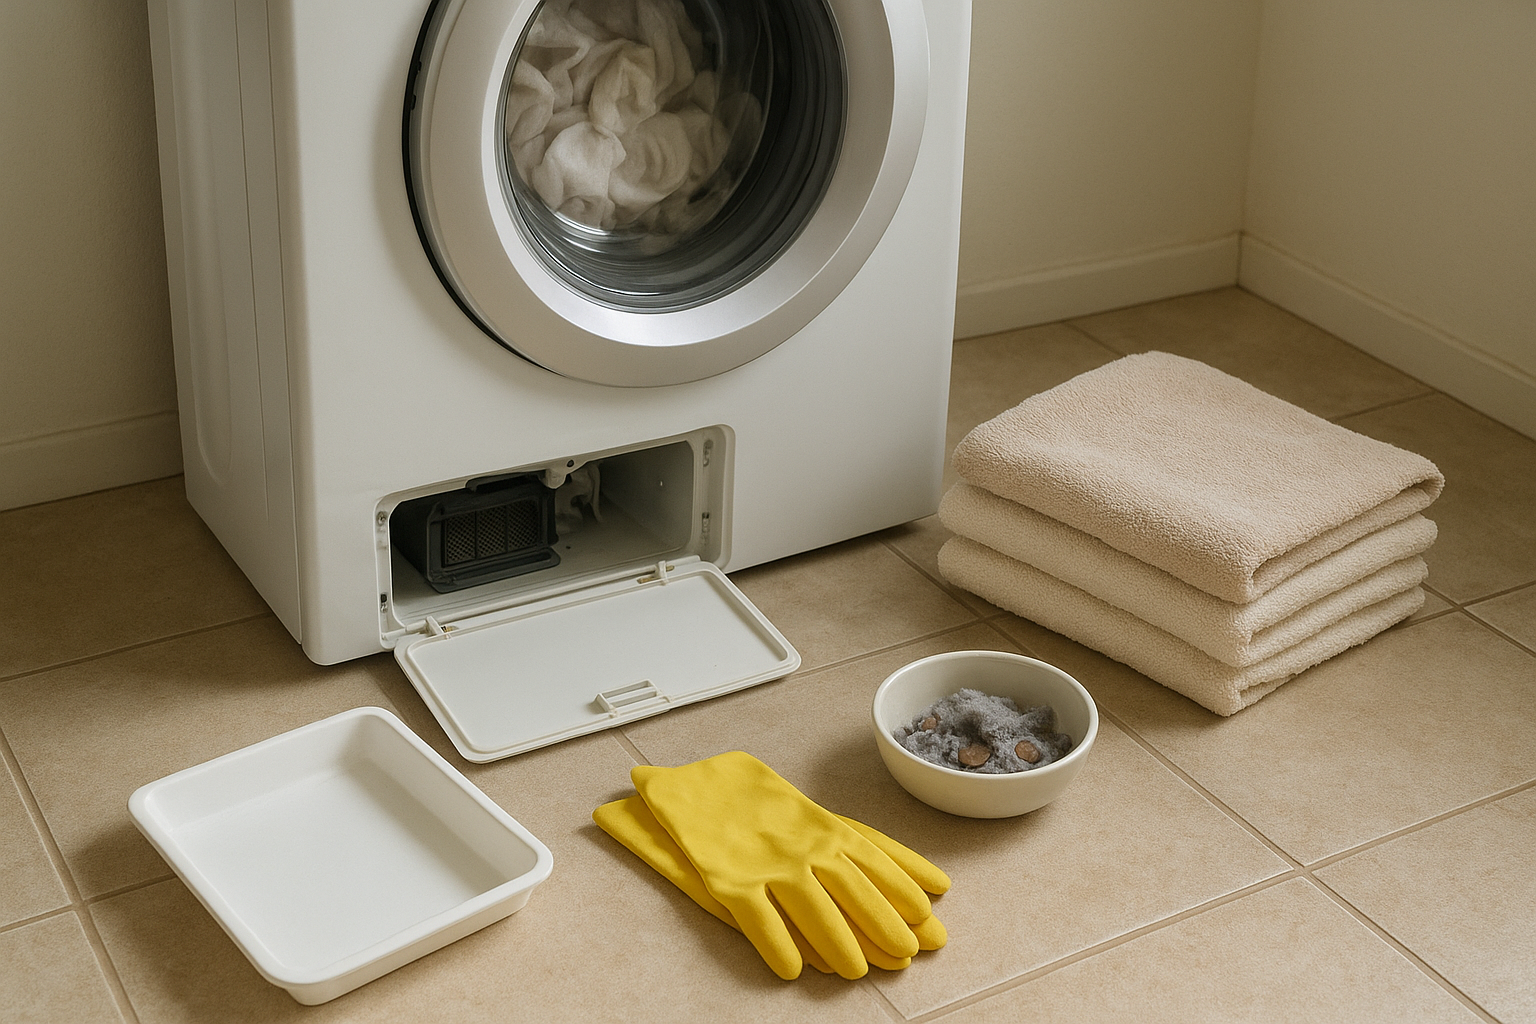
Look for a small square or rectangular access door along the lower front of the washer. It may be on the left or right side, depending on the model. Some washers hide the filter behind a removable kick plate or inside a lower drawer area; Whirlpool, for example, describes models where opening and removing the storage drawer reveals the drain pump filter. ([producthelp.whirlpool.com](https://producthelp.whirlpool.com/Laundry/Washers/Product_Info/Washer_Cleaning_and_Care/Cleaning_the_Pump_Filter_-_Front_Load_Washer?utm_source=openai))
Not every washer has an easy-access filter. Some top load washers and some front load models use a different design or require panel removal. If you do not see an access door, do not start prying panels off at random. Look up your exact model number and read the maintenance section of the manual.
Supplies You’ll Need
- Old bath towels or several thick rags
- A shallow pan, baking sheet, or low plastic container
- Rubber gloves
- A small bowl for debris
- Soft brush or old toothbrush
- Flashlight
- Mild dish soap, if the filter is greasy or grimy
Tip: If your washer is in a tight laundry closet, pull out only as much as needed to work safely. Do not stretch water lines or kink the drain hose.
How to Clean a Front Load Washer Drain Pump Filter
1. Turn the washer off and unplug it
Start with safety. Turn the washer off, then unplug it from the outlet. Whirlpool’s filter-cleaning instructions begin by unplugging the washer or disconnecting it from power, and that is a smart rule for any washer maintenance task. ([producthelp.whirlpool.com](https://producthelp.whirlpool.com/Laundry/Washers/Product_Info/Washer_Cleaning_and_Care/Cleaning_the_Pump_Filter_-_Front_Load_Washer?utm_source=openai))
2. Protect the floor
Lay towels on the floor in front of the washer. Slide a shallow pan or low container under the filter area if it fits. GE’s instructions warn that it is normal to catch about a cup of water when the filter is removed, but some machines may release more if a cycle stopped mid-drain. ([products.geappliances.com](https://products.geappliances.com/appliance/gea-support-search-content?contentId=16687&utm_source=openai))
3. Open the access panel
Open the small lower access door. Some doors pop open by hand; others may need a coin or flat screwdriver in the notch. Be gentle so you do not snap the plastic tab.
4. Drain the small hose first, if your washer has one
Many front load washers have a small black or rubber drain hose next to the filter. Pull it free from its clip, aim it into your shallow pan, and remove the plug. Let the water drain slowly. Replace the plug firmly and clip the hose back in place once it stops dripping. Whirlpool’s guidance also notes that if water does not drain well from this hose, a slight repositioning may clear a kink. ([producthelp.whirlpool.com](https://producthelp.whirlpool.com/Laundry/Washers/Product_Info/Washer_Cleaning_and_Care/Cleaning_the_Pump_Filter_-_Front_Load_Washer?utm_source=openai))
If your washer does not have a small drain hose, skip this step and be ready for more water when you loosen the filter itself.
5. Slowly loosen the filter
Turn the filter counterclockwise just a little. Do not yank it out all at once. Let water trickle into the pan, then tighten it briefly if you need to empty the pan or swap towels. Repeat until the water slows.
Once the water is mostly drained, finish unscrewing the filter and pull it straight out. Expect lint, gray sludge, coins, buttons, hair ties, toothpicks, and the occasional tiny sock. It is not glamorous, but it is satisfying.
6. Clean the filter
Remove large clumps of lint and debris by hand and place them in the trash. Rinse the filter under warm running water. Use a soft brush to scrub around the threads, grooves, and mesh or grate area if your filter has one. Whirlpool recommends rinsing away remaining residue and using a soft brush for stubborn dirt when needed. ([producthelp.whirlpool.com](https://producthelp.whirlpool.com/Laundry/Washers/Product_Info/Washer_Cleaning_and_Care/Cleaning_the_Pump_Filter_-_Front_Load_Washer?utm_source=openai))
Avoid harsh tools like knives, wire brushes, or anything that could damage the filter seal. If the filter has a rubber gasket, wipe it clean and check that it is seated properly.
7. Check the filter opening
Shine a flashlight into the filter housing. If you can safely reach loose debris right at the opening, remove it. Do not force your fingers deep into the pump area, and do not poke around with sharp tools. If you see something jammed farther inside, that may be a job for an appliance technician.
8. Reinstall the filter securely
Slide the filter back into place and turn it clockwise until snug. It should be secure, but do not overtighten it so aggressively that you damage the threads. GE’s instructions emphasize tightening the filter securely before closing the access door. ([products.geappliances.com](https://products.geappliances.com/appliance/gea-support-search-content?contentId=16687&utm_source=openai))
Wipe the area dry, close the panel, plug the washer back in, and run a short rinse-and-spin cycle with no laundry. Watch the lower access area for drips during the first few minutes. If you see leaking, pause the machine, unplug it, and reseat the filter.
How Often Should You Clean It?
A good household rhythm is every three to six months, depending on how much laundry you do. Clean it more often if you wash pet bedding, heavily linting towels, kids’ clothes with pockets full of treasures, or small items like baby socks. Some GE installation materials advise cleaning the pump filter every six months or sooner if the unit is not draining properly. ([nfm.com](https://www.nfm.com/on/demandware.static/-/Library-Sites-NFMSharedLibrary/default/dw74b7b7e6/product-pdfs/062/33/62331996-installation-or-assembly-guide.pdf?utm_source=openai))
Signs the Filter Needs Attention
- The washer drains slowly or leaves water in the drum.
- Loads are wetter than usual after the spin cycle.
- You hear odd rattling during draining.
- The machine shows a drain-related error code.
- There is a sour smell near the lower front panel.
- You recently washed pet beds, rugs, or very linty items.
What Not to Do
- Do not open the filter right after a hot cycle. Let the washer cool first so you do not release hot water onto your hands or floor.
- Do not remove the filter without towels. Even a well-drained washer can surprise you.
- Do not run the washer with the filter loose. A poorly seated filter can leak quickly.
- Do not ignore repeated drain errors. If the filter is clean and the problem returns, the drain hose, pump, or household drain may need attention.
When to Call a Pro
Call an appliance repair technician if the filter is stuck, the filter cap cracks, water continues leaking after you reinstall it, or the washer still will not drain after the filter is clean. You should also get help if your model requires removing a front panel and you are not comfortable working around appliance wiring, hoses, and pump parts.
For most front load washers with an access door, though, this is one of the simplest maintenance tasks you can do. Clean the drain pump filter a few times a year, check pockets before every load, and your washer has a much better chance of draining cleanly when you need it most.