How to Fix a Running Toilet Without Calling a Plumber
A running toilet is one of those little house problems that can quietly waste water, raise your bill, and keep you awake at night. The good news: most running toilets are caused by a few inexpensive parts inside the tank, and many fixes take less than 30 minutes.
This guide walks you through how to fix a running toilet step by step, starting with the easiest checks before moving on to replacement parts. Household leaks can waste thousands of gallons a year, and the EPA notes that worn toilet flappers are a common culprit, so this is a repair worth doing sooner rather than later. ([epa.gov](https://www.epa.gov/watersense/residential-toilets?utm_source=openai))
What Makes a Toilet Keep Running?
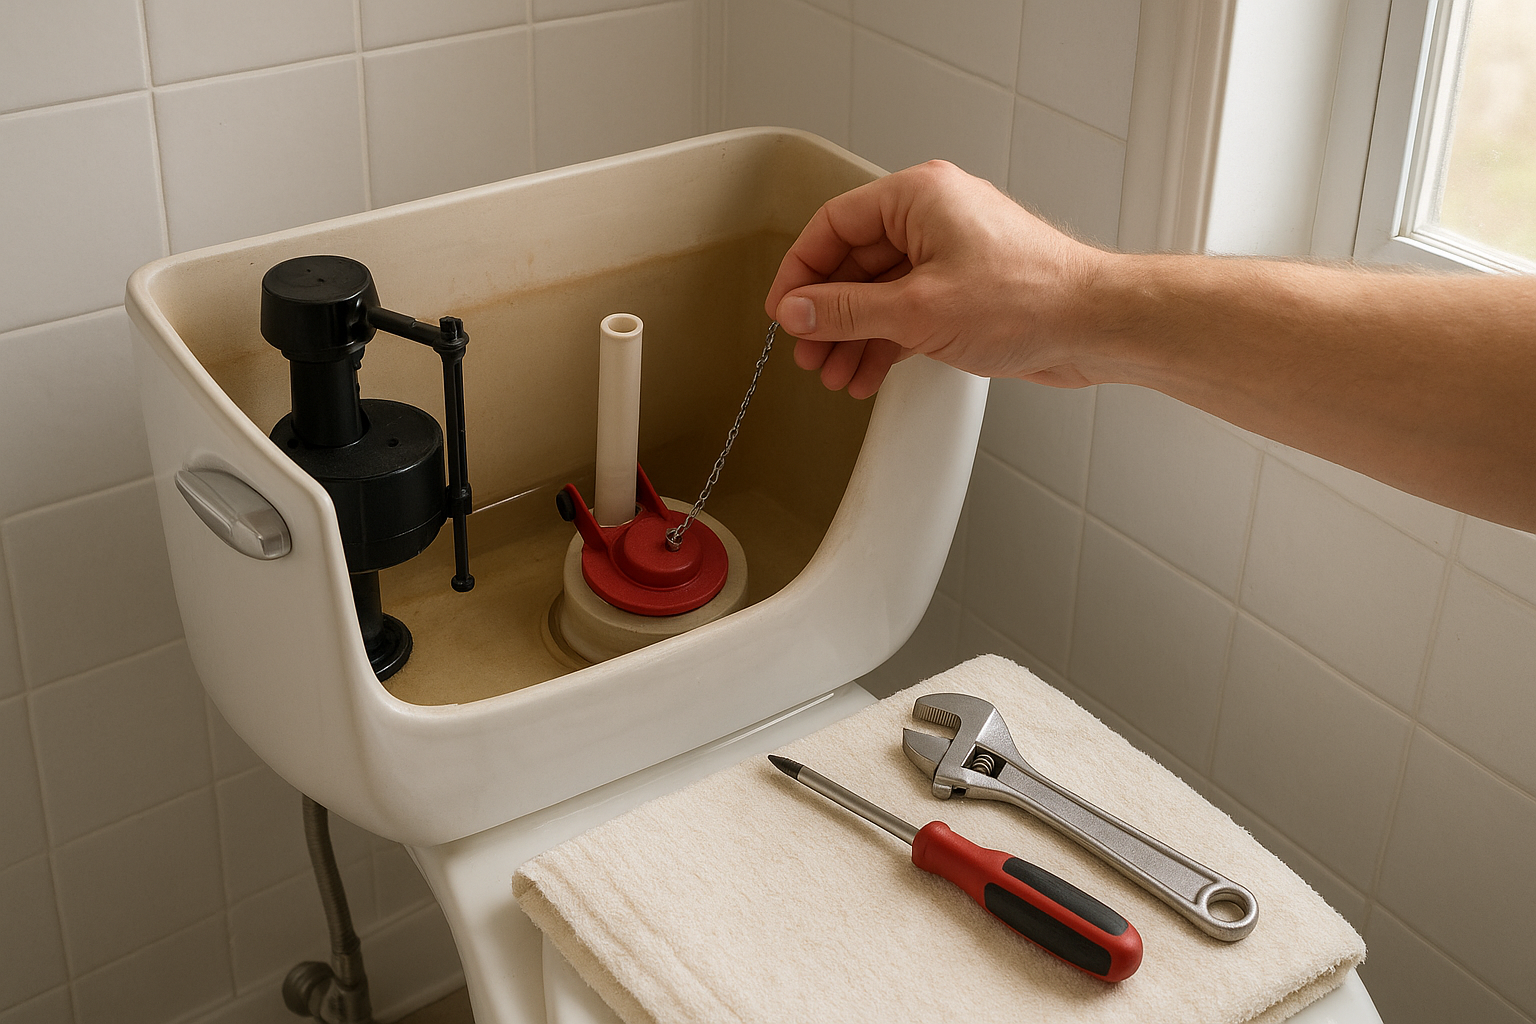
A toilet runs when water keeps leaving the tank or the fill valve never fully shuts off. Inside most standard toilet tanks, the main parts are the flapper, flush lever and chain, overflow tube, float, and fill valve.
The most common causes are:
- A flapper that is dirty, warped, cracked, or not sealing
- A chain that is too tight or tangled
- Water level set too high and spilling into the overflow tube
- A float that is stuck or adjusted incorrectly
- A fill valve that is worn out or clogged
Before buying parts, take five minutes to look inside the tank while the toilet is running. That usually tells you where to start.
Tools and Supplies You May Need
- Rubber gloves
- Sponge or towel
- Small bucket
- Adjustable wrench or pliers
- Replacement flapper, if needed
- Replacement fill valve, if needed
- Food coloring or leak-detection dye tablet
Most toilet flappers and fill valves are sold as universal parts, but not every toilet uses the same style. If possible, take a photo of the inside of your tank and the old part before going to the hardware store.
Step 1: Take Off the Tank Lid and Watch
Carefully lift the tank lid and set it on a towel. Flush the toilet, then watch what happens as the tank refills.
If water rises above the overflow tube and spills into it, the problem is usually the float or fill valve. If the tank fills, stops, then starts again a few minutes later, the flapper is probably leaking. If the handle stays partly down or the chain catches, the flapper may be held open.
Step 2: Check the Flapper Chain
The chain should have a little slack when the flapper is closed. If it is too tight, it can hold the flapper slightly open and let water leak into the bowl. If it is too loose, the toilet may flush weakly or require holding the handle down.
- Jiggle the handle and see whether the flapper drops flat onto the flush valve seat.
- Untangle the chain if it is kinked or caught under the flapper.
- Move the chain clip to a different hole on the flush lever if needed.
- Leave about 1/4 to 1/2 inch of slack with the flapper closed.
Flush again. If the toilet stops running, you are done.
Step 3: Adjust the Water Level
Look for the water level mark inside the tank. If there is no mark, the water should usually stop about an inch below the top of the overflow tube. If water is spilling into the tube, lower the float.
For a float cup fill valve
Most newer toilets use a float cup that slides up and down the fill valve shaft. Turn the adjustment screw or pinch the adjustment clip, depending on the design, to lower the float. Flush and let the tank refill.
For a ball float
Older toilets may have a round ball on the end of a metal or plastic arm. Turn the adjustment screw where the arm meets the fill valve, or very gently bend a metal arm downward. Do not force brittle plastic parts.
The Home Depot’s toilet repair guidance also points to checking the fill valve when water runs constantly without rushing quickly through the bowl. ([homedepot.com](https://www.homedepot.com/c/ah/how-to-fix-a-running-toilet/9ba683603be9fa5395fab90138bd8691?utm_source=openai))
Step 4: Test the Flapper for a Slow Leak
If the toilet runs off and on, do a simple dye test.
- Wait until the tank has fully refilled.
- Add a few drops of food coloring to the tank water.
- Do not flush.
- Wait 10 to 15 minutes.
- Look in the bowl. If colored water appears, the flapper or flush valve seal is leaking.
A worn flapper may look curled, stiff, slimy, cracked, or misshapen. Sometimes mineral buildup on the flush valve seat prevents a good seal, too.
Step 5: Clean or Replace the Flapper
First, try wiping the underside of the flapper and the rim of the flush valve seat with a clean cloth or sponge. If the rubber feels rough, sticky, brittle, or warped, replace it.
- Turn off the water supply valve behind the toilet.
- Flush the toilet to drain most of the tank.
- Unhook the chain from the flush lever.
- Pull the old flapper off the pegs on the overflow tube.
- Attach the new flapper to the pegs.
- Reconnect the chain with slight slack.
- Turn the water back on and test-flush.
Make sure the new flapper falls evenly over the opening. Manufacturer instructions for common toilet repair kits also stress that the flapper should be clipped in so it can fall evenly on the flush valve seat. ([fluidmaster.com](https://www.fluidmaster.com/wp-content/uploads/2016/12/400arhrkp10_instr_061015.pdf?utm_source=openai))
Step 6: Check the Fill Valve
If the flapper seals well but the water still runs, the fill valve may not be shutting off. Signs of a bad fill valve include constant hissing, water that never reaches the proper shutoff point, a float that sticks, or a valve that turns on and off by itself.
Before replacing it, try this quick reset:
- Turn off the water supply.
- Flush the toilet.
- Move the float up and down gently to see if it sticks.
- Check that the refill tube is clipped to the overflow tube, not shoved down inside it.
- Turn the water back on and flush again.
If the valve still will not shut off, replace the fill valve. Most replacement fill valves come with step-by-step instructions, and the basic process is to shut off the water, drain the tank, disconnect the supply line, remove the old valve, install the new one with its gasket, reconnect the supply, and adjust the water level. ([homedepot.com](https://www.homedepot.com/c/ah/how-to-replace-a-fill-valve/9ba683603be9fa5395fab90632dda58?utm_source=openai))
When to Call a Plumber
Call a plumber if the shutoff valve will not turn, the toilet is leaking onto the floor, the tank is cracked, the supply line is corroded, or you replace the flapper and fill valve and the toilet still runs. You should also get help if the flush valve itself is damaged, since replacing it often requires removing the tank from the bowl.
How to Prevent the Problem Next Time
- Check inside the tank every few months for water going into the overflow tube.
- Do a dye test once or twice a year, especially in rarely used bathrooms.
- Avoid in-tank cleaning tablets that sit in the tank water; they can damage rubber parts over time.
- Replace a stiff or cracked flapper before it becomes a constant leak.
- Keep a spare universal flapper on hand if your toilets use a common size.
A running toilet is usually not a mystery once you know what to look for. Start with the chain, water level, and flapper, then move to the fill valve if needed. In many homes, a small adjustment or a low-cost flapper replacement is all it takes to quiet the toilet and stop the water waste.