How to Clean Refrigerator Coils Without Moving the Fridge
If your refrigerator seems to run constantly, feels warm around the base, or just has not had a good cleaning in years, the condenser coils are a smart place to start. Learning how to clean refrigerator coils is a simple home maintenance task that can help the appliance release heat more easily and may reduce strain on the cooling system.
The good news: you usually do not need special skills. With a vacuum, a long refrigerator coil brush, and about 20 to 30 minutes, you can remove dust, pet hair, and crumbs from one of the hardest-working appliances in the house.
Why refrigerator coils get so dirty
Refrigerator condenser coils help release heat from the cooling system. When those coils or the surrounding grille get packed with dust and hair, the refrigerator has a harder time shedding heat. ENERGY STAR recommends keeping condenser coils clean, especially on older refrigerators, and leaving space for airflow around the appliance. ([energystar.gov](https://www.energystar.gov/products/refrigerators?utm_source=openai))
Coil buildup is especially common in homes with shedding pets, a dusty kitchen floor, or a fridge that sits near a cooking area. The dust often hides behind the lower toe grille or on the back of the refrigerator, so it is easy to miss during everyday sweeping.
How often should you clean refrigerator coils?
A good general rule is to check the coils at least once a year. Whirlpool lists condenser coil cleaning as a yearly refrigerator maintenance task, while some repair guidance suggests every 6 to 12 months depending on dust and use. ([producthelp.whirlpool.com](https://producthelp.whirlpool.com/Refrigeration/Full-Size_Refrigerators/Product_Info/Cleaning_and_Care/Preventative_Maintenance_for_Refrigerators?utm_source=openai))
If you have pets, a busy kitchen, or visible dust collecting under the fridge, aim for every six months. A practical schedule is once in spring and once before the holiday cooking season, when the refrigerator is likely to be packed and working harder.
What you’ll need
- Vacuum with hose attachment: A crevice tool works well for the front grille and floor.
- Long refrigerator coil brush: This narrow, flexible brush reaches where a vacuum cannot.
- Soft brush attachment: Helpful for grilles, vents, and delicate surfaces.
- Flashlight: Makes it easier to see dust under the fridge.
- Microfiber cloth: For wiping the grille and nearby floor.
- Work gloves: Optional, but useful around metal edges and dust.
GE recommends removing dust, dirt, and pet hair from condenser coils with a refrigerator condenser cleaning brush. GE’s freezer maintenance guidance also suggests using a refrigerator coil brush or a vacuum hose with a soft brush to remove dust and dirt from coils. ([products.geappliances.com](https://products.geappliances.com/appliance/gea-support-search-content?contentId=16266&utm_source=openai))
Before you start: a few safety checks
First, look at your owner’s manual if you have it. Some refrigerators have exposed coils on the back, while many modern models place the condenser area behind a bottom front grille. A few designs may have covered or low-maintenance condensers that are not meant to be brushed aggressively.
For safety, unplug the refrigerator before cleaning near the coils or fan area. If your refrigerator has an automatic ice maker or water dispenser and you need to pull the appliance far from the wall, be careful not to kink or strain the water line. Whirlpool owner guidance notes that if a refrigerator with an automatic ice maker is connected to the household water supply, the water supply should be turned off before certain cleaning or moving tasks. ([whirlpool.com](https://www.whirlpool.com/content/dam/global/documents/201911/owners-manual-w10730915-revc.pdf?utm_source=openai))
Step-by-step: how to clean refrigerator coils
1. Empty the floor area around the fridge
Move trash cans, pet bowls, rugs, step stools, and anything stored beside the refrigerator. You will need room for the vacuum and enough space to kneel or reach the toe grille comfortably.
2. Unplug the refrigerator
Pull the plug from the outlet if you can reach it safely. If the outlet is behind the fridge and you cannot move the appliance, turn off power at the breaker only if you are comfortable identifying the correct circuit. Keep the doors closed while you work so the food stays cold.
3. Find the coils
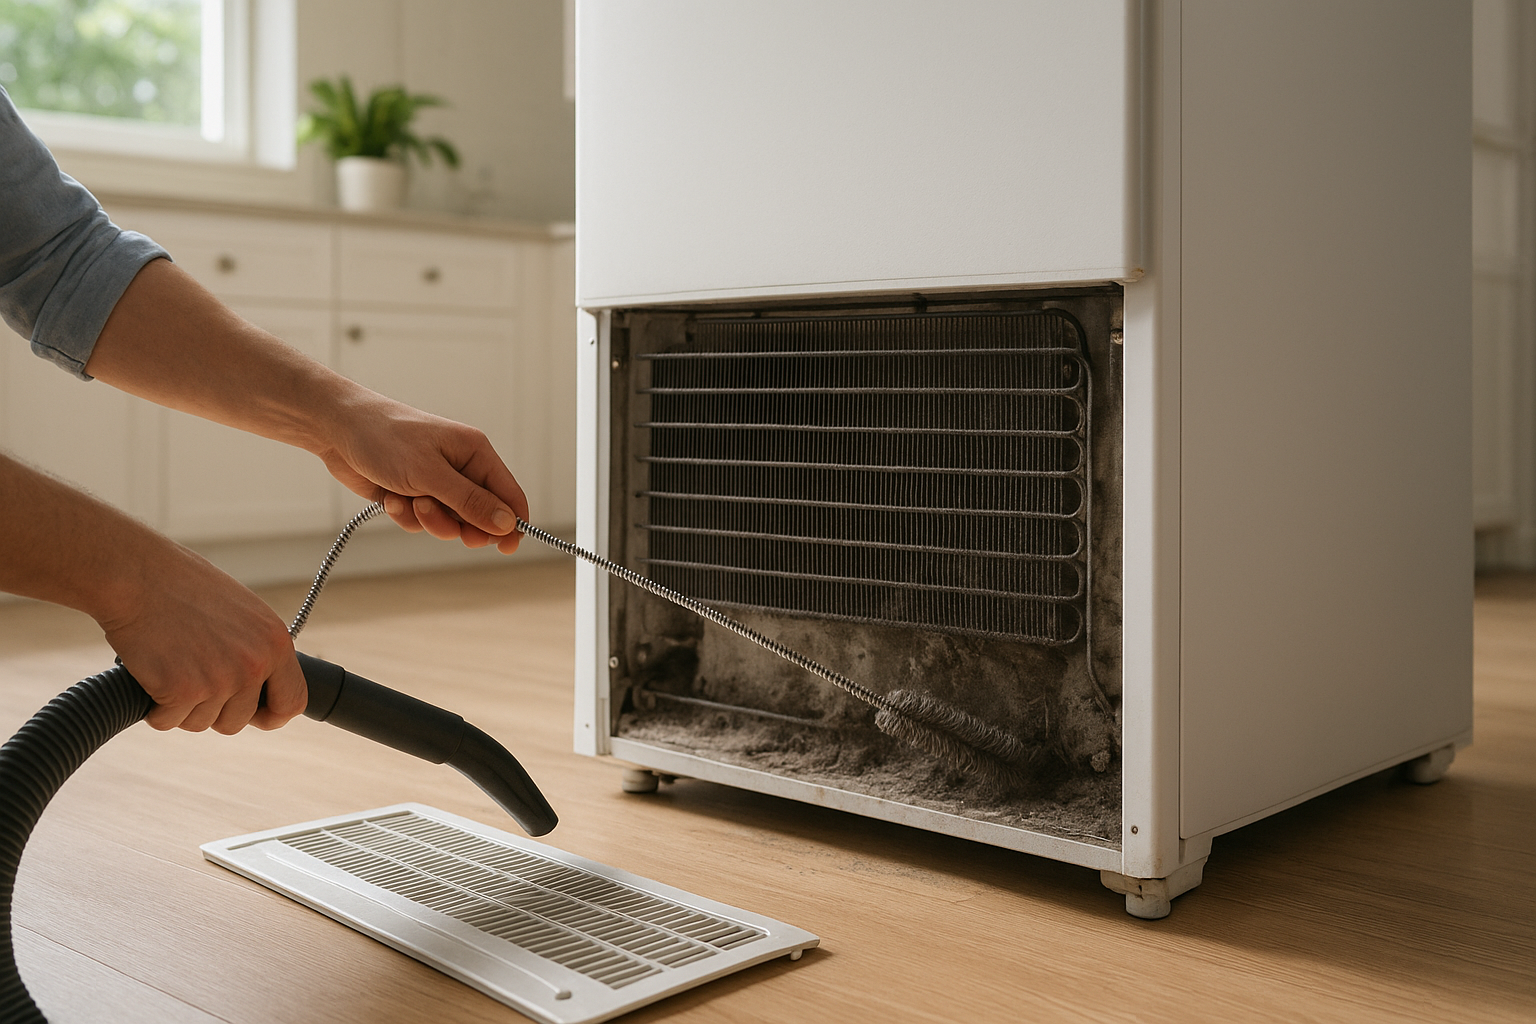
Look in two main places: behind the bottom front grille or on the back of the refrigerator. If your fridge has a removable toe grille, it usually pops off by pulling straight forward, though some models may have clips or screws. GE notes that bottom-mounted condenser coils may be covered by a base grille that needs to be removed before cleaning. ([repair.geappliances.com](https://repair.geappliances.com/resources/faq/article/freezer-maintenance-tips?utm_source=openai))
4. Vacuum loose dust first
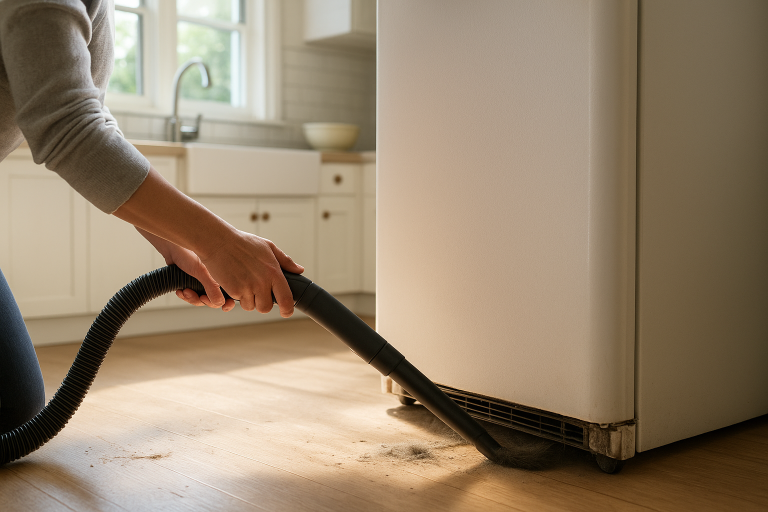
Use the vacuum hose or crevice tool to remove the loose dust from the grille, floor, and the open area you can see. Do not jam the vacuum nozzle into wiring, fan blades, or delicate tubing. The goal is to collect loose debris before brushing so it does not float around the kitchen.
5. Brush the coils gently
Slide the long coil brush into the dusty area and work it back and forth with light pressure. Pull the brush out often and vacuum off the dust it brings with it. If the coils are under the refrigerator, you may need to insert the brush from several angles to reach the whole surface.
Be patient here. The first pass often removes only surface lint; the second and third passes usually pull out the compacted pet hair and gray dust that block airflow.
6. Vacuum again
After brushing, vacuum the area thoroughly. Use the soft brush attachment on the grille itself, then vacuum the floor beneath the front edge of the refrigerator. If you can access the back safely, vacuum the rear cover vents and the floor behind the appliance too.
7. Replace the grille and restore power
Snap or screw the toe grille back into place. Plug the refrigerator back in, or turn the breaker back on. Listen for normal operation, then avoid opening the doors repeatedly for the next hour while the temperature stabilizes.
How to clean coils if you cannot move the refrigerator
If your fridge is too heavy or boxed in by cabinets, focus on what you can safely reach from the front. Many bottom-coil refrigerators are designed for front access through the toe grille. Remove the grille, vacuum the opening, then use the long coil brush to reach underneath.
Do not force the refrigerator forward if it is connected to a short water line, wedged under a cabinet panel, or sitting on flooring that scratches easily. If the fridge must be moved, ask for help and pull it straight out slowly. Avoid rocking it hard from side to side.
Signs your coils need attention
- The refrigerator seems to run more often than usual.
- The toe grille area is covered in dust or pet hair.
- You can see a gray mat of lint under the fridge with a flashlight.
- The kitchen feels warmer near the refrigerator base or back.
- You have not cleaned the coils in a year or more.
Dirty coils are not the only reason a refrigerator may cool poorly, but they are one of the easiest things to check. GE notes that if a refrigerator runs but is not cold enough, cleaning the condenser coils may be needed. ([products.geappliances.com](https://products.geappliances.com/appliance/gea-support-search-content?contentId=16266&utm_source=openai))
What not to do
- Do not use water on the coils. This is a dry cleaning job.
- Do not use a stiff wire brush. It can damage fins, tubing, or nearby parts.
- Do not remove sealed panels unless the manual says to. Stick to accessible grilles and open coil areas.
- Do not leave the fridge unplugged for a long time. Work efficiently and keep the doors closed.
- Do not ignore burning smells, clicking, or no cooling. Those may need appliance service.
While you’re there, do these quick checks
Once the grille is off and the vacuum is out, take two extra minutes for simple refrigerator maintenance. Wipe the door gasket with a damp cloth so it seals well. Check that food packages are not blocking interior air vents. Make sure the fridge has a little breathing room around it if your kitchen layout allows.
You can also vacuum the floor under the front edge before replacing the grille. That little strip collects crumbs, pet hair, twist ties, and all the mystery bits that disappear from the kitchen.
The bottom line
Cleaning refrigerator coils is not glamorous, but it is one of the most useful kitchen maintenance jobs you can do in under half an hour. Check the coil area once or twice a year, use a vacuum and coil brush, and keep airflow paths clear.
If your refrigerator still runs constantly or struggles to stay cold after the coils are clean, it may be time to check the door gasket, temperature settings, airflow inside the fridge, or call an appliance technician. But in many homes, a dusty condenser area is the simple fix that has been hiding in plain sight.