How to Clean a Window Air Conditioner Filter
If your window air conditioner is running but the room still feels stuffy, the filter is one of the first places to check. A dusty filter blocks airflow, makes the unit work harder, and can leave you with weak cooling right when you need it most.
The good news: learning how to clean a window air conditioner filter takes about 10 to 20 minutes, plus drying time. You do not need special tools, but you do need to be gentle and let the filter dry fully before putting it back.
How Often Should You Clean a Window AC Filter?
As a practical rule, check the filter every 30 days during cooling season and clean it whenever you see dust buildup. If you run the unit daily, have pets, live near a busy road, or are going through a hot, smoky, or pollen-heavy stretch, check it every two weeks.
Many window air conditioners use a reusable mesh filter behind the front grille. Some newer models also have a filter reminder light that comes on after a set number of operating hours. Treat that reminder as a nudge, not a perfect schedule. A bedroom unit used only at night may stay cleaner longer than a kitchen or living room unit that runs all day.
What You’ll Need
- Vacuum with brush attachment
- Sink, tub, or outdoor hose with gentle water pressure
- Mild dish soap
- Soft brush or old soft toothbrush
- Clean towel
- Owner’s manual, if you have it
Avoid harsh cleaners, bleach, boiling water, and stiff scrub brushes. The filter mesh can bend, tear, or lose its shape, and a damaged filter will not sit correctly in the unit.
Step-by-Step: How to Clean a Window Air Conditioner Filter
1. Turn the unit off and unplug it
Before you touch the front panel, turn the air conditioner off and unplug it from the wall. This is a simple safety step, and it also prevents the fan from pulling loose dust into the unit while you work.
2. Open the front grille
Most window AC filters slide out from behind the front grille. On some units, the grille pops open from the top or sides. Go slowly, especially on older plastic covers that may be brittle. If something feels stuck, check for tabs, clips, or a small latch rather than forcing it.
3. Remove the filter carefully
Slide the filter out and hold it flat. If it is packed with dust, carry it straight to the trash can or sink so you do not scatter lint and debris across the room. Take a quick look at the filter frame. If it is cracked, warped, or torn, cleaning may not be enough; you may need a replacement filter made for your exact model.
4. Vacuum loose dust first
Use a vacuum brush attachment to remove the dry layer of dust from both sides. This makes washing easier and keeps clumps of lint from going down the drain. Use light pressure. You are lifting dust, not scrubbing carpet.
5. Wash with lukewarm water and mild soap
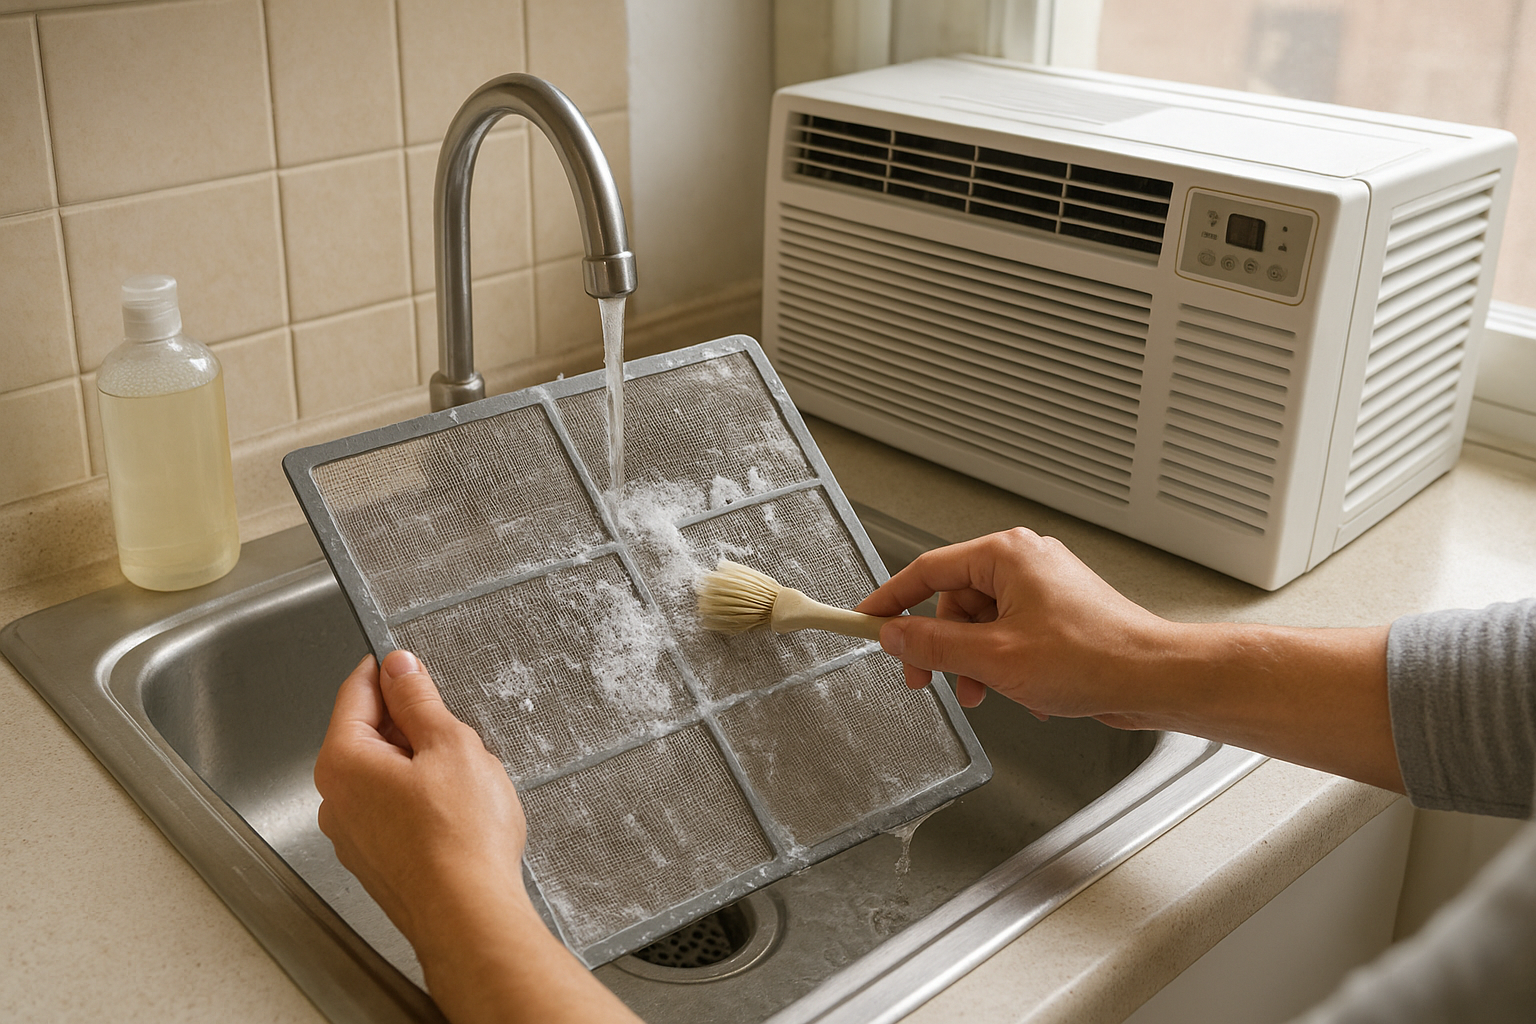
Rinse the filter under lukewarm running water. If it feels greasy or grimy, add a drop or two of mild dish soap and gently work it across the mesh with your fingers or a soft brush. Rinse from the cleaner side toward the dirtier side when possible; this helps push debris out instead of deeper into the mesh.
If the filter has stubborn buildup, soak it in a sink of lukewarm, soapy water for 10 minutes. Then rinse well until the water runs clear and no soap film remains.
6. Let the filter dry completely
Shake off excess water, pat the frame with a towel, and set the filter upright in a well-ventilated spot. Do not reinstall it while damp. A wet filter can encourage musty odors and may send moisture where it does not belong.
Do not use a hair dryer, oven, or direct high heat to speed things up. Heat can warp the plastic frame or mesh. Air drying is slower, but safer.
7. Wipe the grille and intake area
While the filter dries, wipe the front grille with a damp cloth. If dust is stuck in the slats, use the vacuum brush or a soft toothbrush. Keep water away from the control panel and electrical parts. You are not deep-cleaning the whole appliance here; you are clearing the airflow path.
8. Reinstall the dry filter
Once the filter is completely dry, slide it back into place the same way it came out. Close the grille securely, plug the unit back in, and turn it on. You should feel steady airflow from the front vents within a minute or two.
Quick Checks That Help Your Window AC Cool Better
Cleaning the filter solves many weak-airflow problems, but a few other quick checks can help the unit run better.
- Make sure curtains are not blocking the intake. Keep fabric, furniture, and bedding away from the front of the unit.
- Check the outside vents. Leaves, cottonwood fluff, and dirt can collect on the outdoor side. Brush away loose debris only when the unit is off and unplugged.
- Look for standing water or musty smells. Window AC units produce condensation. If water is not draining properly or the unit smells moldy, it may need a deeper cleaning or service.
- Confirm the unit is slightly tilted as recommended. Many window units are designed so condensation drains toward the outside. Follow your manual for the correct installation angle.
- Do not run the unit without the filter. The filter helps keep dust off the internal parts. Running without it can make the unit dirtier faster.
What If the Filter Still Looks Dirty?
Some staining is normal on an older washable filter. Gray discoloration does not always mean it is dirty if the mesh is clear and water rinses through easily. But if the filter feels sticky, smells sour, has visible mold growth, or is falling apart, replace it.
Search by the model number printed on your air conditioner, not just by the brand name. Window AC filters are often model-specific, and a filter that is slightly too large or too small may rattle, bend, or leave gaps.
Can You Clean the Inside Coils Too?
You can safely do light surface maintenance, such as vacuuming the front grille and removing loose debris from accessible areas. But be cautious around the coils and metal fins. They bend easily, can be sharp, and sit near parts you do not want to soak.
If you see heavy grime, mold-like growth, ice forming on the coils, leaking indoors, burning smells, or weak cooling even after the filter is clean, stop and call an appliance repair technician or HVAC pro. Those problems can involve drainage, refrigerant, fan, or electrical issues.
A Simple Summer Routine
For a window unit that runs regularly, make filter care part of your monthly home routine. On the first weekend of each month, unplug the unit, check the filter, vacuum or wash it, wipe the grille, and look for blocked vents outside.
That small habit helps the air conditioner move air freely, reduces strain on the unit, and can prevent musty smells before they settle in. When a heat wave arrives, you will be glad your AC is clean, dry, and ready to work.