How to Clean Between Oven Door Glass Safely
If your oven still looks grimy after you scrub the inside and outside of the door, the mess may be trapped between the glass panes. Grease drips, steam, and spills can work their way into that narrow space, leaving brown streaks where an ordinary sponge cannot reach.
The good news: many oven doors can be cleaned between the glass with a careful, no-rush approach. The important part is checking your owner’s manual first, because door removal and glass access vary by model, and some doors are better left to a service technician.
Before You Start: Read This First
Oven doors are heavier than they look, and the glass can break if it is twisted, bumped, or cleaned while hot. GE Appliances notes that the best instructions for removing an oven door are in the owner’s manual because the process can vary by model. Some side-opening wall oven doors are not owner-removable at all. ([products.geappliances.com](https://products.geappliances.com/appliance/gea-support-search-content?contentId=18065&utm_source=openai))
Also, do not put a cool damp cloth on hot inner oven glass. Whirlpool’s care guidance warns against applying a cool damp cloth to inner door glass before it has completely cooled, because temperature shock can damage glass. ([whirlpool.com](https://www.whirlpool.com/content/dam/global/documents/202506/owners-manual-w11779864-reva.pdf?utm_source=openai))
Stop and call for service if: your manual says not to remove the door, the hinges feel loose or spring-loaded in a way you do not understand, the glass is cracked, or you would need to fully disassemble the door beyond what the manual describes.
What You’ll Need
- Owner’s manual for your exact oven model
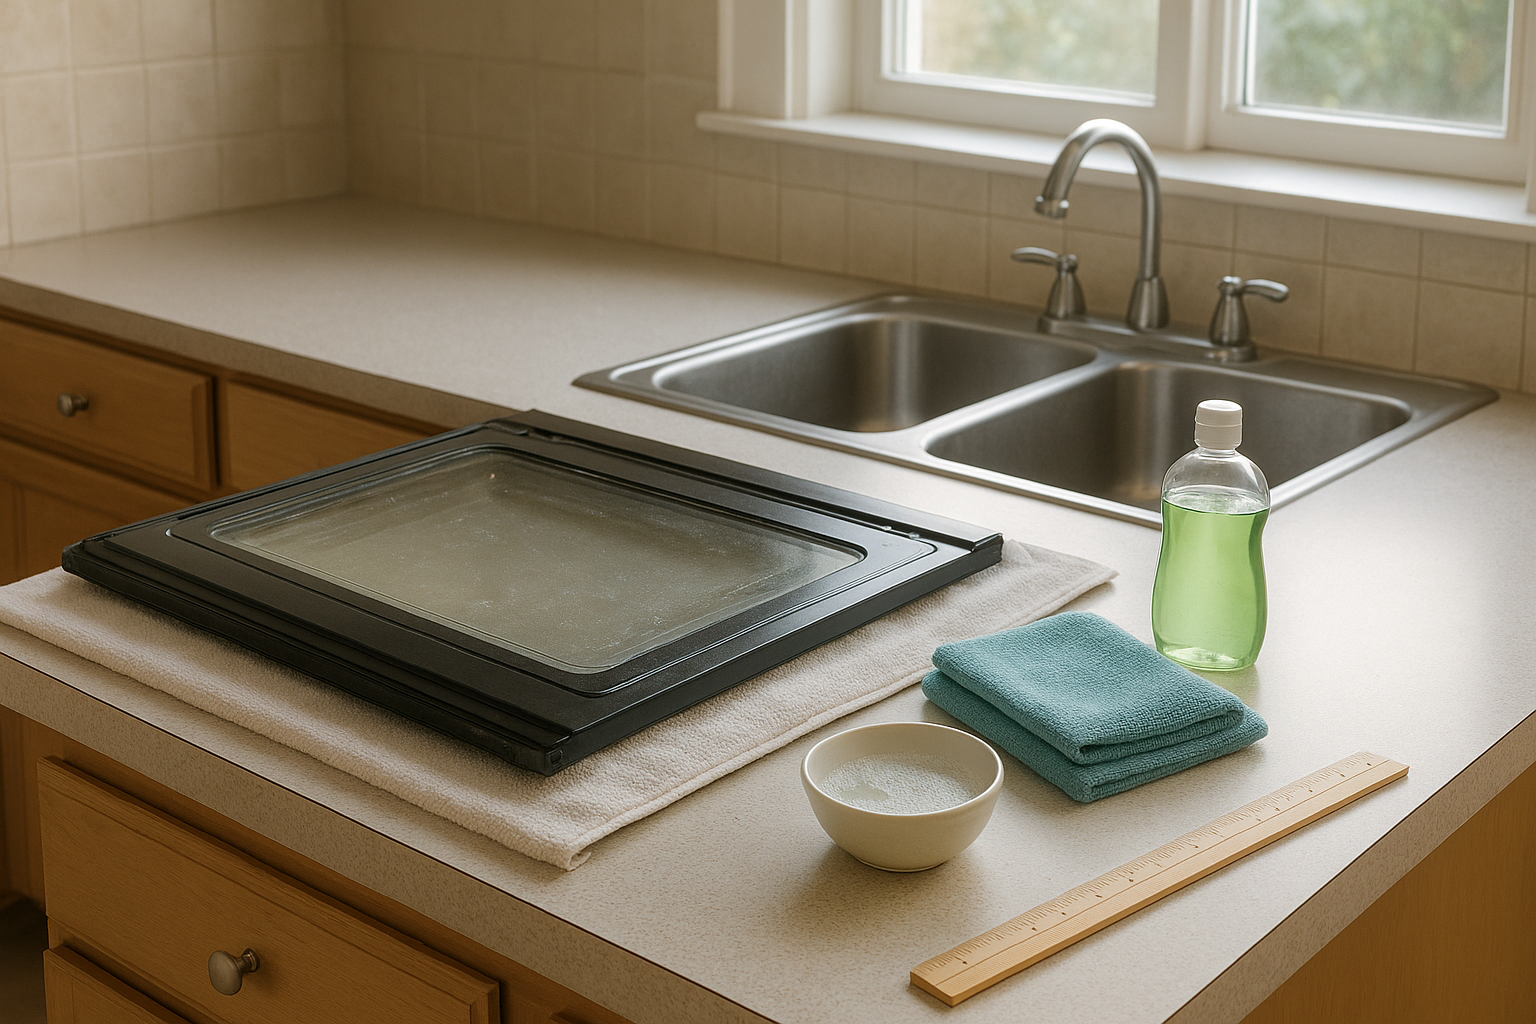
- Thick towel or folded blanket
- Mild dish soap
- Warm water
- Microfiber cloths
- Non-scratch sponge
- Wooden yardstick or long flat handle
- Rubber band or painter’s tape
- Dry lint-free cloth
- Small bowl
- Vacuum with crevice tool, optional
Avoid oven cleaner, abrasive pads, razor blades, and excess water inside the door. Harsh cleaners and loose liquid can damage finishes, seep into insulation, or leave residue where you cannot rinse it well.
Step 1: Let the Oven Cool Completely
Turn the oven off and wait until the door, glass, and surrounding metal are fully cool. This is not just for comfort; hot glass and cold cleaning water are a bad combination. Once cool, unplug the range if you can safely reach the plug, or switch off power at the breaker if your manual recommends it for door removal.
Step 2: Inspect the Door Vents and Bottom Edge
Most streaks between oven glass happen because grease or liquid entered through vents at the top, bottom, or sides of the door. Open the oven door and look along the top edge and bottom edge. You may see narrow slots that lead into the space between panes.
If the streaks are light and close to an opening, you may be able to clean them without taking the door apart. GE’s own guidance says that, on many wall ovens and ranges, cleaning between the glass is possible if streaks appear, but the method depends on the door design. ([products.geappliances.com](https://products.geappliances.com/appliance/gea-support-search-content?contentId=34524&utm_source=openai))
Step 3: Try the No-Disassembly Method First
This is the safest first attempt for many ovens because you are not removing screws or separating glass panels.
- Mix a few drops of dish soap into a bowl of warm water.
- Wrap a damp microfiber cloth around the end of a wooden yardstick.
- Secure the cloth with a rubber band or painter’s tape. Make sure no sticky tape will touch the glass.
- Slide the wrapped end gently through the lower vent or access slot.
- Move slowly across the glass, using light pressure only.
- Switch to a clean damp cloth if grease transfers heavily.
- Finish with a dry lint-free cloth wrapped around the yardstick to remove moisture.
Use as little water as possible. The cloth should be damp, not dripping. If water runs inside the door, it can leave new streaks or reach areas that are difficult to dry.
Step 4: If Needed, Remove the Oven Door
If the mess is heavy or the access slot is awkward, removing the door may give you better control. Only do this if your manual gives owner instructions for your model.
For many standard GE-style oven doors, the general process involves opening the door to a specific removal position, gripping both sides, and lifting it up and out. GE’s instructions mention closing the door to a removal position of about 1 to 2 inches from closed on some models, but they also emphasize that model-specific instructions matter. ([products.geappliances.com](https://products.geappliances.com/appliance/gea-support-search-content?contentId=18065&utm_source=openai))
Lay a thick towel on the floor, table, or counter before you lift the door. GE recommends placing a towel on a floor or large work surface to protect the door when removed. ([products.geappliances.com](https://products.geappliances.com/appliance/gea-support-search-content?contentId=34524&utm_source=openai))
Safety tip: Keep fingers away from hinge areas. Older GE care instructions warn that hinges can snap back and pinch fingers if handled incorrectly. ([geappliances.com](https://www.geappliances.com/content/older-pdfs/39-4755.PDF?utm_source=openai))
Step 5: Clean Through the Door Openings
With the door lying flat on the towel, look again for openings along the bottom or top edge. Vacuum loose crumbs with a crevice tool if you can reach them without forcing anything into the door.
Then repeat the wrapped-yardstick method. Work from one side to the other, changing cloths as they pick up grease. For sticky brown streaks, hold the damp cloth against the spot for a few seconds, then wipe. Do not jab, scrape, or pry against the glass.
Step 6: Dry Thoroughly Before Reinstalling
Moisture trapped between panes can leave cloudy marks, so drying matters as much as washing. Wrap a fresh dry microfiber cloth around the yardstick and pass it through the same openings. Repeat with another dry cloth if needed.
Let the door rest flat for 20 to 30 minutes before reinstalling, especially if you used more than one damp cloth. This gives hidden edges time to air out.
Step 7: Put the Door Back Carefully
Follow your manual for reinstalling the door. Do not force the hinges, slam the door, or test the oven until the door is seated evenly. Open and close it slowly once or twice to make sure it moves normally.
If the door does not sit flush, feels crooked, or will not close fully, stop using the oven until the door is reseated correctly. A poorly seated door can affect heat retention and may damage the hinge area.
What Not to Use Between Oven Glass
- Oven cleaner: It is hard to rinse from inside a sealed door cavity.
- Bleach: It is unnecessary and can damage surfaces.
- Steel wool or abrasive pads: They can scratch glass and metal trim.
- Razor blades: Too risky inside a narrow space.
- Lots of vinegar or water: Excess liquid can create new streaks and seep into the door.
- Wire hangers: They can scratch glass or catch insulation.
How Often Should You Clean Between Oven Door Glass?
Most homes do not need to clean between oven glass often. Once or twice a year is usually plenty unless there has been a spill that ran into the vents. For everyday upkeep, wipe the inside glass after messy baking once the oven is cool, and clean the outside with a microfiber cloth and glass-safe cleaner.
To prevent future streaks, place casseroles and pies on a rimmed baking sheet, avoid overfilling roasting pans, and wipe fresh spills before they bake on repeatedly. Small habits do more than deep cleaning when it comes to keeping the oven door clear.
When to Call a Technician
Call an appliance technician if the glass panels must be separated with screws, the door has electrical parts or a complex lock assembly, the hinge will not stay in position, or the stains are sealed beyond reachable vents. Some manufacturers and appliance pros treat internal door glass removal as a service job rather than routine cleaning, especially when the door must be disassembled.
That may feel frustrating, but it is cheaper than replacing broken oven glass or a bent hinge. If you are unsure, look up the model number inside the oven frame and check the official manual before going further.
The Bottom Line
The safest way to clean between oven door glass is to start gently: cool oven, manual in hand, damp microfiber cloth, mild soap, and a long flat tool through the vent openings. If your oven door is designed for owner removal, laying it flat on a towel can make the job easier. If the door needs to be taken apart, skip the guesswork and bring in a pro.