How to Winterize Outdoor Faucets Before a Freeze
Outdoor faucets are easy to forget until the first hard freeze is in the forecast. A few simple steps now can help prevent frozen hose bibs, split pipes, and the soggy mess that follows when temperatures climb again.
This guide walks you through how to winterize outdoor faucets in a practical, homeowner-friendly way. You do not need fancy tools, but you do need to disconnect hoses, drain trapped water, and protect any exposed plumbing before freezing weather settles in.
Why Outdoor Faucets Freeze
Water expands when it freezes. If water is trapped inside a hose, faucet, or short section of pipe near an exterior wall, that expansion can crack the fixture or pipe. Illinois Extension warns that even a small crack in a pipe can release a large amount of water into a home, which is why prevention matters before cold weather arrives. ([extension.illinois.edu](https://extension.illinois.edu/disasters/water-pipes?utm_source=openai))
Outdoor faucets are especially vulnerable because they sit right where indoor warmth meets outdoor cold. A frost-free hose bib offers more protection than an older standard spigot, but it is not magic. If a hose stays attached, water can remain trapped and keep the faucet from draining the way it should.
Supplies You May Need
- Adjustable wrench or pliers, if a hose is stuck
- Bucket or towel for draining water
- Foam outdoor faucet covers
- Pipe insulation for exposed pipes
- Caulk or expanding foam for small air gaps around pipe penetrations
- Painter’s tape and a marker for labeling shutoff valves
Foam faucet covers are inexpensive and widely available at hardware stores. Portland Water Bureau recommends molded-foam hose bib covers, or in a pinch, newspaper or rags covered with plastic wrap to help insulate outdoor faucets. ([portland.gov](https://www.portland.gov/water/prepare-winter?utm_source=openai))
Step 1: Disconnect Every Garden Hose
Start by removing hoses from every outdoor faucet, even frost-free ones. This is the most important step and the one many people skip. Several public utility and extension sources recommend disconnecting hoses before freezing weather because attached hoses can trap water at the faucet and supply line. ([portland.gov](https://www.portland.gov/water/prepare-winter?utm_source=openai))
If the hose coupling is stuck, use pliers or an adjustable wrench and turn gently. Do not crank hard enough to twist the faucet out of the wall. If it will not budge, apply a little penetrating oil, wait, and try again. Once the hose is off, drain it fully by stretching it downhill or lifting it section by section. Store it in a garage, shed, or other protected spot.
Step 2: Find the Indoor Shutoff Valve
Many homes have a separate shutoff valve for outdoor faucets, often in the basement, crawl space, utility room, or near the pipe that feeds the exterior wall. It may be a round handle or a small lever valve. If you have more than one outdoor faucet, each may have its own shutoff, or several may share one valve.
Turn the valve off. For a round handle, that usually means turning clockwise until snug. For a lever handle, turn it so the handle is perpendicular to the pipe. Do not force an old valve; if it feels frozen in place or starts leaking, stop and call a plumber.
If you do not have an indoor shutoff for the outdoor faucet, you can still disconnect the hose and insulate the faucet. However, adding a proper interior shutoff can be a worthwhile plumbing upgrade, especially in colder climates.
Step 3: Open the Outdoor Faucet and Drain It
After shutting off the indoor valve, go back outside and open the faucet fully. Let any remaining water drain out. Portland Water Bureau specifically recommends opening outdoor spigots after turning off the water so remaining water can drain from the pipes. ([portland.gov](https://www.portland.gov/water/prepare-winter?utm_source=openai))
Leave the outdoor faucet open for the winter if the indoor shutoff is closed. This gives any leftover water a place to expand and lets you quickly see in spring whether the indoor valve is holding properly. If water continues to run steadily after a minute or two, the indoor shutoff may not be fully closed or may need repair.
Step 4: Cover the Faucet
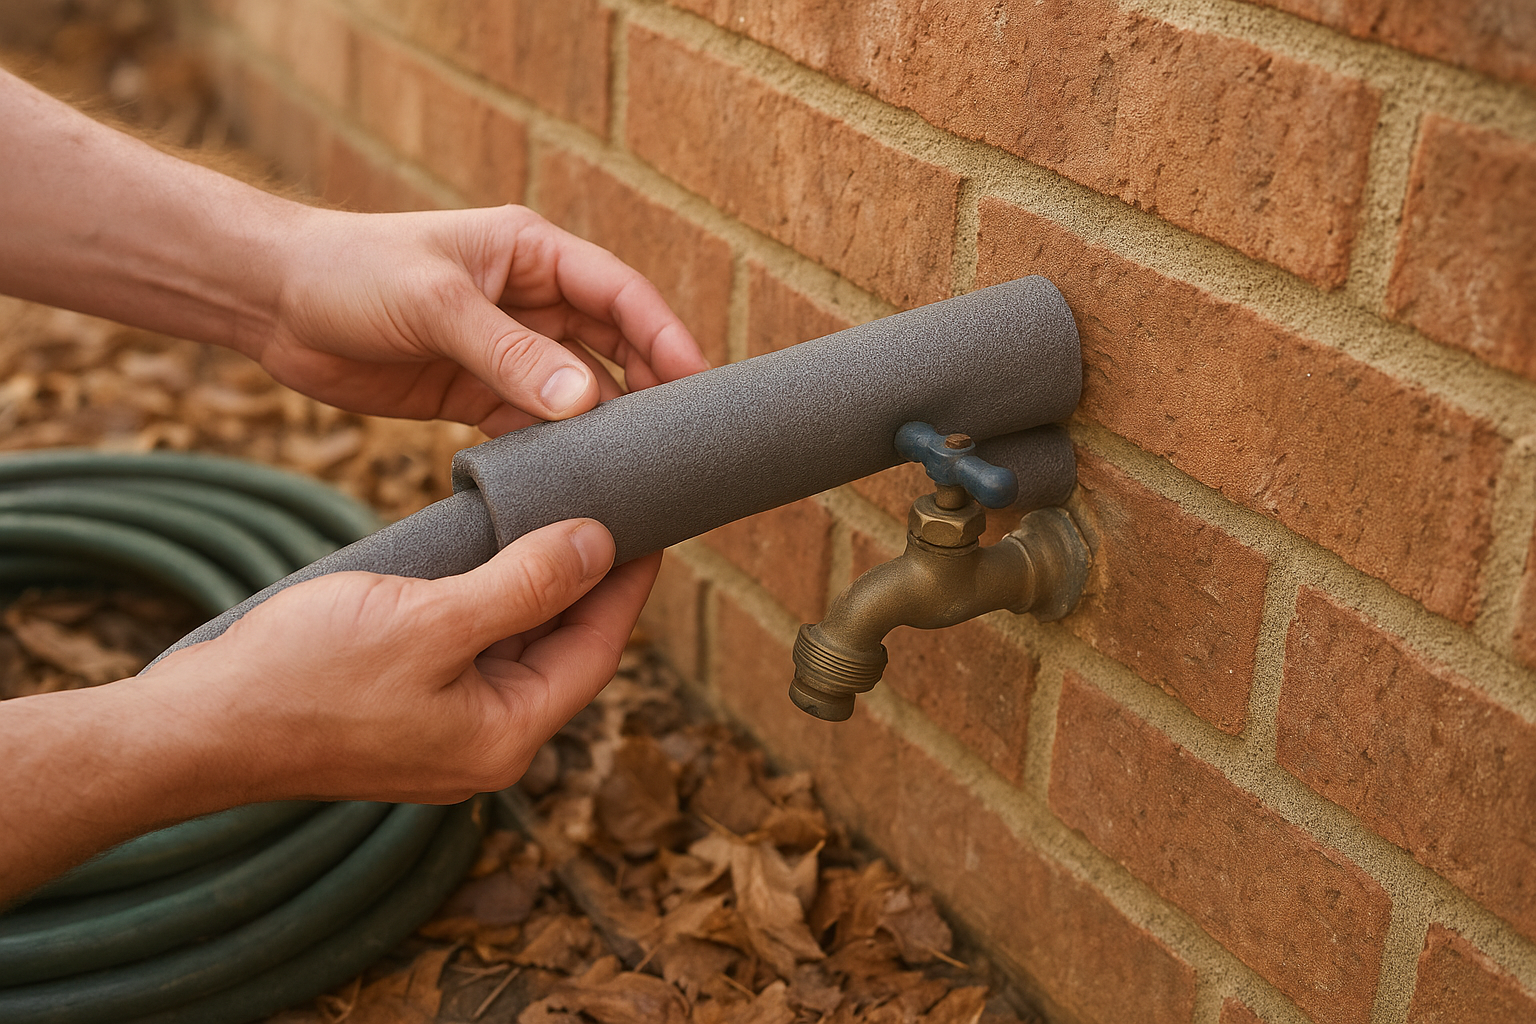
Once the faucet is drained, install a foam faucet cover. Most covers use a loop or cord that hooks over the faucet handle. Pull the cover snug against the wall so cold air cannot easily reach the fixture.
The cover should sit flat. If siding, brick, or an uneven wall leaves big gaps, tuck a small amount of insulation around the opening without jamming material into the faucet itself. The goal is to slow heat loss and block wind, not to pack the fixture so tightly that it traps moisture.
Step 5: Seal Cold Air Leaks Around Pipes
Look where the pipe enters the wall. If you can see daylight or feel a draft, seal the gap. Cold air blowing into a wall cavity, crawl space, or basement can freeze nearby pipes even when the rest of the house feels warm. Illinois Extension recommends sealing leaks that allow cold air inside where pipes are located. ([extension.illinois.edu](https://extension.illinois.edu/disasters/water-pipes?utm_source=openai))
Use exterior-grade caulk for small gaps. For larger openings, use appropriate foam sealant and follow the product directions. Avoid sealing over weep holes in brick or blocking areas that are meant to drain or ventilate.
Step 6: Insulate Exposed Pipe Indoors
If the pipe feeding the outdoor faucet runs through an unheated basement, crawl space, garage, or attic, add pipe insulation. Foam pipe sleeves are simple to install: cut them to length, slip them around the pipe, and secure as directed.
Pay attention to sections near rim joists, vents, garage doors, and exterior walls. Portland Water Bureau recommends insulating pipes in unheated areas such as attics, crawl spaces, and basements as part of freeze preparation. ([portland.gov](https://www.portland.gov/water/prepare-winter?utm_source=openai))
What If You Have a Frost-Free Hose Bib?
A frost-free hose bib has a longer stem, so the actual shutoff point sits farther inside the wall where it is warmer. That design helps, but it only works properly when the hose is disconnected. If a hose remains attached, water may not drain out of the faucet body.
For frost-free faucets, your basic winter routine is still simple: remove the hose, check for leaks, and add a foam cover for extra protection. If the faucet drips after you turn it off, repair it before winter. A slow drip can freeze and build up ice where you do not want it.
Common Mistakes to Avoid
- Leaving a hose attached: This is the big one. Remove hoses before the first freeze.
- Assuming a foam cover fixes everything: A cover helps, but it does not drain trapped water from the pipe.
- Forgetting secondary faucets: Check side yards, patios, decks, garages, and detached structures.
- Closing the outdoor faucet after draining: If the indoor shutoff is closed, leaving the outside faucet open is usually better for winter.
- Ignoring crawl spaces: Exposed pipes in cold crawl spaces may need insulation too.
If a Freeze Is Coming Tonight
If you are short on time, do the essentials first. Disconnect the hose, close the indoor shutoff if you have one, open the outdoor faucet to drain it, and install a foam cover. If you do not have a cover, wrap the faucet with dry rags or newspaper and cover that with plastic to keep the insulation dry, following the same general approach recommended by Portland Water Bureau for temporary protection. ([portland.gov](https://www.portland.gov/water/prepare-winter?utm_source=openai))
Inside the house, keep heat on. If pipes are in a cabinet along an exterior wall, opening cabinet doors can help warm air reach them during freezing weather. For severe cold, many utilities also advise letting vulnerable indoor faucets drip slightly, but check local guidance because water systems and conditions vary.
When to Call a Plumber
Call a plumber if the indoor shutoff valve leaks, the outdoor faucet spins loosely, water keeps running after the shutoff is closed, or you see damp drywall, wet framing, or pooling water near the pipe. You should also get help if you suspect a pipe is frozen. Illinois Extension cautions against thawing pipes with an open flame or torch because of fire and safety risks. ([extension.illinois.edu](https://extension.illinois.edu/disasters/water-pipes?utm_source=openai))
A Simple Yearly Reminder
Make outdoor faucet winterizing part of your fall home checklist. A good time to do it is after your final garden watering but before regular overnight freezes arrive. In many homes, the whole job takes less than 30 minutes.
Once everything is drained and covered, label the indoor shutoff valve so you can find it quickly next year. That small step makes this chore faster every fall and can save precious time if a pipe ever leaks.