How to Weatherstrip a Door to Stop Drafts
A drafty exterior door can make a room feel chilly in winter, hot in summer, and dusty all year. The good news is that most door drafts can be fixed with a few inexpensive supplies: weatherstripping around the jamb and a sweep at the bottom.
This guide walks through how to weatherstrip a door in a practical, beginner-friendly way. You do not need special carpentry skills, but you do need to measure carefully and make sure the door can still close and latch when you are done.
First, Find Where the Door Is Leaking
Before buying anything, check the whole door. Drafts often come from more than one spot, especially on older exterior doors.
- Look for daylight. Stand inside during the day with the door closed. If you can see light around the sides, top, or bottom, air can get through too.
- Use your hand. On a windy day, slowly move your hand around the door edges and feel for moving air.
- Try the paper test. Close the door on a piece of paper. If the paper slides out with almost no resistance, the seal is too loose in that spot.
- Check the latch side. If the door is not pulling tight against the stop, the strike plate or hinges may need a small adjustment before weatherstripping will work well.
Weatherstripping is meant for parts that move, like doors and operable windows. For cracks around fixed trim or gaps between the frame and wall, caulk or low-expansion window-and-door foam is usually the better fix.
Choose the Right Weatherstripping
There are several types of weatherstripping, and the best choice depends on your door, your budget, and how much wear the area gets.
For the Top and Sides
- Kerf-style foam or vinyl seal: Best if your door frame already has a narrow groove, called a kerf, around the stop. This is common on newer exterior doors. The fin presses into the groove and the soft bulb seals against the door.
- Self-adhesive foam tape: Easy and cheap, but not the longest-lasting option. It works best on clean, smooth surfaces and low-traffic doors.
- V-seal or tension seal: A folded vinyl or metal strip that springs against the door to block air. It can work well for narrow, uneven gaps.
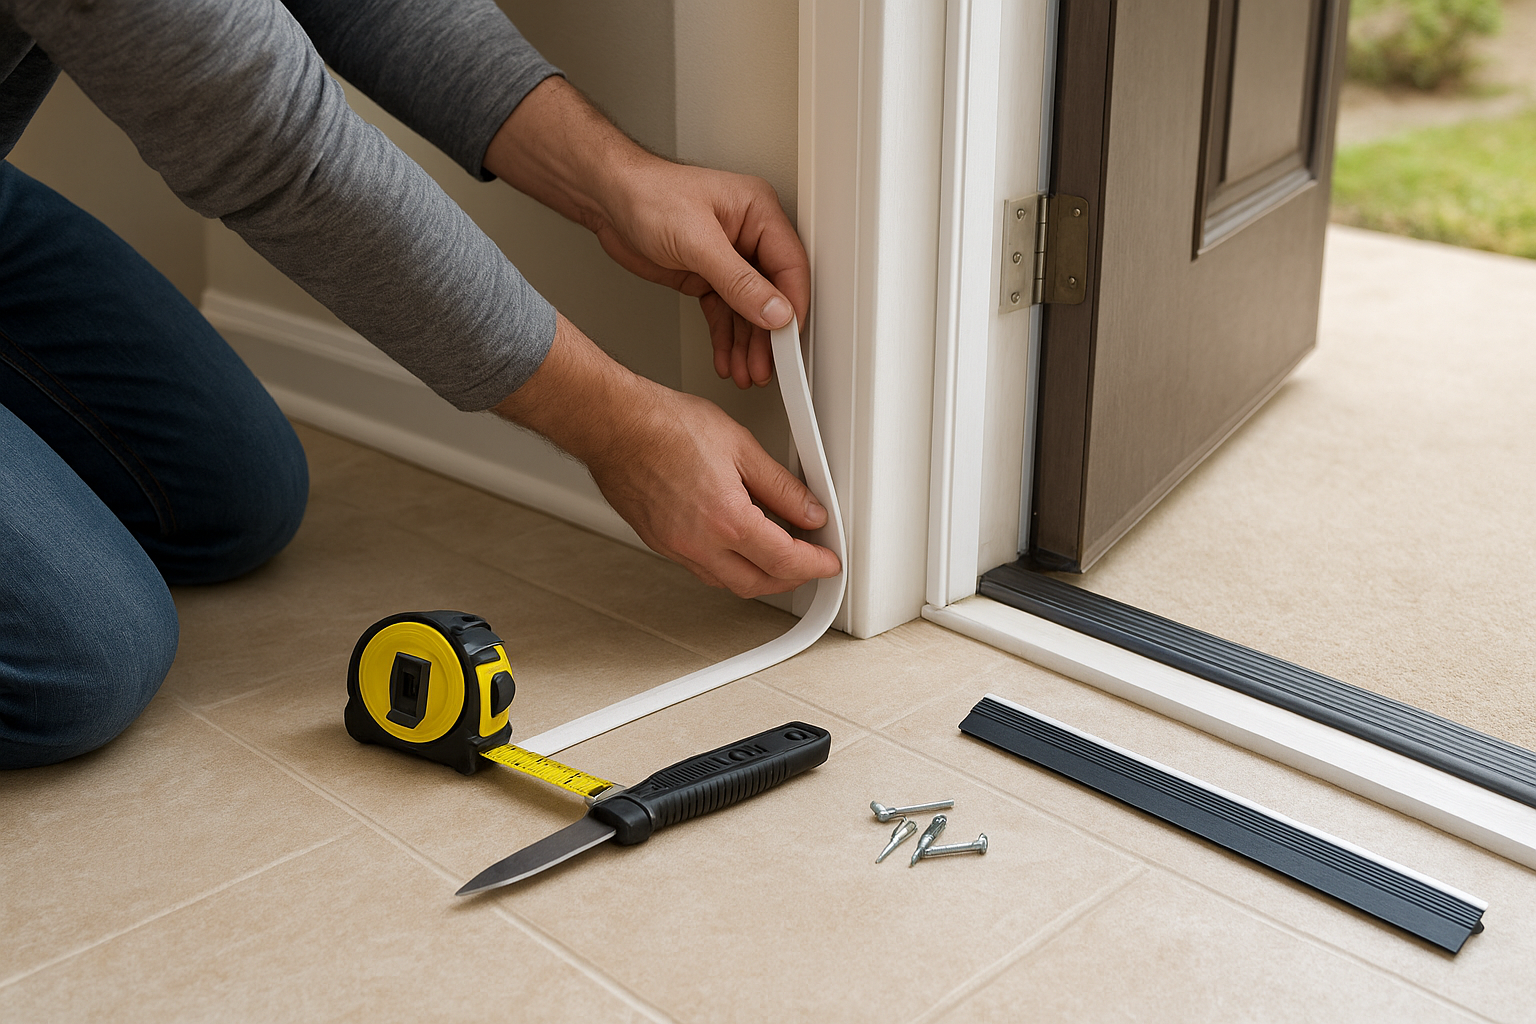
- Nail-on or screw-on door stop weatherstripping: A durable choice for older doors that do not have a kerf groove. It usually has a metal or wood carrier with a flexible vinyl bulb.
For the Bottom
The bottom of the door needs its own solution. A door sweep attaches to the door itself and lightly contacts the threshold. Common choices include vinyl, rubber, silicone, or brush sweeps. Many exterior doors use an aluminum sweep with a flexible insert.
If your threshold is very uneven, an adjustable sweep can help. If the door drags on carpet or a high threshold, look for a low-profile sweep or consider an automatic door bottom, which drops when the door closes and lifts when it opens.
Tools and Supplies
- Tape measure
- Pencil
- Utility knife or scissors
- Hacksaw or tin snips, if cutting a metal sweep
- Screwdriver or drill
- Cleaning cloth
- Mild cleaner or rubbing alcohol for adhesive-backed products
- Weatherstripping for the top and sides
- Door sweep for the bottom
Buy a little extra weatherstripping if possible. For most doors, you need enough for both sides and the top, plus a little waste for trimming. Measure twice before cutting, because short pieces leave gaps at the corners.
Step 1: Remove Old Weatherstripping
Open the door and pull off old, loose, cracked, or flattened weatherstripping. Kerf-style seals usually pull straight out of the groove. Adhesive foam may need to be scraped away gently with a putty knife.
Clean the surface before installing the new seal. Adhesive products stick best to clean, dry surfaces. If the jamb is dusty, greasy, or peeling, the strip may fail early. Let the area dry completely before moving on.
Step 2: Measure the Door Jamb
Measure the two vertical sides from the top corner down to the threshold. Then measure the top piece from side to side. Do not assume both sides are exactly the same length, especially in an older house.
If you are installing kerf-style weatherstripping, cut each piece slightly long at first. You can trim it for a snug corner after it is seated. For self-adhesive strips, cut clean square ends so the pieces meet tightly at the top corners.
Step 3: Install the Top and Side Weatherstripping
Start with the hinge side, then the latch side, then the top. The goal is a continuous seal that touches the door when it is closed without making the door hard to shut.
- Position the strip. For adhesive foam, place it on the door stop where the closed door presses against it. For kerf-style seal, press the fin into the groove by hand.
- Work slowly. Do not stretch foam or vinyl as you install it. Stretched material can shrink back later and leave gaps.
- Keep corners tight. The side pieces should meet the top piece with no open notch.
- Test the door. Close it gently. You should feel light compression, not a hard slam.
If the door suddenly will not latch, the weatherstripping may be too thick or placed too far forward. Do not force the door. Reposition the strip or use a thinner profile.
Step 4: Install the Door Sweep
Close the door and measure the width of the door, not the opening. Cut the sweep to fit. If it has a metal channel, use a hacksaw for the metal and a utility knife for the flexible insert.
Hold the sweep against the inside bottom edge of an in-swinging exterior door. The flexible part should touch the threshold lightly along the full width. It should not buckle, drag heavily, or prevent the door from opening.
- Mark the screw holes with a pencil.
- Drill small pilot holes if the door is wood or metal and the screws are hard to start.
- Attach the sweep loosely at first.
- Close the door and adjust the sweep until it seals evenly.
- Tighten the screws once the fit is right.
For an out-swinging exterior door, the sweep may belong on the exterior side, depending on the product. Follow the package directions and make sure it sheds water away from the door, not toward the inside.
Step 5: Check the Threshold and Corners
The corners at the bottom of the jamb are common trouble spots. If you still feel air near the lower corners after installing a sweep, the sweep may not meet the side weatherstripping well. Some door systems use small corner pads to close that gap.
Also look at the threshold. Many exterior thresholds have adjustment screws hidden under small caps. Turning them can raise or lower the threshold slightly so it meets the sweep better. Make small adjustments and test the door each time.
Common Mistakes to Avoid
- Using indoor foam outdoors. Exterior doors need material that can handle moisture, temperature changes, and repeated use.
- Making the seal too tight. Weatherstripping should compress when the door closes, but the door should still latch normally.
- Leaving gaps at the corners. Even a small opening can let in noticeable drafts.
- Ignoring hinge problems. A sagging door may need hinge screws tightened or replaced with longer screws before sealing.
- Caulking a moving joint. Do not caulk the gap where the door opens and closes. Use weatherstripping there.
When Weatherstripping Is Not Enough
If the door is warped, badly rotted, or visibly out of square, new weatherstripping may only help a little. The same is true if the frame has pulled away from the wall or the threshold is damaged. In those cases, you may need to repair the frame, replace the threshold, or consider a new prehung exterior door.
But for a typical drafty door, fresh weatherstripping and a properly adjusted sweep can make an immediate difference in comfort. Take your time, keep the seal continuous, and test the door as you go. A good fit should stop the draft without making the door a daily wrestling match.