How to Winterize Outdoor Faucets Before a Freeze
Outdoor faucets are easy to forget until the first hard freeze is in the forecast. A few minutes of fall prep can help prevent split pipes, cracked hose bibs, and messy leaks inside the wall when temperatures drop.
This guide walks through how to winterize outdoor faucets the practical way: disconnect the hose, shut off and drain the line if you can, cover the faucet, and know when a simple cover is not enough.
Why Outdoor Faucets Freeze
An outdoor faucet, also called a hose bib or spigot, sits at the edge of your home where cold air can reach the metal parts quickly. If water is trapped in the faucet, hose, or pipe behind the wall, it can freeze and expand. That pressure can crack fittings or split a pipe, and the damage may not show up until the ice thaws.
University extension guidance is very consistent on the basics: disconnect garden hoses, shut off water to exterior faucets when possible, and drain the pipe leading to the outdoor faucet before cold weather arrives. ([site.extension.uga.edu](https://site.extension.uga.edu/forsyth/protect-water-pipes-from-freezing/?utm_source=openai))
Supplies You May Need
- Foam outdoor faucet covers or insulated faucet socks
- Adjustable wrench or pliers, if hose fittings are stuck
- Bucket or towel for drips near the indoor shutoff
- Pipe insulation for exposed above-ground pipes
- Permanent tag or tape to label the indoor shutoff valve
Most homes only need inexpensive foam faucet covers and a few minutes of time. If you have exposed pipes, a crawl space, an older hose bib that drips, or no indoor shutoff valve, plan for a little extra protection.
Step 1: Disconnect Every Garden Hose
Start by removing hoses from all outdoor faucets, even if the faucet is frost-free. A connected hose can hold water at the outlet and keep the faucet from draining correctly. That trapped water can freeze inside the connection and damage the faucet.
After removing the hose, hold one end higher and walk the length of the hose to drain out as much water as possible. Coil it loosely and store it in a garage, shed, basement, or another spot where it will not sit full of ice all winter. If the hose fitting is stuck, avoid forcing it so hard that you twist the faucet in the wall. Use gentle pressure with pliers or an adjustable wrench, and support the faucet body with your other hand.
Step 2: Find the Indoor Shutoff Valve
Next, look inside the house for the shutoff valve that feeds the outdoor faucet. It is often in a basement, crawl space, utility room, garage, or under a sink near the outside wall. In many homes, each outdoor faucet has its own valve on the pipe leading to that spigot.
Turn the valve clockwise until it stops. If it is a lever-style ball valve, turn the handle so it is perpendicular to the pipe. Once you find it, label it. A simple tag that says “front hose bib” or “back outdoor faucet” makes this job much easier next fall.
If you cannot find a dedicated shutoff valve, do not shut off your whole house water just for this step unless you are comfortable restoring service and checking fixtures afterward. Instead, disconnect the hose, cover the faucet well, and consider asking a plumber about adding an interior shutoff with a drain port during a non-emergency visit.
Step 3: Open the Outdoor Faucet to Drain It
Once the indoor valve is off, go back outside and open the outdoor faucet all the way. Water left between the shutoff valve and the spigot should drain out. Leave the faucet open for several minutes, or until it stops dripping.
Some indoor shutoff valves have a small drain cap or bleeder port on the side. If yours does, place a bucket or towel underneath and carefully open that little cap to drain any remaining water from the line. Close the drain cap afterward, but leave the outdoor faucet open for the winter unless your plumbing setup calls for something different.
Step 4: Add an Insulated Faucet Cover
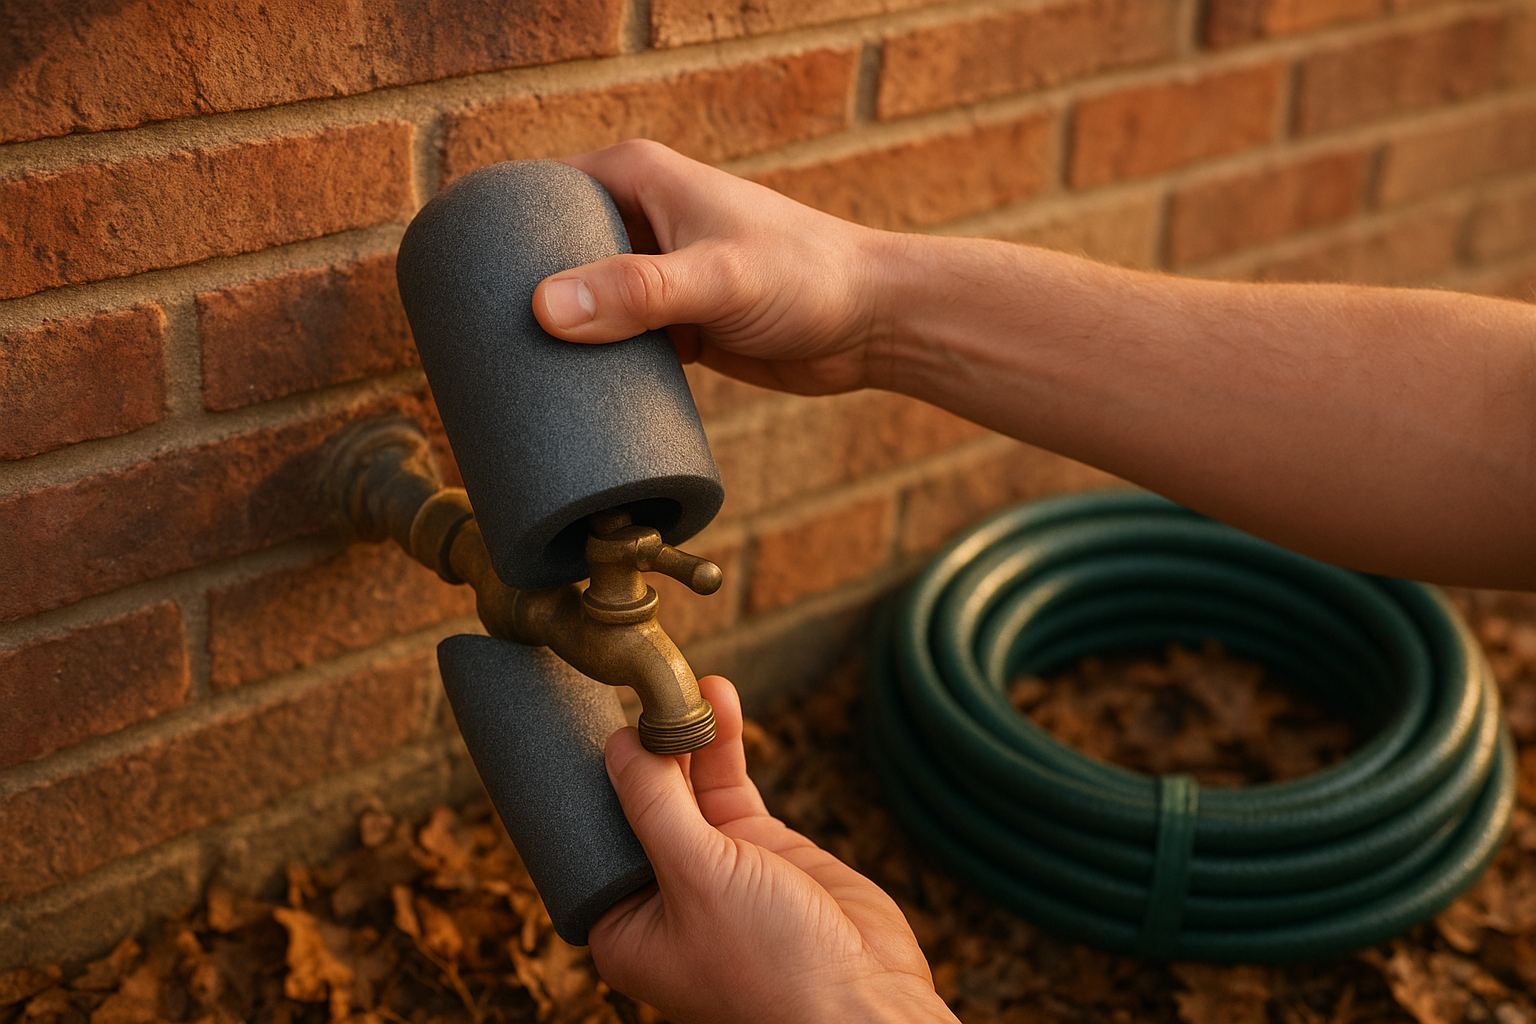
After the line is drained, install an insulated faucet cover. The common foam dome style slips over the faucet and tightens with a cord or loop inside. Pull it snug against the wall so cold air cannot blow behind it.
Faucet covers are not magic, but they are a useful extra layer. Portland Water Bureau recommends covering outdoor faucets and hose bibs with insulating covers to lower the risk of freezing, along with disconnecting hoses before freezing weather. ([portland.gov](https://www.portland.gov/water/prepare-winter?utm_source=openai))
If the faucet sticks out from siding, brick, or stone with gaps around the pipe, do not pack the wall opening with wet rags or anything that can hold moisture. Use proper exterior caulk or foam sealant for gaps around penetrations when the surface is dry and temperatures are suitable for the product.
What About Frost-Free Faucets?
A frost-free faucet has a long stem that shuts the water off farther inside the warm part of the house, not right at the outside handle. That design helps the outer portion drain after you turn it off. But it only works if the faucet was installed with a slight downward pitch toward the outside and if no hose is attached.
So yes, you should still disconnect hoses from frost-free faucets. In colder climates, many homeowners also add a foam cover as cheap insurance, especially on north-facing walls, windy corners, unheated garages, or older installations.
If You Do Not Have an Indoor Shutoff
Some homes, especially in milder climates, do not have dedicated indoor shutoffs for outdoor faucets. In that case, your best routine is:
- Disconnect and drain the hose.
- Make sure the faucet is fully turned off and not dripping.
- Cover the faucet with a snug insulated cover.
- Insulate any exposed pipe leading to the faucet.
- During severe cold, check the area regularly for leaks or ice buildup.
If the faucet drips after you close it, repair it before winter if possible. A slow drip can freeze on the outside, and it may also mean the valve is not sealing well.
Do Not Forget Exposed Pipes and Backflow Devices
If you have above-ground irrigation pipes, a backflow preventer, or exposed plumbing near a hose bib, those parts need attention too. Wrap exposed pipes with appropriate pipe insulation, and follow your irrigation system’s winterizing instructions. Some sprinkler systems need professional blowout service before freezing weather.
For a simple hose bib, do not overcomplicate it. For irrigation backflow assemblies and sprinkler lines, however, shutting off the controller is not the same as removing water from the system.
Common Mistakes to Avoid
- Leaving the hose attached: This is the big one. Even a frost-free faucet can be damaged if a hose traps water at the outlet.
- Closing the outdoor faucet after draining: If the indoor shutoff is closed, leaving the outside faucet open gives any remaining water a place to expand or drain.
- Relying only on a cover: A cover helps, but draining the line is better when your home has an indoor shutoff.
- Ignoring a dripping spigot: A leak before winter can become a bigger problem during a freeze.
- Forgetting side yards and garages: Walk the whole exterior. Many homes have more hose bibs than people remember.
Quick Outdoor Faucet Winterizing Checklist
- Walk around the house and locate every outdoor faucet.
- Remove all hoses, splitters, timers, and spray nozzles.
- Drain hoses and store them out of the weather.
- Turn off the indoor shutoff valve for each exterior faucet.
- Open the outdoor faucet and let the line drain.
- Open the small bleeder cap at the indoor valve if your setup has one.
- Install a snug foam or insulated faucet cover.
- Check exposed pipes, crawl spaces, and irrigation parts for needed insulation.
When to Call a Plumber
Call a plumber if the indoor shutoff will not turn, the outdoor faucet keeps dripping after the shutoff is closed, the faucet feels loose in the wall, or you see water stains indoors near the spigot. It is also worth getting help if you want to add shutoff valves, replace old hose bibs with frost-free models, or winterize a sprinkler system with compressed air.
The best time to winterize outdoor faucets is before the first hard freeze, not while you are rushing around in the dark with a flashlight. Once you make it part of your fall routine, it becomes a quick, simple job that can save a lot of trouble later.