How to Clean Refrigerator Coils in 20 Minutes
If your refrigerator seems to run constantly, feels warm around the bottom, or struggles to keep food cold, dusty condenser coils may be part of the problem. The good news: learning how to clean refrigerator coils is a simple home maintenance job that usually takes about 20 minutes and needs only a vacuum, a brush, and a little care.
Condenser coils release heat from the refrigerator. When they’re covered in dust, lint, and pet hair, the appliance has to work harder to do its job. ENERGY STAR recommends keeping condenser coils clean, especially on older refrigerators, and leaving a few inches of space between the wall and the refrigerator for airflow. ([energystar.gov](https://www.energystar.gov/products/refrigerators?utm_source=openai))
How Often Should You Clean Refrigerator Coils?
For most homes, clean the coils every 6 to 12 months. The U.S. Department of Energy’s Building America Solution Center gives that same 6- to 12-month range to help the refrigerator cool quickly, save energy, and last longer. ([basc.pnnl.gov](https://basc.pnnl.gov/diy-guides/clean-refrigerator-condenser-coils?utm_source=openai))
You may want to clean them closer to every 6 months if you have shedding pets, a dusty kitchen, a refrigerator in a garage, or a model with coils underneath near the floor. If you live alone, have no pets, and keep the kitchen relatively dust-free, once a year may be enough.
What You’ll Need
- Vacuum with hose and crevice or brush attachment
- Refrigerator condenser coil brush or long flexible appliance brush
- Microfiber cloth or old towel
- Flashlight
- Screwdriver, only if your toe grille or rear panel requires one
- Work gloves, optional but helpful
A condenser coil brush is inexpensive and worth keeping with your cleaning supplies. ENERGY STAR notes that coil cleaning brushes are available at most hardware stores. ([energystar.gov](https://www.energystar.gov/products/refrigerators?utm_source=openai))
Step 1: Find the Coils
Refrigerator coils are usually in one of three places:
- Behind the toe grille at the front bottom: Common on many modern refrigerators.
- Across the back of the refrigerator: Common on some older or simpler models.
- Underneath the refrigerator: Often reached from the front after removing the lower grille.
If you still have your owner’s manual, check it first. If not, look for a removable grille at the bottom front, then carefully pull the refrigerator forward and check the back. GE Appliances notes that if a refrigerator runs but is not cold enough, cleaning the condenser coils may be needed, and the coils may be accessed depending on the model design. ([products.geappliances.com](https://products.geappliances.com/appliance/gea-support-search-content?contentId=16266&utm_source=openai))
Step 2: Unplug the Refrigerator
Before you put a brush, vacuum attachment, or hand anywhere near the coils, unplug the refrigerator. GE Appliances specifically advises unplugging the refrigerator before maintenance or cleaning to reduce the risk of electric shock. ([products.geappliances.com](https://products.geappliances.com/appliance/gea-support-search-content?contentId=16266&utm_source=openai))
Don’t worry about the food for a short cleaning job. Keep the doors closed while you work, and the refrigerator should hold its temperature well enough for the 15 to 20 minutes this usually takes. If you expect the job to take longer, place highly perishable items in a cooler.
Step 3: Pull the Fridge Out Carefully
If your coils are on the back, pull the refrigerator straight out from the wall. Go slowly so you do not scratch the floor, kink the water line, or tug the power cord. If your fridge has an ice maker or water dispenser, check the water line behind it before moving it too far.
For hard floors, slide a towel or appliance glides under the front feet if needed. For built-in or cabinet-depth refrigerators, consult the manual before moving anything; some units have special installation requirements.
Step 4: Remove the Grille or Access Panel
If the coils are behind the front toe grille, gently pull the grille off. Some snap in place; others may have screws. Set the grille and screws aside where they won’t get kicked under the cabinet.
If there is a rear cardboard or metal access panel, remove only the panel intended for routine access. Do not force sealed panels open or remove anything that looks like it protects wiring, refrigerant lines, or controls. When in doubt, stop and check the manual.
Step 5: Vacuum Loose Dust First
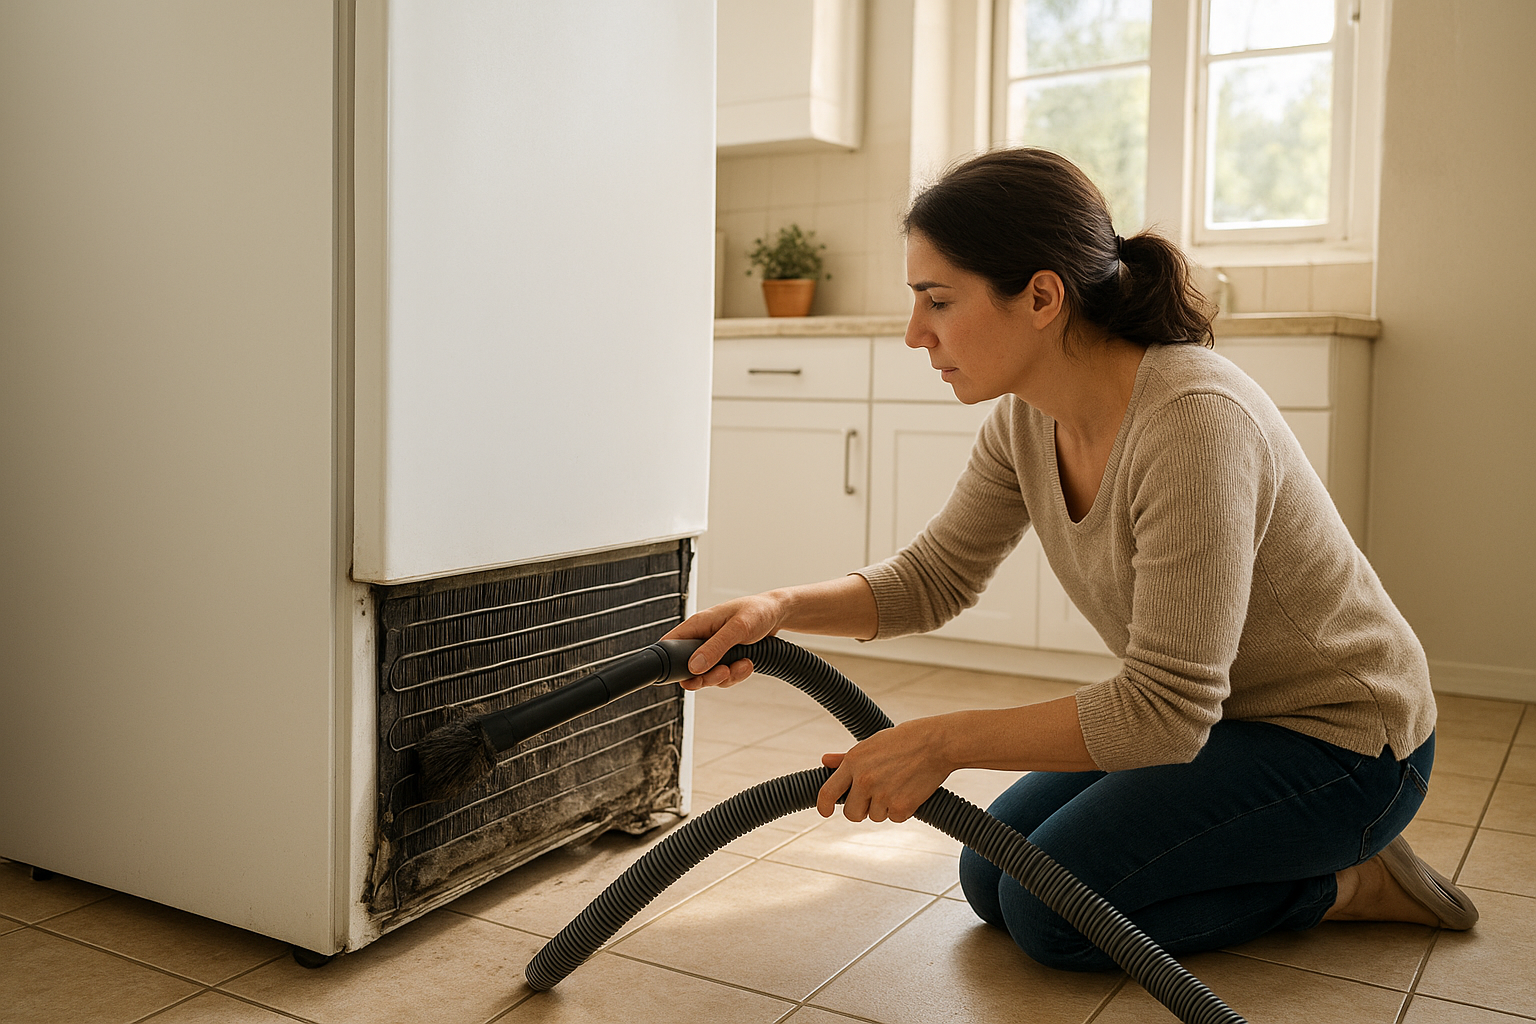
Start with the vacuum. Use the hose attachment to remove loose dust, crumbs, pet hair, and lint from the floor, grille, and the open area around the coils. If the coils are underneath, use a crevice attachment and a flashlight so you can see what you’re doing.
Work gently. The goal is to remove debris, not bend fins or knock anything loose. Do not use a wet cloth on the coils, and do not spray cleaner into the refrigerator’s mechanical area.
Step 6: Brush Between the Coils
Next, use the condenser coil brush. Slide it gently between and around the coils, then pull it back out. Vacuum what falls loose. Repeat this brush-and-vacuum pattern until you stop pulling out heavy dust.
GE recommends wiping dust, dirt, and pet hair from condenser coils with a refrigerator condenser cleaning coil brush. ([products.geappliances.com](https://products.geappliances.com/appliance/gea-support-search-content?contentId=16266&utm_source=openai)) A long brush is especially useful for the compact, hard-to-reach coils underneath many refrigerators.
Step 7: Clean the Grille, Floor, and Nearby Area
Before you put everything back, vacuum the floor where the refrigerator sits. Dust often collects behind and under the appliance, and it will quickly get pulled back toward the coils if you leave it there.
Wash or wipe the toe grille if it is greasy or dusty, then dry it completely before reinstalling it. If the grille openings are clogged with lint, the fridge may have trouble pulling in enough air.
Step 8: Reassemble and Plug It Back In
Replace the grille or access panel, move the refrigerator back into position, and plug it in. Leave a little breathing room behind it if your kitchen layout allows. ENERGY STAR suggests leaving a few inches between the refrigerator and wall to support airflow. ([energystar.gov](https://www.energystar.gov/products/refrigerators?utm_source=openai))
Listen for the refrigerator to restart. It may run for a while as temperatures stabilize, especially if the doors were opened or the unit was unplugged for several minutes.
Signs Your Coils Needed Cleaning
- The refrigerator was running more often than usual.
- The kitchen floor near the fridge had visible dust and pet hair.
- The front grille was fuzzy or clogged.
- The fridge felt warmer than normal around the bottom or back.
- Food wasn’t staying as cold as expected.
Dirty coils are not the only reason a refrigerator struggles, but they are one of the easiest problems to check. If the fridge still does not cool properly after cleaning, confirm the temperature settings, make sure vents inside are not blocked by food, and check that the door seals close tightly.
Safety Tips and Mistakes to Avoid
- Do unplug first. This is the most important safety step.
- Don’t use water on the coils. Dry brushing and vacuuming are enough.
- Don’t bend the fins. Be gentle with the brush and vacuum tools.
- Don’t yank the fridge forward. Watch for water lines, cords, and flooring.
- Don’t ignore the manual. Some newer or built-in models have specific access instructions.
Make It a Twice-a-Year Habit
The easiest way to remember this chore is to pair it with seasonal maintenance: clean refrigerator coils in spring and fall, or whenever you change smoke detector batteries. Add it to your calendar, especially if you have pets.
It is not a glamorous job, but it is satisfying. In less time than it takes to mop the kitchen, you can clear out a hidden layer of dust and help one of the hardest-working appliances in your home run more efficiently.