How to Winterize Outdoor Faucets Before a Freeze
Outdoor faucets are easy to forget until the first hard freeze is already in the forecast. A few minutes of fall prep can help prevent frozen hose bibs, cracked fittings, and surprise leaks inside the wall when you turn the water back on in spring.
The good news: learning how to winterize outdoor faucets is simple, and most homes only need a short checklist. Do it before freezing weather arrives, especially if you still have hoses, splitters, timers, or sprayers attached.
Why Outdoor Faucets Freeze
Water expands when it freezes, and any trapped water in or near an exterior faucet can put pressure on the pipe, valve, or hose bib. Extension guidance from the University of Georgia recommends disconnecting garden hoses from exterior faucets, then shutting off and draining the faucet line where possible to help prevent freeze damage. ([site.extension.uga.edu](https://site.extension.uga.edu/forsyth/protect-water-pipes-from-freezing/?utm_source=openai))
The most common mistake is leaving a hose connected. A hose can hold water against the faucet and keep a frost-free spigot from draining the way it was designed to. Even if your faucet is labeled frost-free, remove anything attached to it before winter.
What You’ll Need
- Bucket or towel
- Adjustable wrench or pliers, if hose fittings are stuck
- Foam outdoor faucet covers or insulated faucet socks
- Pipe insulation for exposed indoor lines, if needed
- Penetrating oil, optional for stubborn hose couplings
- Labels or painter’s tape for marking shutoff valves
Step 1: Disconnect Every Hose and Attachment
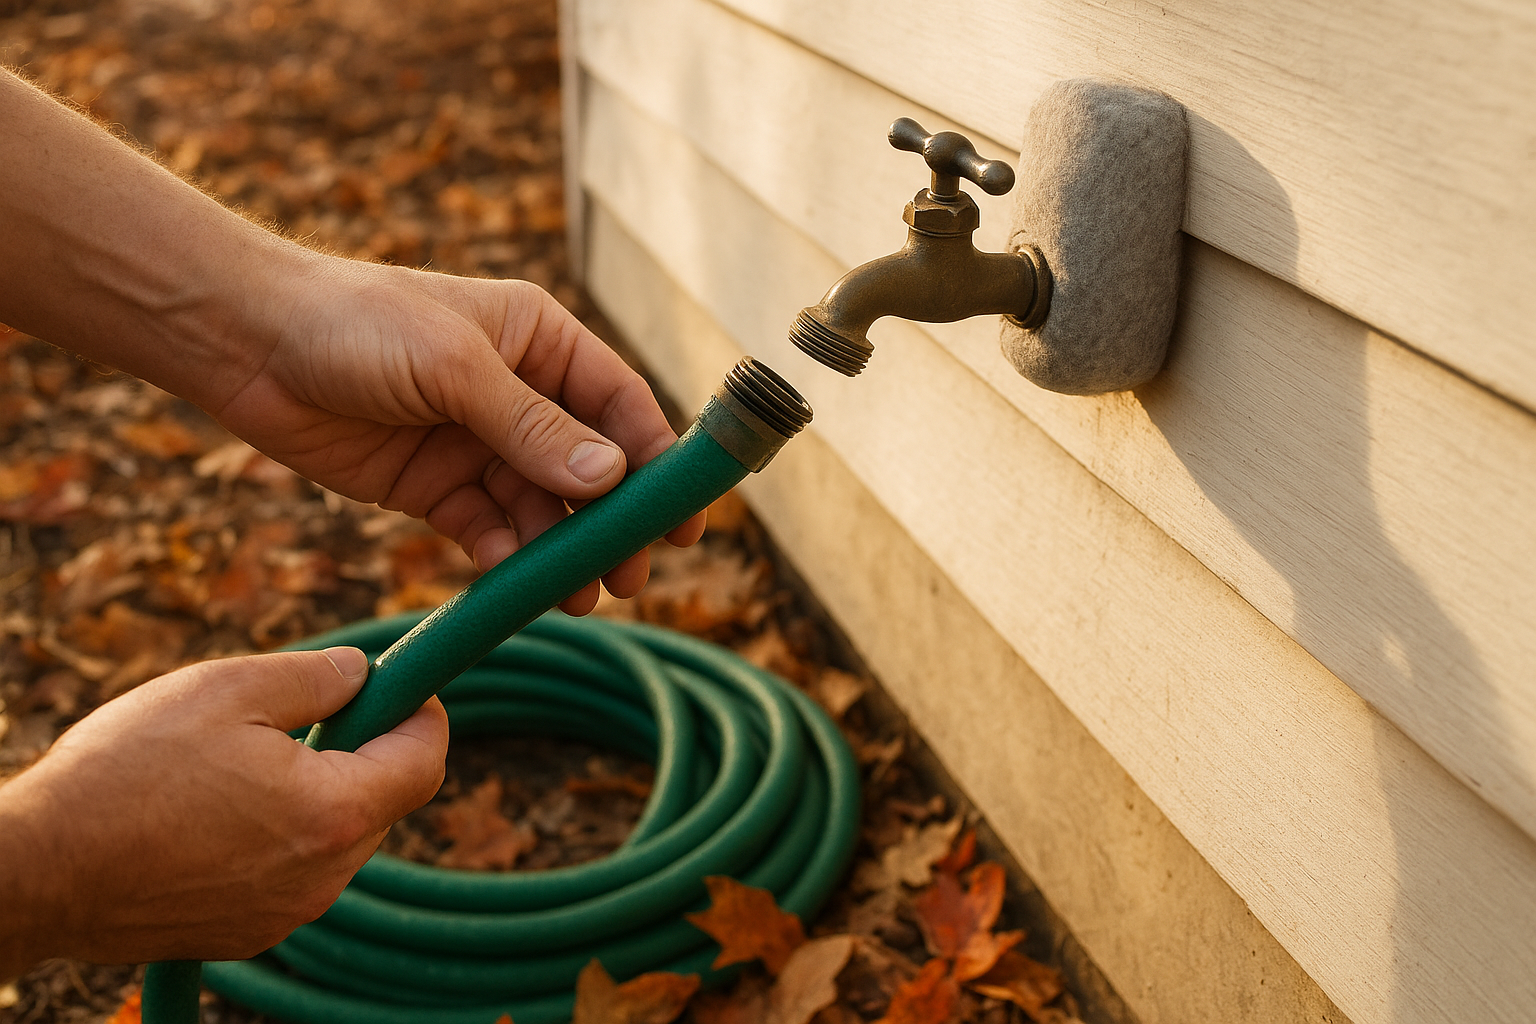
Start outside. Remove garden hoses, watering wands, Y-splitters, quick-connect fittings, hose timers, backflow add-ons, and any decorative faucet extenders. Do this for every outdoor faucet, including ones on garages, sheds, patios, decks, and crawlspace walls.
If a hose is stuck, do not force it so hard that you twist the faucet body or pipe in the wall. Hold the faucet steady with one hand or a second wrench, then loosen the hose coupling with pliers. If it will not budge, spray the connection with penetrating oil, wait a few minutes, and try again.
Step 2: Drain and Store the Hoses
Once the hose is off, drain it fully. Lay it downhill if you can, or walk the hose from one end to the other, lifting sections as you go so water runs out. A hose stored full of water can split after freezing, and metal fittings can crack or corrode.
Coil hoses loosely and store them in a garage, shed, basement, or other protected spot. If you use hose timers, remove the batteries and bring the timers indoors. Small plastic irrigation parts are especially vulnerable to freeze damage.
Step 3: Find the Indoor Shutoff Valve
Many homes in cold-winter areas have indoor shutoff valves for outdoor faucets. Look in the basement, crawlspace, utility room, garage, or under a sink near the wall where the faucet exits the house. The valve may be a round handle or a small lever on the pipe leading to the outdoor spigot.
Turn the indoor valve off. Then go back outside and open the outdoor faucet all the way. Let the water drain into a bucket or onto the ground. Leaving the outdoor faucet open after the indoor valve is shut allows leftover water to escape instead of being trapped in the line.
If you find multiple shutoffs, label them now. A small tag that says “front hose bib” or “back patio faucet” saves time next fall and helps anyone in the house respond quickly if there is ever a leak.
Step 4: Use the Bleeder Cap if Your Valve Has One
Some indoor shutoff valves have a small bleeder cap or drain port on the side. After the main shutoff is closed and the outside faucet is open, place a towel or bucket under the valve and carefully loosen the bleeder cap to drain the last bit of water from the line.
Retighten the cap once the line stops dripping. Do not overtighten it; snug is enough. If the cap is corroded, leaking, or hard to move, leave it alone and call a plumber rather than breaking a small fitting before winter.
Step 5: Add an Outdoor Faucet Cover
After the faucet is disconnected and drained, add a foam cover or insulated faucet sock. These covers are inexpensive and reusable, and they help reduce direct exposure to freezing wind and cold air. They are not a substitute for draining a vulnerable line, but they are useful extra protection.
To install a hard foam cover, place the loop or cord over the faucet handle, pull the cover tight to the wall, and secure it so there are no large gaps. For a soft insulated sock, slide it fully over the faucet and cinch it closed. Make sure the cover sits flat against the siding, brick, or foundation as much as possible.
What If You Have Frost-Free Outdoor Faucets?
Frost-free faucets, also called frost-proof sillcocks, shut off water farther inside the house rather than right at the exterior wall. That design helps the faucet drain away from the coldest area. But it only works if the faucet can actually drain.
That means you should still disconnect hoses and attachments every fall. If a hose stays attached, water can remain trapped in the faucet assembly and freeze. A cover is still a smart backup, especially on north-facing walls, windy corners, unheated garages, or older installations.
What If There Is No Indoor Shutoff?
If you cannot find a dedicated indoor shutoff, you may have a frost-free faucet, or your home may simply not have one installed. In that case, disconnect hoses, drain the faucet as much as possible, and use a well-fitting insulated cover.
For older homes, exposed crawlspace plumbing, or faucets on unheated garage walls, consider having a plumber add an indoor shutoff with a drain port. It is a practical upgrade if your area gets freezing weather every year.
Quick Outdoor Faucet Winterizing Checklist
- Remove hoses and attachments. Do not leave timers, splitters, sprayers, or quick-connects on the faucet.
- Drain hoses completely. Coil and store them out of the weather.
- Close the indoor shutoff valve. Look in the basement, crawlspace, garage, or utility area.
- Open the outdoor faucet. Let remaining water drain out.
- Drain the bleeder cap if present. Use a bucket and retighten gently.
- Install a faucet cover. Make sure it is snug against the wall.
Common Mistakes to Avoid
- Leaving a hose attached “just one more week.” Early cold snaps can arrive before you expect them.
- Assuming frost-free means maintenance-free. Frost-free faucets still need hoses removed.
- Closing the outdoor faucet after draining. If the indoor valve is off, leaving the outdoor faucet open helps avoid trapped water.
- Using only a cover on a non-drained line. Covers help, but they do not remove water from the pipe.
- Forgetting garage faucets. Garages can freeze, especially near exterior walls.
When to Call a Plumber
Call a plumber if the faucet spins in the wall, the indoor shutoff will not close, you see corrosion or dripping around the valve, or you suspect the pipe has already frozen. Also get help if an outdoor faucet leaks inside the wall when turned on in spring. That can mean the pipe split over winter and only leaks when pressurized.
For most homes, though, winterizing outdoor faucets is a simple fall chore: disconnect, drain, shut off, and cover. Put it on your seasonal checklist before the first freeze, and you will head into winter with one less thing to worry about.