How to Test Garden Soil in Fall Before Spring Planting
If your spring garden struggled this year, fall is the best time to stop guessing and look at what is happening underground. A simple soil test can tell you your soil pH and nutrient levels before you spend money on lime, fertilizer, compost, or new plants.
Here is how to test garden soil in fall the practical way: where to sample, how deep to dig, what to send to a lab, and what to do when the results come back.
Why Fall Is a Good Time to Test Garden Soil
Fall soil testing gives you breathing room. Extension guidance commonly recommends testing several months before planting or fertilizing, and fall or winter testing works well for spring vegetable gardens and flower beds. That timing allows you to apply lime or other recommended amendments early enough for them to begin reacting in the soil before the next growing season. ([content.ces.ncsu.edu](https://content.ces.ncsu.edu/a-gardeners-guide-to-soil-testing?utm_source=openai))
Fall is also convenient because many beds are cleared after harvest. You can reach the soil without stepping over tomatoes, squash vines, or annual flowers, and you can make corrections before spring garden centers start tempting you with seedlings.
What a Soil Test Can Tell You
A basic garden soil test usually measures soil pH and major nutrients, and it may include recommendations for lime and fertilizer based on what you plan to grow. Soil pH matters because it affects how available nutrients are to plant roots; Cornell notes that many crops grow best around a slightly acidic to neutral range, roughly 6.2 to 7.2. ([blogs.cornell.edu](https://blogs.cornell.edu/soilnow/ph/how-to-test-soil-ph/?utm_source=openai))
That does not mean every bed should be pushed to the same number. Blueberries, azaleas, and rhododendrons prefer more acidic soil, while many vegetables are happiest closer to neutral. This is why it is better to test and amend for the plants you actually want to grow instead of sprinkling lime or fertilizer everywhere.
Home Test Kit or Lab Test?
For a quick rough check, an at-home pH kit can be useful. But for planning a vegetable garden, lawn repair, fruit planting, or a new perennial bed, a lab test is more helpful because it can give nutrient readings and specific amendment recommendations. Many state Cooperative Extension offices can direct homeowners to soil testing labs or provide submission boxes and forms. ([hort.extension.wisc.edu](https://hort.extension.wisc.edu/soil-testing-for-successful-gardens/?utm_source=openai))
If you only do one thing, choose a lab test for your main growing area. Guessing wrong can waste money and create bigger problems, especially with phosphorus, potassium, or lime.
What You Need to Collect a Soil Sample
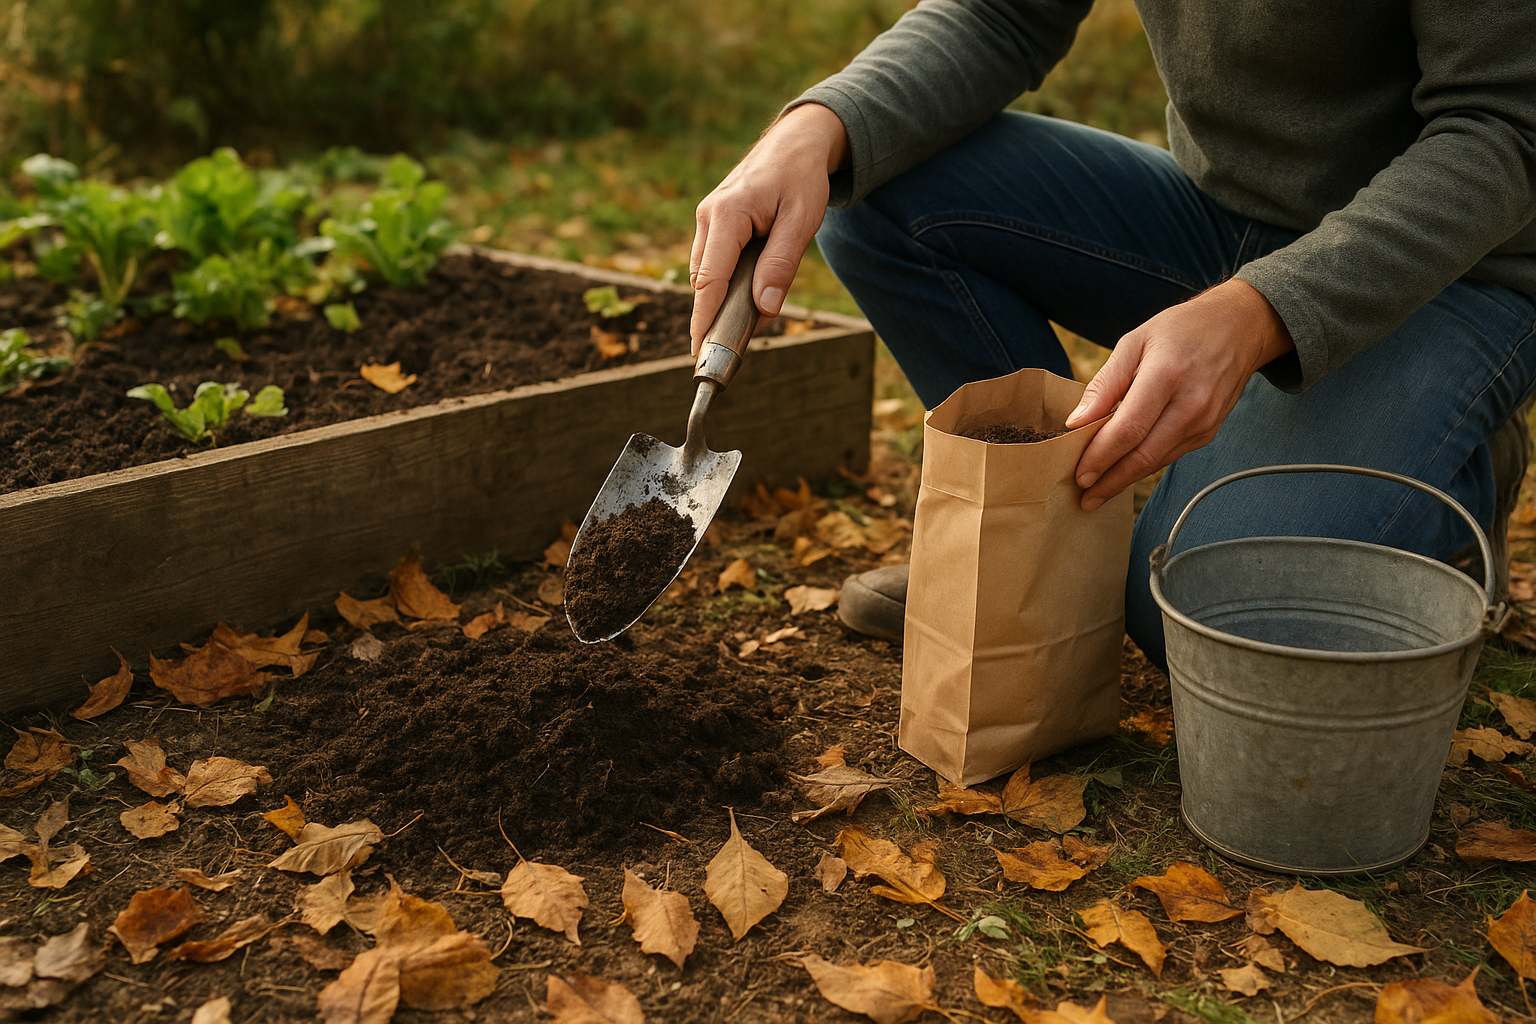
- A clean trowel, soil probe, or shovel
- A clean plastic bucket
- A paper bag, soil test box, or lab-approved sample bag
- A permanent marker
- A notebook or phone note for labeling garden areas
Avoid using a rusty bucket, fertilizer bucket, or container that once held chemicals. You want the sample to represent your soil, not residue from something else.
Step-by-Step: How to Test Garden Soil in Fall
1. Divide the yard into separate testing areas
Do not mix soil from the lawn, vegetable garden, rose bed, blueberry bed, and foundation planting into one sample. Different areas often have different fertilizer histories, soil textures, drainage, and pH. Extension guidance recommends sampling distinct areas separately, such as a lawn and a vegetable garden. ([extension.oregonstate.edu](https://extension.oregonstate.edu/catalog/ec-628-guide-collecting-soil-samples-farms-gardens?reference=catalog&utm_source=openai))
Good sample labels might be “front lawn,” “raised vegetable bed,” “new berry patch,” or “south perennial border.” If one corner of a bed has been doing poorly, sample it separately from the healthy area instead of blending them together.
2. Clear away mulch and debris
Pull aside mulch, leaves, grass clippings, stones, and plant stems before digging. Wisconsin Extension advises sampling soil only, not surface mulch or vegetation. ([hort.extension.wisc.edu](https://hort.extension.wisc.edu/soil-testing-for-successful-gardens/?utm_source=openai))
3. Dig to the right depth
For most vegetable gardens and flower beds, collect soil from the root zone, often the top 5 to 7 inches. Cornell describes garden soil sampling as generally the top 6 inches, while Wisconsin recommends the top 5 to 7 inches for garden sampling. ([blogs.cornell.edu](https://blogs.cornell.edu/soilnow/ph/how-to-test-soil-ph/?utm_source=openai))
For established lawns, sample shallower. Some Extension resources recommend about 3 to 4 inches for lawns and turf because that better represents the active root and amendment zone. ([ask.extension.org](https://ask.extension.org/kb/faq.php?id=414348&utm_source=openai))
4. Take several small samples, not one scoop
One scoop from one spot is not enough. Walk through the bed in a zigzag pattern and collect several thin slices or cores from different locations. Put them all in your clean bucket. Rutgers Extension recommends collecting multiple subsamples at random locations within the area to get a representative sample. ([extension.rutgers.edu](https://extension.rutgers.edu/soil-testing-lab/residential?utm_source=openai))
For a small raised bed, 5 to 8 subsamples may be enough. For a larger in-ground vegetable garden, aim for 10 to 15 small subsamples. Skip odd spots unless you are testing them separately, such as right beside a compost pile, under a burn pile, near a downspout, or where fertilizer spilled.
5. Mix, dry if needed, and package
Break up clumps and mix the subsamples together in the bucket. Remove roots, rocks, worms, and plant pieces. If the soil is wet, spread it on clean newspaper or a clean tray and let it air-dry indoors. Do not bake it in the oven.
Once mixed, fill the soil test bag or box according to the lab’s directions. Many labs need only a small portion of the mixed soil, not the whole bucket. Label it clearly with the garden area and the crop you plan to grow.
What to Write on the Soil Test Form
Be specific about the planting area. “Vegetable garden” will produce more useful recommendations than “yard.” If the form lets you choose a crop or planting type, choose the closest match: vegetable garden, lawn, fruit trees, berries, annual flowers, perennial border, or shrubs.
If you are starting a new bed, note that too. New beds often need different recommendations than long-established gardens that have received years of compost and fertilizer.
How to Use the Results
If the pH is too low
Low pH means acidic soil. A test report may recommend lime to raise pH. Apply only the amount recommended for your soil and planting type. More is not better, and adding lime when you do not need it can make some nutrients less available.
If the pH is too high
High pH means alkaline soil. This can be harder to change, especially in regions with naturally alkaline soils or irrigation water. Your report may recommend sulfur or suggest plant choices that tolerate your soil. Follow local guidance carefully because changing pH downward takes time.
If nutrients are low
Use the report to choose fertilizer instead of buying a general-purpose product blindly. If nitrogen is needed, that is often handled closer to planting time because it moves through soil more readily than some other nutrients. Phosphorus and potassium recommendations depend heavily on your actual test levels.
If nutrients are high
This is just as important. A high nutrient reading may mean you should skip certain fertilizers for a while. Overapplying nutrients wastes money and can contribute to runoff problems.
Common Soil Testing Mistakes to Avoid
- Testing right after fertilizing: Wait long enough for fertilizer to move into the soil, or your sample may not reflect normal conditions.
- Mixing different beds together: A lawn and vegetable garden need separate samples.
- Sampling only the problem spot: Test problem areas separately, but do not let one bad corner represent the whole garden.
- Forgetting to label samples: Once soil is bagged, every sample looks the same.
- Adding lime without a test: Lime changes pH and should be used only when needed.
How Often Should You Test?
You do not need to test every bed every year unless you are troubleshooting a problem or growing intensively. NC State Extension notes that if pH and nutrient levels are in the desired range, annual testing may not be necessary. Many home gardeners do well testing every few years, or before starting a new bed. ([content.ces.ncsu.edu](https://content.ces.ncsu.edu/a-gardeners-guide-to-soil-testing?utm_source=openai))
Try to test at about the same time of year when comparing results over time. Cornell recommends sampling around the same season when monitoring pH changes, which makes your records more useful. ([blogs.cornell.edu](https://blogs.cornell.edu/soilnow/ph/how-to-test-soil-ph/?utm_source=openai))
A Simple Fall Soil Testing Plan
- Choose one or two priority areas, such as the vegetable garden and front lawn.
- Collect separate samples on a dry fall day.
- Send them to a lab or your Extension-recommended testing service.
- Read the report before buying lime, fertilizer, or soil amendments.
- Apply fall-safe amendments as directed, and save spring fertilizers for planting time if recommended.
Soil testing is not flashy, but it is one of the most useful fall garden chores you can do. A half hour with a trowel and bucket can help you grow healthier plants, avoid unnecessary products, and start spring with a plan instead of a guess.