How to Divide Daylilies in Late Summer
If your daylilies made plenty of leaves this year but fewer flowers, the clump may be crowded. Late summer is one of the handiest times to divide daylilies because flowering is mostly finished, the soil is still warm, and the new pieces have time to root before winter.
This is a satisfying garden job: one tired-looking clump can become several healthy plants for edging a path, filling bare spots, or sharing with a neighbor. Here is how to divide daylilies without turning it into an all-day wrestling match.
When to Divide Daylilies
Daylilies are forgiving perennials, but timing still matters. University extension sources commonly recommend dividing them in spring or in late summer to early fall. Iowa State University Extension notes that when dividing in late summer, cutting the foliage back to 6 to 8 inches makes the job easier, while Purdue Extension says late-summer or early-fall planting gives daylilies time to establish roots before cold weather. ([yardandgarden.extension.iastate.edu](https://yardandgarden.extension.iastate.edu/faq/when-can-i-divide-daylilies?utm_source=openai))
For many gardens, that means after the main bloom show has ended and before the first hard freeze is close. In colder zones, aim for late August or early September. In warmer climates, you may have a little more breathing room, but avoid doing this during a heat wave if you can.
Signs a Daylily Clump Needs Dividing
You do not need to divide daylilies every year. In fact, many clumps bloom happily for years with very little fuss. Divide when the plant is showing clear signs that it has outgrown its spot.
- Fewer flowers than usual: A crowded clump often produces lots of leaves but fewer blooms.
- A dead or thin center: The middle of the clump may look woody, bare, or less vigorous.
- Plants are spilling into paths or neighbors: Daylilies expand steadily and can crowd nearby perennials.
- Flower stems are shorter or weaker: Competition for water and nutrients can reduce overall performance.
- You want more plants: Division is the easiest free way to repeat a favorite daylily around the yard.
Tools and Supplies
Gather everything before you dig. The less time the roots spend sitting in the sun, the better.
- Sharp spade or garden fork
- Hand pruners or garden scissors
- Bucket of water or hose
- Compost or well-rotted organic matter
- Mulch
- Watering can or hose with a gentle spray
- Gloves, especially for large, tough clumps
A garden fork is helpful because it loosens the soil with less slicing than a shovel. Still, an old, congested clump may need a sharp spade or knife to separate it.
Step 1: Water the Day Before
Water the clump well the day before you plan to divide it, especially if the weather has been dry. Moist soil is easier to dig, and hydrated roots handle the stress of lifting and replanting better.
If possible, choose an overcast day or work in the morning or evening. The University of Minnesota Extension recommends dividing perennials on a cloudy day because hot sun can dry plants out quickly. ([extension.umn.edu](https://extension.umn.edu/gardening-minnesota/dividing-perennials?utm_source=openai))
Step 2: Cut Back the Leaves
Use pruners to trim the daylily foliage to about 6 to 8 inches tall. This does not hurt the plant, and it gives you a better handle on the clump. It also reduces water loss while the divided plants are settling into their new spots.
Do not cut all the way down to the crown. Leave enough leaf fan to show you where each growing point is and to help the plant keep functioning after replanting.
Step 3: Dig Up the Whole Clump
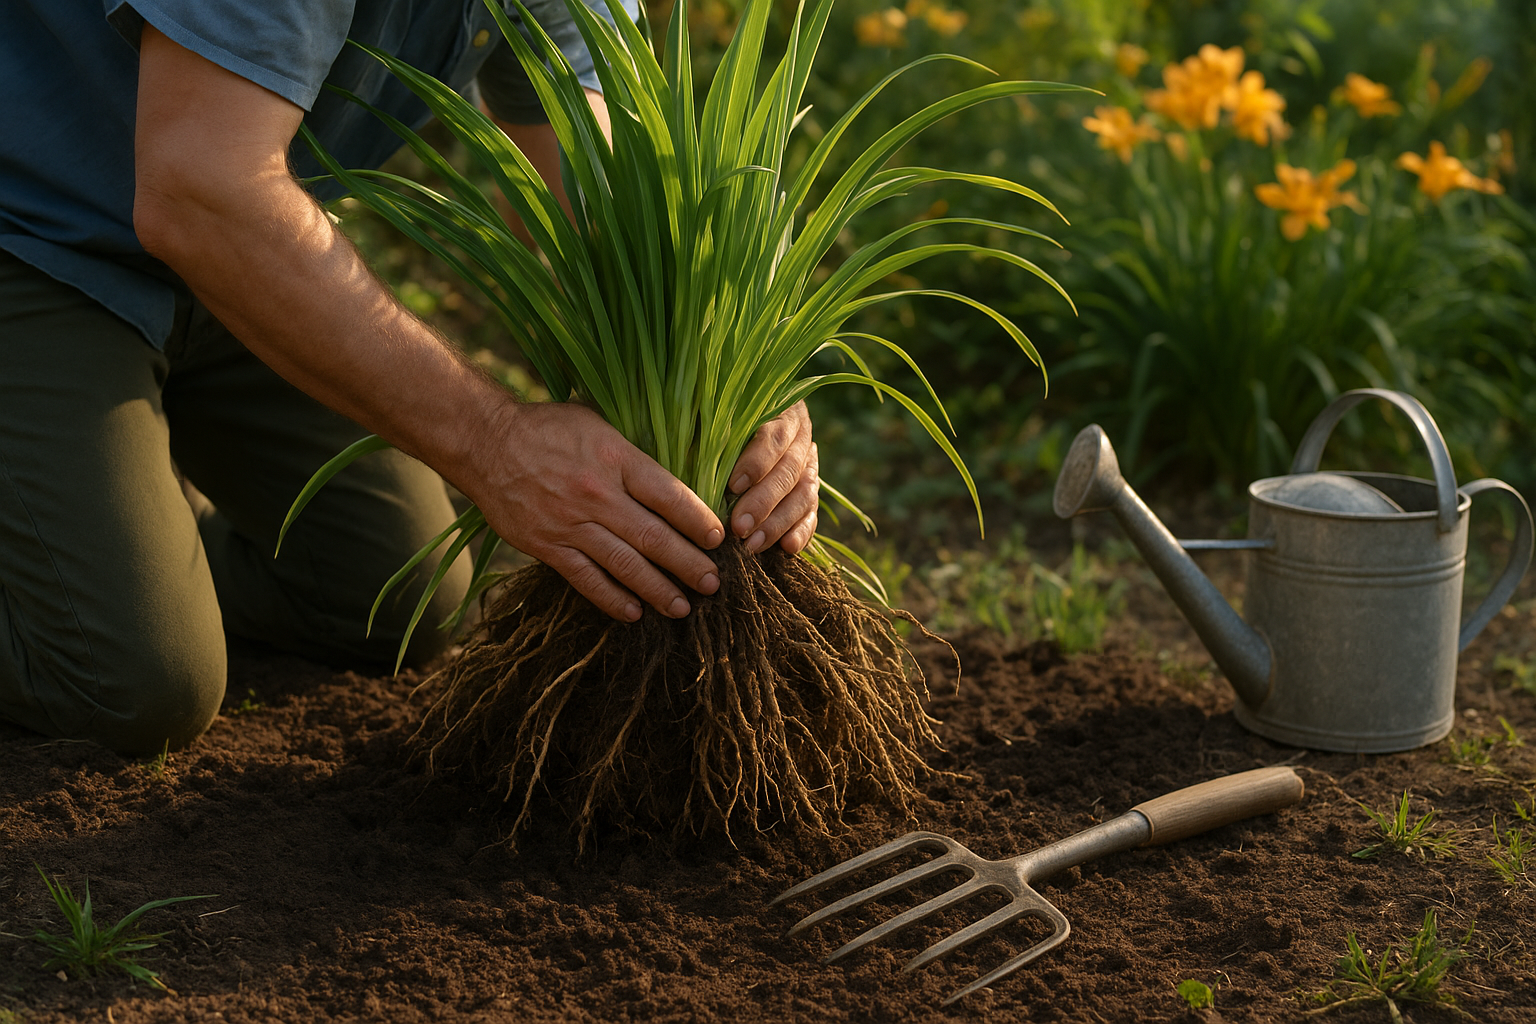
Push your spade or fork into the soil several inches outside the leaf fans. Work your way around the plant in a circle, loosening as you go. Then slide the tool underneath and lift the entire clump.
Large daylilies can be heavy. If the clump is too big to lift in one piece, use the spade to cut it into two or three large chunks while it is still in the ground, then lift each section separately.
Step 4: Shake or Rinse Off Soil
Knock off loose soil with your hands or rinse the roots gently with a hose. You do not need to make the roots perfectly clean, but you do need to see where the fans and crowns are connected.
The crown is the point where the leaves meet the roots. Each good division should have at least one healthy fan of leaves and a decent cluster of roots. Bigger divisions with two or three fans often look fuller sooner, but single fans can grow well if they have strong roots.
Step 5: Pull or Cut the Clump Apart
Start by trying to pull the fans apart by hand. Daylily roots are fleshy, and many clumps will separate with steady pressure. For stubborn clumps, place two garden forks back-to-back in the center and gently pry apart, or cut between crowns with a sharp spade or soil knife.
Remove any mushy, dried-out, or obviously dead sections. If the center is old and woody with weak roots, compost that part and keep the vigorous outer pieces.
Step 6: Replant at the Right Depth
Prepare the new planting holes before the roots dry out. Loosen the soil wider than the root spread and mix in compost if the bed is tired or compacted. Make a small mound of soil in the center of each hole, drape the roots over it, and backfill gently.
Planting depth is important. Purdue Extension advises setting the daylily crown no deeper than 1 inch below the soil surface. Planting too deep can reduce blooming and may encourage rot in poorly drained soil. ([ag.purdue.edu](https://ag.purdue.edu/department/hla/extension/extension-publications-library/ext-pubs/ho-16-w.html?utm_source=openai))
Space most daylily divisions about 18 to 24 inches apart, depending on the variety and how quickly you want the bed to fill in. Larger varieties need more room than small border types.
Step 7: Water and Mulch
Water each division deeply right after planting to settle soil around the roots. Add 2 inches of mulch around the plants, keeping mulch slightly away from the crowns so they are not buried.
For the next few weeks, keep the soil evenly moist but not soggy. New divisions do not have a full working root system yet, so they need steady moisture while they reestablish. If the leaves flop for a few days, do not panic. That is common after division, especially in warm weather.
Common Mistakes to Avoid
- Dividing in extreme heat: Wait for a cooler spell if temperatures are high and the soil is dry.
- Letting roots bake in the sun: Keep divisions shaded and replant as soon as possible.
- Planting too deep: Keep the crown close to the soil surface, not buried several inches down.
- Making tiny weak divisions: A fan with skimpy roots may survive, but it will take longer to bloom well.
- Skipping aftercare: Water is the difference between a quick recovery and a sulky plant.
Will Divided Daylilies Bloom Next Year?
Many healthy divisions bloom the following season, especially if you replant larger pieces and keep them watered after division. Smaller divisions may spend a year rebuilding roots before they put on a strong flower show.
That is normal. The tradeoff is worth it: by giving the plants more space, you usually get healthier foliage, stronger flowering, and a cleaner-looking bed over time.
A Simple Late-Summer Garden Win
Learning how to divide daylilies is mostly about timing, depth, and aftercare. Work after bloom, trim the leaves, lift the clump, keep divisions with healthy roots, and replant the crowns shallowly.
Once you have done one clump, the rest go faster. By next summer, those crowded plants should look refreshed, and you may have enough extra daylilies to brighten another corner of the yard.