How to Divide Bearded Iris in Late Summer
If your bearded iris put on more leaves than flowers this spring, the clump may simply be too crowded. Late summer is one of the best times to dig, divide, and replant bearded iris so the rhizomes have time to settle in before winter.
The job looks a little intimidating the first time because iris grow from thick, knobby rhizomes rather than typical roots. Once you understand what to keep, what to toss, and how shallowly to replant them, it becomes a straightforward garden chore.
Why Bearded Iris Need Dividing
Bearded iris are tough perennials, but they do not bloom their best forever in the same crowded clump. As the rhizomes multiply, the center of the plant can become congested with old, spent growth. That crowding often leads to fewer flowers, smaller blooms, and more pest or rot problems.
University of Missouri Extension notes that bearded iris growing in good conditions usually benefit from division every three to four years, especially when clumps become large and flowering drops off. ([ipm.missouri.edu](https://ipm.missouri.edu/meg/index.cfm?ID=438&utm_source=openai)) Wisconsin Horticulture also points out that regular division helps keep plants blooming well and can help manage issues such as iris borer and bacterial soft rot. ([hort.extension.wisc.edu](https://hort.extension.wisc.edu/articles/dividing-bearded-iris/?utm_source=openai))
Best Time to Divide Bearded Iris
The sweet spot is usually mid- to late summer, after bloom has finished. In many gardens, that means July through August. During this slower growth period, the plants are easier to lift and divide, and they still have time to grow new roots before cold weather.
Missouri Extension specifically recommends July and August as a successful time to trim back, dig, divide, and transplant iris because growth slows then. ([ipm.missouri.edu](https://ipm.missouri.edu/meg/index.cfm?ID=438&utm_source=openai)) Penn State Extension gives similar practical guidance for division after flowering, with attention to clean cuts, pest inspection, and shallow replanting. ([extension.psu.edu](https://extension.psu.edu/dividing-irises?utm_source=openai))
If you garden in a very hot climate, aim for a cooler stretch, work in the morning, and water the bed the day before if the soil is dry. In cold-winter areas, avoid waiting too late in fall; the divisions need time to anchor before repeated freezes.
What You’ll Need
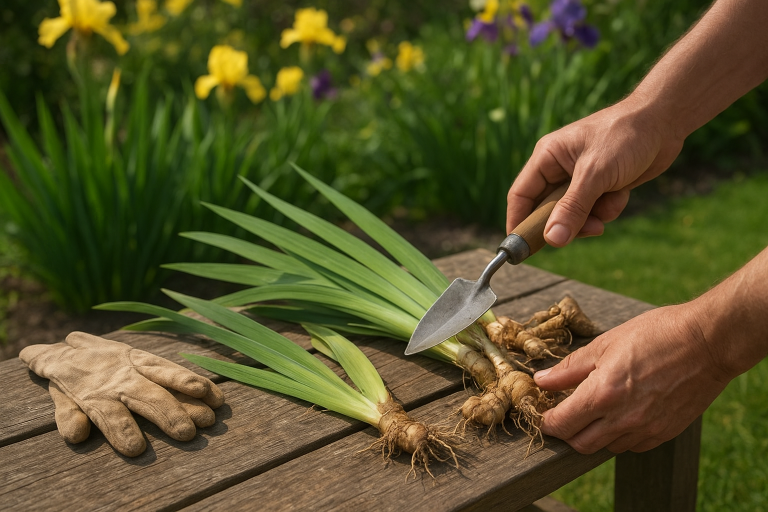
- Garden fork or spade
- Sharp knife or hand pruners
- Bucket or tarp for sorting rhizomes
- Gloves
- Compost, if your soil needs improvement
- Permanent marker or plant labels, if you know the variety
- Household disinfectant or a bleach-water solution for sanitizing tools
A garden fork is helpful because it loosens the clump with less slicing than a shovel. Still, do not worry if a few rhizomes break. A mature clump usually gives you more usable divisions than you expect.
How to Divide Bearded Iris Step by Step
1. Cut the leaves back
Trim the sword-like leaves into fans about 6 inches tall. This makes the clump easier to handle and reduces the top-heavy “sail” effect after replanting. Keep enough foliage attached so each division is easy to see and position.
2. Lift the whole clump
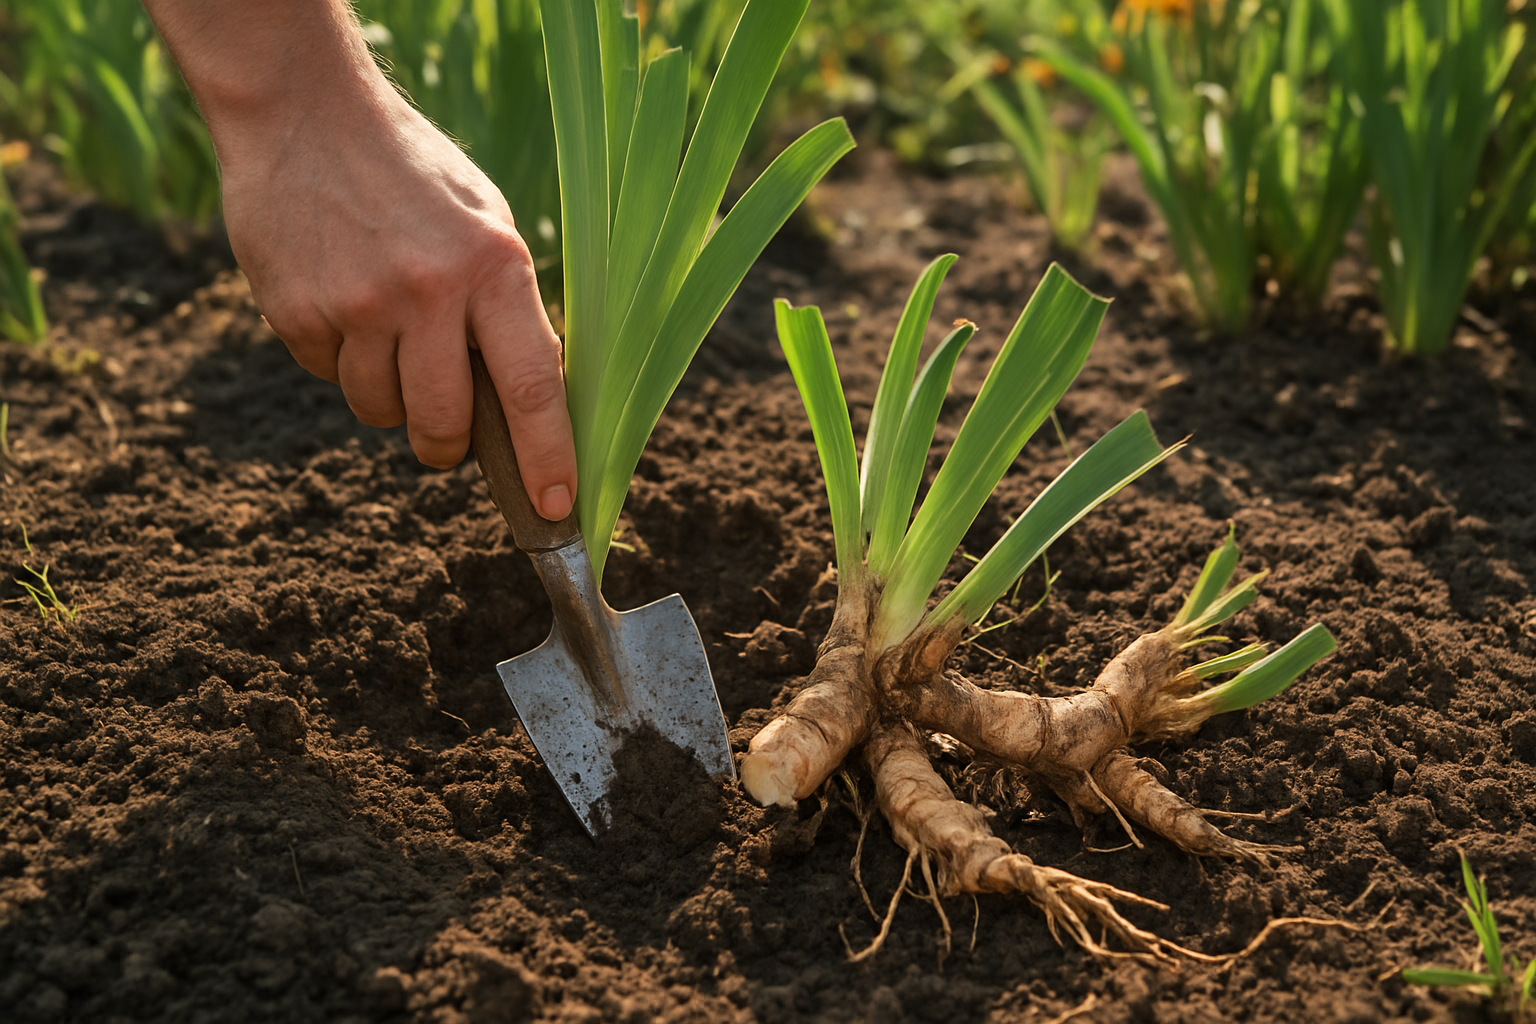
Push a garden fork into the soil several inches away from the clump, then gently pry upward. Work around the plant until the rhizomes loosen. Shake or rinse off loose soil so you can see what you are working with.
3. Separate healthy outer rhizomes
The best divisions usually come from the younger, firm rhizomes around the outside of the clump. Each piece should have a healthy leaf fan and some roots. The Royal Horticultural Society recommends taking divisions from healthy, vigorous areas at the edge of the clump and replanting them at the same depth. ([rhs.org.uk](https://www.rhs.org.uk/plants/iris/dividing?utm_source=openai))
4. Discard old or damaged pieces
Toss rhizomes that are soft, mushy, hollow, foul-smelling, badly shriveled, or have no healthy fan attached. If you see tunnels or a fat, pale grub inside the rhizome, remove and destroy that affected piece. Penn State Extension recommends inspecting rhizomes for iris borer and sanitizing cutting tools between cuts when needed. ([extension.psu.edu](https://extension.psu.edu/dividing-irises?utm_source=openai))
5. Let cut surfaces dry briefly
If you made fresh cuts, let the divisions sit in a shaded, airy place for a few hours before replanting. This gives cut surfaces a little time to dry, which can reduce the chance of rot in damp soil.
How to Replant Bearded Iris Rhizomes
Planting depth is the part that matters most. Bearded iris rhizomes want to sit very near the soil surface. If you bury them deeply like bulbs, they may grow leaves but refuse to bloom.
- Choose a sunny, well-drained spot. Bearded iris bloom best with plenty of sun, and poor flowering is often linked to too much shade, overfertilizing, deep planting, or overcrowding. ([hgic.clemson.edu](https://hgic.clemson.edu/factsheet/iris/?utm_source=openai))
- Loosen the soil and remove weeds. If drainage is poor, improve the bed before replanting rather than setting rhizomes into soggy soil.
- Dig a shallow hole about 4 inches deep with a small mound of soil in the center.
- Set the rhizome horizontally on the mound and spread the roots down over the sides.
- Backfill so the roots are covered but the top of the rhizome is at or just barely below the soil surface.
- Space divisions about 12 to 18 inches apart if you want room for future growth. For a fuller look sooner, you can plant small groups, but expect to divide again earlier.
- Water thoroughly to settle soil around the roots.
UC Master Gardeners describe planting bearded iris rhizomes horizontally in a shallow hole, spreading roots around a mound, and keeping the rhizome at soil level. ([ucanr.edu](https://ucanr.edu/blog/garden-notes/article/dividing-iris-why-when-and-how-divide-and-replant?utm_source=openai)) Wisconsin Horticulture gives the same general approach: make a shallow hole, place the rhizome on a mound, spread out the roots, and only lightly cover the rhizome. ([hort.extension.wisc.edu](https://hort.extension.wisc.edu/articles/dividing-bearded-iris/?utm_source=openai))
Aftercare for Newly Divided Iris
Water well right after planting, then keep the soil lightly moist while new roots establish. Do not keep the bed soggy. Once established, bearded iris are fairly drought tolerant compared with many perennials, and wet soil around rhizomes can invite rot.
Skip heavy feeding at planting time unless your soil test shows a need. Too much nitrogen can encourage leafy growth at the expense of flowers. If your soil is lean, use compost modestly or choose a low-nitrogen fertilizer, keeping fertilizer from direct contact with the rhizome.
Keep the bed weeded, especially while divisions are small. Weeds and neighboring plants can shade the rhizomes, and shade is one of the common reasons bearded iris stop blooming well.
Common Mistakes to Avoid
- Planting too deep: The top of the rhizome should be visible or just barely covered, depending on your climate and soil.
- Keeping the old center: The oldest center pieces often have little vigor. Save firm outer pieces with healthy fans.
- Choosing a wet location: Good drainage is essential. Avoid low spots where water sits after rain.
- Dividing too late: In cold climates, late fall divisions may not root well before winter.
- Leaving pests behind: Cut open suspicious, soft, or tunneled rhizomes and discard any infested pieces.
Will Divided Iris Bloom Next Spring?
Some divisions bloom the following spring, especially if they are large, healthy, and planted on time. Smaller divisions may take a full season to rebuild strength. If they do not bloom the first year, focus on sun, shallow planting, and moderate care rather than digging them up again too soon.
Dividing bearded iris is one of those garden tasks that pays off later. A crowded, tired patch can turn into a refreshed bed of well-spaced plants, plus extra rhizomes to share with neighbors. Do it in late summer, keep the rhizomes shallow, and your iris will have a much better chance of blooming beautifully next spring.